FUEL LID OPENER UNIT REMOVAL
PROCEDURE
-
PRECAUTION
-
REMOVE FUEL FILLER OPENING LID ASSEMBLY
-


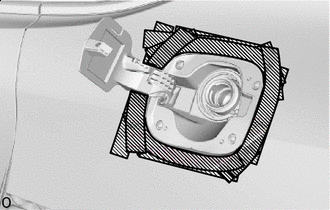
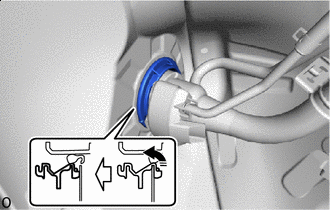
Protective Tape Insert a thin-bladed screwdriver with its tip wrapped with protective tape into the gap between the fuel filler lid assembly and fuel filler opening lid sub-assembly.
-
Raise up the inserted screwdriver and hold it with the lock released.
-
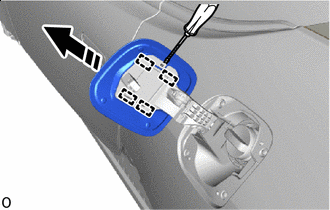

Remove in this Direction Slide the fuel filler opening lid assembly in the direction shown in the illustration, detach the hooks and remove it.
-
-
REMOVE FUEL TANK CAP ASSEMBLY
-
Turn counterclockwise the fuel tank cap assembly and remove it.
-

Detach the clip and disconnect the strap.
-
-
REMOVE FUEL LID WITH MOTOR LOCK ASSEMBLY
-
REMOVE REAR WHEEL LH
-
REMOVE BODY ROCKER PANEL MOULDING ASSEMBLY LH
-
REMOVE REAR WHEEL HOUSE LINER LH
-
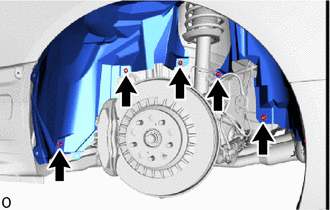
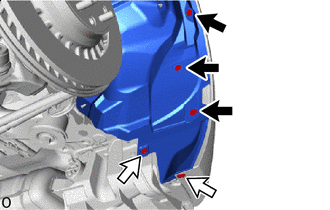
Remove the 5 clips.
-

Grommet 
Clip Remove the 2 clips and 3 grommets.
-
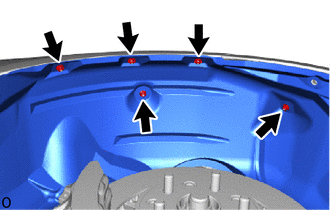
Remove the 5 clips and remove the rear wheel house liner LH.
-
-
REMOVE FUEL FILLER OPENING LID SUB-ASSEMBLY
-
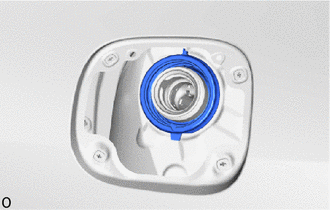
Protective Tape Apply protective tape as shown in the illustration.
-
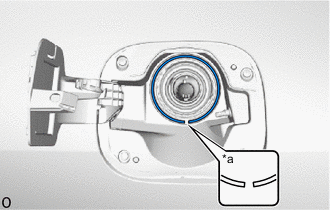
*a End Gap Remove the fuel inlet box ring from the fuel tank filler pipe shield lip.
Tech Tips
Remove from the end gap of the fuel inlet box ring while expanding it.
Note
Do not reuse the fuel inlet box ring which transformed.
-
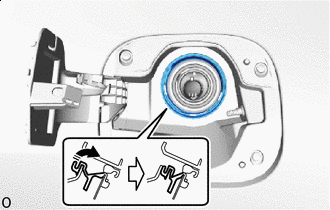
Push Press the fuel filler opening lid sub-assembly into the entire circumference of the lip portion of the fuel tank filler pipe shield.
-
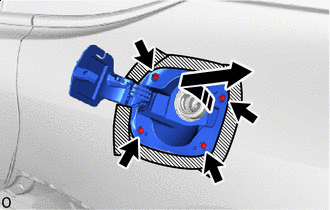
Remove in this Direction Remove the 4 screws.
-
Raise up the fuel filler opening lid sub-assembly toward the rear of the vehicle and remove the fuel filler opening lid sub-assembly backwards diagonally.
-
Push Push the entire circumference of the lip of the fuel tank filler pipe shield to the outside from the inside of the rear fender.
-
Remove the fuel tank filler pipe shield.
-
Install the fuel tank cap assembly to the fuel filler opening to prevent foreign matter from entering.
-
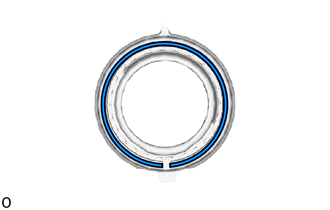
Remove the fuel inlet box ring from fuel tank filler pipe shield.
Note
Do not reuse the fuel inlet box ring which transformed.
-