AIR CONDITIONING PRESSURE SENSOR INSTALLATION
CAUTION / NOTICE / HINT
Tech Tips
-
Centering bolts are used to mount the hood hinge to the vehicle body and hood. The hood cannot be adjusted with the centering bolts on. Substitute the centering bolts for standard bolts (with washers) when making adjustments.
-
A bolt without a torque specification is shown in the standard bolt chart.
-
Use the same procedure for RHD and LHD vehicles.
-
The procedure listed below is for LHD vehicles.
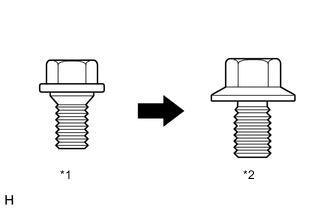
| *1 | Centering Bolt |
| *2 | Standard Bolt |
PROCEDURE
-
INSTALL AIR CONDITIONER PRESSURE SENSOR
-
Remove the attached vinyl tape from the air conditioner pressure sensor installation area of the liquid tube sub-assembly A.
-
Apply a sufficient amount of compressor oil to the fitting surface of a new air conditioner pressure sensor O-ring and the liquid tube sub-assembly A.
Compressor Oil ND-OIL 11 or equivalent Note
-
Do not use any compressor oil other than ND-OIL 11 or equivalent. If any compressor oil other than ND-OIL 11 or equivalent is used, compressor motor insulation performance may decrease, resulting in leakage of electric power.
-
Keep the O-ring and O-ring fitting surface free of foreign matter.
-
-
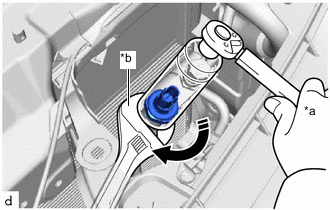
*a Turn *b Hold 
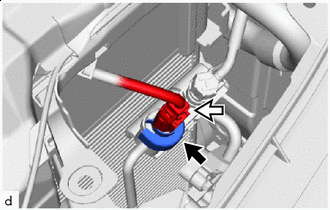
Install in this Direction Using a 27 mm deep socket wrench, install the air conditioner pressure sensor to the liquid tube sub-assembly A.
- Torque:
- 10.8 N*m { 110 kgf*cm, 8 ft.*lbf }
Note
-
Do not apply excessive force to the liquid tube sub-assembly A.
-
Make sure not to cut the O-ring while installing it. (Cut O-rings cannot be installed)
-

No. 2 Cooler Cover 
Connector Install the No. 2 cooler cover.
-
Connect the connector.
-
-
INSTALL LOWER ARM BRACKET BRACE SUB-ASSEMBLY LH
-
INSTALL LOW PITCHED HORN ASSEMBLY
-
INSTALL HOOD LOCK ASSEMBLY (for LHD)
-
INSTALL HOOD LOCK ASSEMBLY (for RHD)
-
Apply MP grease to the sliding areas of the hood lock assembly.
-
Install the hood lock assembly with the 3 bolts.
- Torque:
- 8.0 N*m { 82 kgf*cm, 71 in.*lbf }
-
Connect the connector.
-
-
INSPECT FITTING OF HOOD SUB-ASSEMBLY
-
ADJUST HOOD SUB-ASSEMBLY
-
INSTALL HOOD LOCK RELEASE LEVER PROTECTOR
-
CHARGE AIR CONDITIONING SYSTEM WITH REFRIGERANT
for HFC-134a(R134a):
for HFO-1234yf(R1234yf):
-
WARM UP COMPRESSOR
for HFC-134a(R134a):
for HFO-1234yf(R1234yf):
-
INSPECT FOR REFRIGERANT LEAK
for HFC-134a(R134a):
for HFO-1234yf(R1234yf):