REAR SEAT ASSEMBLY REMOVAL
PROCEDURE
-
REMOVE REAR SEAT CUSHION ASSEMBLY
-
Move both front seats to the frontmost position and collapse them to the front in advance.
-

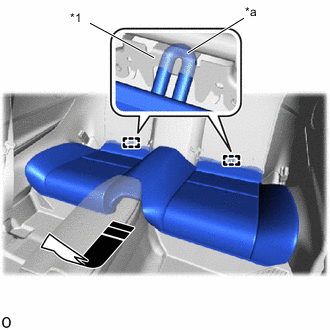
*1 Rear Seat Cushion Lock Hook *a Hook on Front of Rear Seat Cushion 
Place Hand Here 
Remove in this Direction Place your hands at the positions shown in the illustration and pull in the removal direction to detach the 2 hooks on the front of the rear seat cushion from the 2 rear seat cushion lock hooks.
Note
-
Detach the rear seat cushion front side hooks one at a time.
-
If the hook on the front of the rear seat cushion assembly is detached, replace the rear seat cushion lock hook with a new one.
-
-
*1 Child Restraint Seat Anchor Bracket *a Hook on Rear of Rear Seat Cushion Remove in this Direction Pull in the removal direction shown in the illustration to detach the hooks on the rear of the rear seat cushion assembly from the 2 child restraint seat anchor brackets.
-
Remove the rear seat cushion assembly.
Note
Do not damage the rear seat cushion assembly, body and body interior.
-
-
REMOVE REAR SEAT CUSHION LOCK HOOK
Note
-
If the hook on the front of the rear seat cushion assembly is detached, replace the rear seat cushion lock hook with a new one.
-
Do not reuse the rear seat cushion lock hook after removing it.
Tech Tips
Use the same procedure for the other side.
-
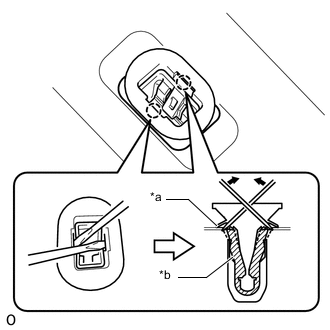
*a Body *b Sleeve Insert 2 thin-bladed screwdrivers between the sleeve and body of the rear seat cushion lock hook.
-
Pull up the 2 thin-bladed screwdrivers to detach the claws and remove the rear seat cushion lock hook.
-
-
REMOVE REAR SEAT CUSHION HOLDER BRACKET
Tech Tips
Use the same procedure for the other side.
-
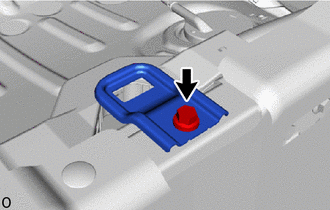
Remove the bolt and rear seat cushion holder bracket.
-
-
REMOVE REAR SEAT SIDE GARNISH
-
REMOVE REAR SEATBACK COVER
Tech Tips
Use the same procedure for the other side.
-
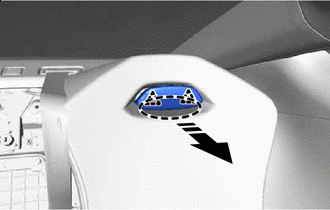
Place Hand Here Remove in this Direction Insert your hand in the gap between the seatback cover as shown in the illustration and pull back to detach the clips and remove the rear seatback cover.
-
-
REMOVE REAR SEATBACK ASSEMBLY LH
-

Nut 
Bolt Remove in this Direction Remove the nut and 2 bolts.
-
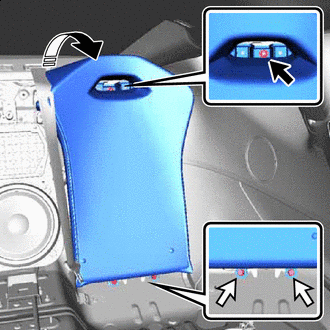
Pull down in the direction of the arrow shown in the illustration to remove the rear seatback assembly LH.
Note
Do not damage the rear seatback assembly LH, body and body interior.
-
-
REMOVE REAR SEATBACK ASSEMBLY RH
Tech Tips
Use the same procedure described for the LH side.