HEIGHT CONTROL SENSOR(for Rear Side) INSTALLATION
CAUTION / NOTICE / HINT
Tech Tips
-
Use the same procedure for the RH side and LH side.
-
The following procedure is for the LH side.
PROCEDURE
-
INSTALL LOAD SENSING VALVE SENSOR BRACKET
-
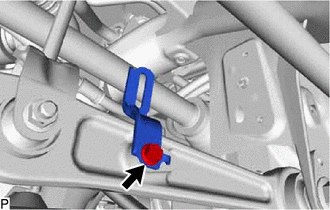
Install the load sensing valve sensor bracket with the bolt.
- Torque:
- 5.4 N*m { 55 kgf*cm, 48 in.*lbf }
-
-
INSTALL REAR HEIGHT CONTROL SENSOR SUB-ASSEMBLY LH
-
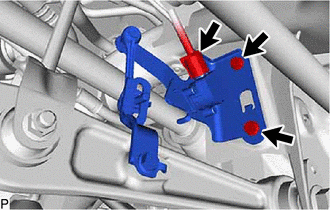
Install the rear height control sensor sub-assembly LH with the 2 bolts.
- Torque:
- 13.5 N*m { 138 kgf*cm, 10 ft.*lbf }
Note
Do not drop the height control sensor LH. If it is dropped, replace it with a new one.
-
Connect the connector.
-
When reusing the load sensing valve sensor bracket:
-
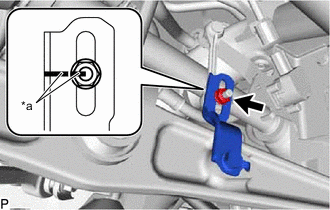
*a Matchmark Align the matchmarks on the height control sensor link and load sensing valve sensor bracket.
- Torque:
- 5.4 N*m { 55 kgf*cm, 48 in.*lbf }
-
-
When replacing the load sensing valve sensor bracket with a new one:
-
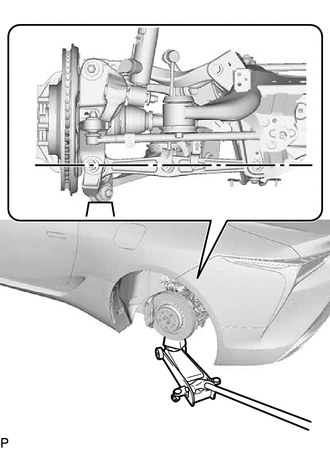
Jack up the axle carrier with a wooden block between the jack and axle carrier. Apply a load to the rear suspension so that the rear No. 2 suspension arm assembly LH becomes level.
-
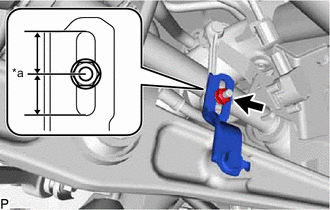
*a Center of the long hole Install the rear height control sensor link to load sensing valve sensor bracket with the nut.
- Torque:
- 5.4 N*m { 55 kgf*cm, 48 in.*lbf }
Tech Tips
Install the height control sensor link to the center of the long hole on the load sensor valve sensor bracket.
-
-
-
INSTALL REAR WHEEL LH
-
CONNECT CABLE TO NEGATIVE AUXILIARY BATTERY TERMINAL
Note
When disconnecting the cable, some systems need to be initialized after the cable is reconnected.
-
INSTALL NO. 2 DECK BOARD