FUEL PUMP DISASSEMBLY
CAUTION / NOTICE / HINT
Note
Do not try to remove the black nylon tube as it is welded to the fuel suction tube with pump and gauge assembly.
PROCEDURE
-
REMOVE FUEL SENDER GAUGE ASSEMBLY
-
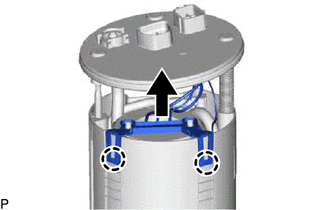
REMOVE NO. 1 FUEL SUB-TANK
-
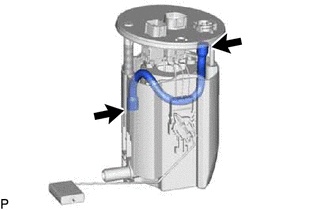
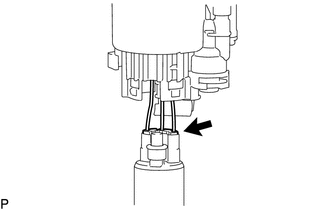
Disconnect the 2 fuel pump harness connectors.
-
Detach the fuel pump harness clamp.
-
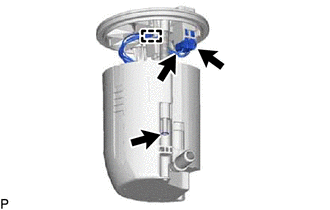
Using needle nose pliers, remove the fuel tank pipe setting holder.
-
Remove the fuel suction plate sub-assembly (fuel filter) and No. 2 fuel tank cushion from the No. 1 fuel sub-tank.
-
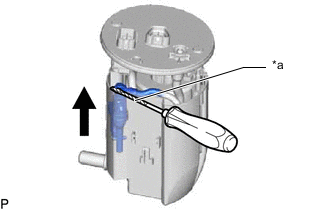
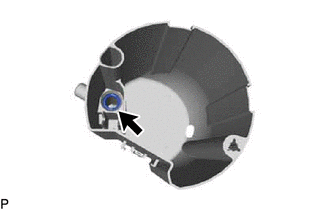
*a Protective Tape Using a screwdriver, disconnect the jet pump from the No. 1 fuel sub-tank.
Note
-
Do not damage the No. 1 fuel sub-tank.
-
The O-ring is installed firmly between the jet pump and No. 1 fuel sub-tank. Therefore, the jet pump and No. 1 fuel sub-tank should be separated carefully using a screwdriver.
Tech Tips
Tape the screwdriver tip before use.
-
-
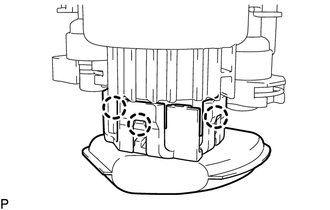
Detach the 2 claws and remove the fuel suction plate sub-assembly (fuel filter) from the No. 1 fuel sub-tank.
Note
Do not damage the No. 1 fuel sub-tank and fuel suction plate sub-assembly (fuel filter).
-
Remove the O-ring from the No. 1 fuel sub-tank.
-
-
REMOVE FUEL PUMP FILTER
-
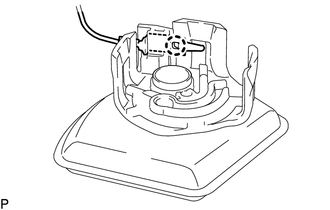
Detach the 3 claws from the holes and disconnect the fuel pump filter from the fuel suction plate sub-assembly (fuel filter).
Note
Do not damage the fuel suction plate sub-assembly (fuel filter).
-
Detach the claw to disconnect the fuel pump harness from the fuel pump filter.
Note
Do not damage the fuel pump filter.
-
-
REMOVE FUEL PUMP
-
Remove the fuel pump from the fuel suction plate sub-assembly (fuel filter).
-
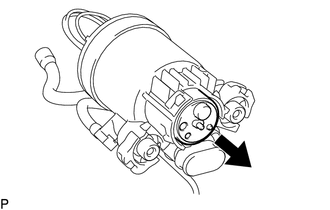
Disconnect the fuel pump harness connector to remove the fuel pump harness from the fuel pump.
-
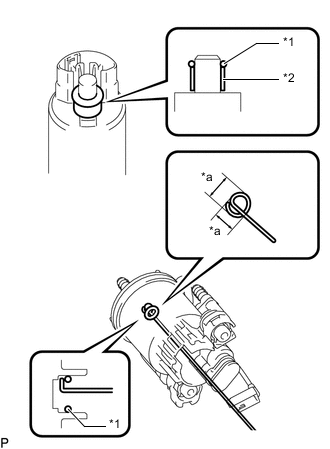
*1 O-Ring *2 Fuel Pump Spacer *a 5.0 mm (0.197 in.) Remove the O-ring and fuel pump spacer from the fuel pump.
Tech Tips
If the O-ring still remains in the fuel suction plate sub-assembly (fuel filter), remove it using a wire tip (1 mm diameter) that is formed as shown in the illustration.
-