REAR COMBINATION LIGHT ASSEMBLY REASSEMBLY
CAUTION / NOTICE / HINT
Tech Tips
-
Use the same procedure for the RH and LH sides.
-
The procedure listed below is for the LH side.
PROCEDURE
-
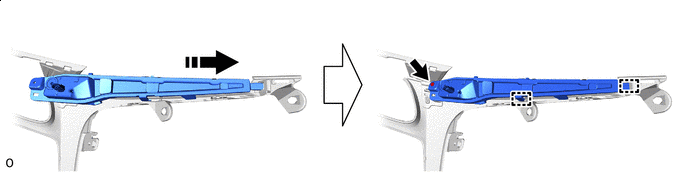
INSTALL REAR BUMPER PROTECTOR LH
-
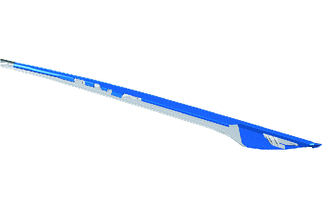
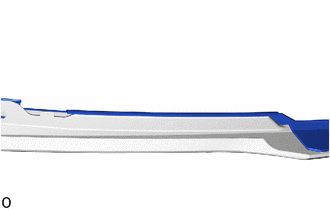
Clean the blue-colored application area of the rear bumper protector LH shown in the illustration.
-

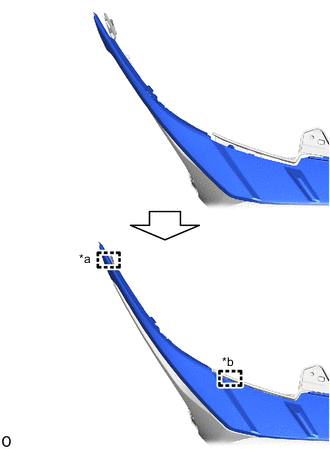
*a Front Area Remove the peeling tape from the front area of a new rear bumper protector LH.
-
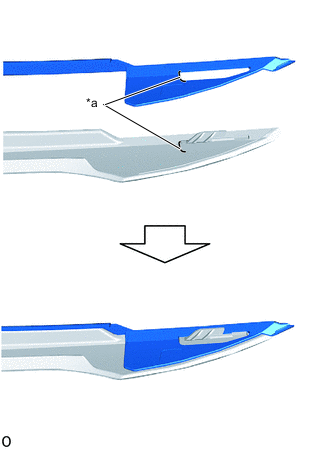
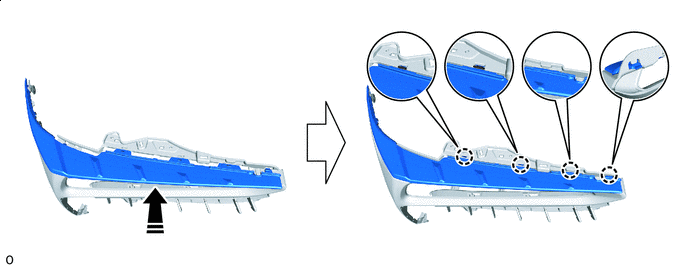
*a Specified Application Position Align the specified application positions and set the front area of the rear bumper protector LH.
-

Press Here Press the set portion of the part with your finger to secure it.
Note
Do not slide your finger horizontally, as doing so may stretch the part unnecessarily.
-

*a Center Area Remove the peeling tape from the center area of the rear bumper protector LH.
-
*a Specified Application Position Set in this Direction Align the specified application positions and set the front of the center area of the rear bumper protector LH.
-
Align the rear combination light cover LH to the curved line and set the center area of the rear bumper protector LH.
-
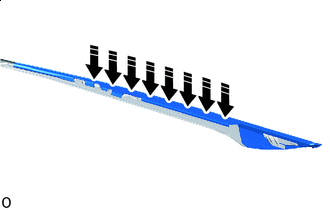
Press Here Press the set portion of the part with your finger to secure it.
Note
Do not slide your finger horizontally, as doing so may stretch the part unnecessarily.
-
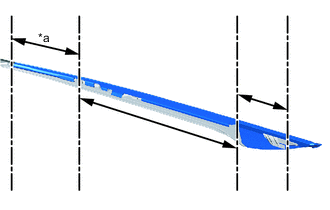
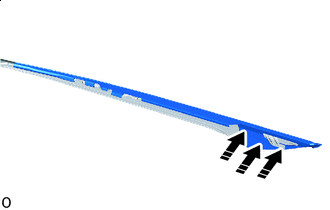
*a Rear Area Remove the peeling tape from the rear area of the rear bumper protector LH.
-
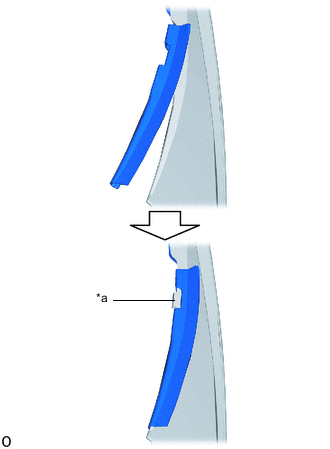
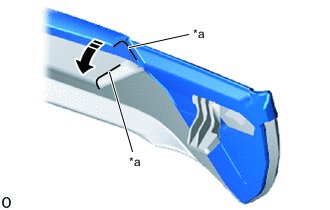
*a Rib Set the rear bumper protector LH so that the hole does not overlap the rib on the rear combination light cover LH.
-

Press Here Press the set portion of the part with your finger to secure it.
Note
Do not slide your finger horizontally, as doing so may stretch the part unnecessarily.
-
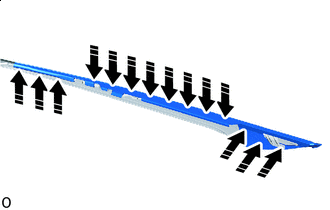
Press Here Press down on each application area again with your finger.
Note
Do not slide your finger horizontally, as doing so may stretch the part unnecessarily.
-
-
INSTALL REAR COMBINATION LIGHT COVER LH
-
Attach the claw to set the rear combination light cover LH to the No. 1 rear garnish bracket LH.
Note
Take care as the attachment surface (gray area in illustration) for the No. 1 rear garnish bracket LH claws break easily.
Install in this Direction 
Easily damaged area -
*a Hook *b Guide Attach the guide and hook.
-
-
INSTALL REAR BUMPER UPPER RETAINER LH
-
Slide the rear bumper upper retainer to attach the hook to install it.
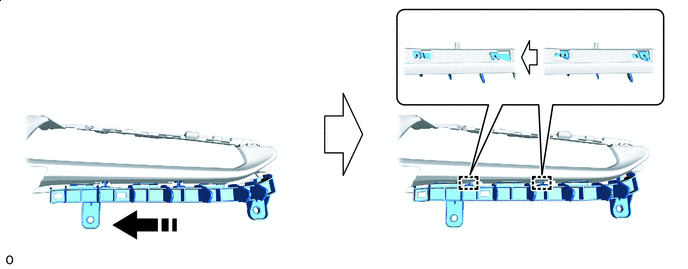
Install in this Direction - -
-
-
INSTALL REAR COMBINATION LIGHT LENS LH
-
Attach the hook to install the rear combination light lens LH.
-
Install the screw.
Install in this Direction - -
-
-
INSTALL REAR COMBINATION LIGHT RIM LH
-
Attach the claw to install the rear combination light rim LH.
-
-
INSTALL REAR NO. 1 GARNISH BRACKET LH
-
Attach the guide to set the rear No. 1 garnish bracket LH.
-
Install the 8 screws.
-
-
INSTALL REAR COMBINATION LIGHT PROTECTOR LH
-
Install the rear combination light protector LH with the 2 screws.
-
-
INSTALL REAR BUMPER LOWER RETAINER LH
-
Attach the hook to install the rear bumper lower retainer LH.
-
-
INSTALL LUGGAGE ELECTRICAL KEY SWITCH (for RH Side)
-

*a Connector Clamp *b Wire Harness Clamp Install the luggage electrical key switch with the 2 screws.
-
Attach the wire harness clamp.
-
Connect the connector and connector clamp.
-