REAR SEAT ASSEMBLY REASSEMBLY
PROCEDURE
-
INSTALL SEAT COVER WIRE
-

Install the 8 seat cover wires.
Tech Tips
-
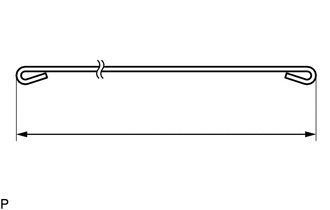
Wire 1000 mm (3.28 ft.) or longer and shaped wire are available as supplied parts.
-
For wire 1000 mm (3.28 ft.) or less in length, cut or shape 1000 mm (3.28 ft.) wire into the dimensions shown in the illustration.
-
Make sure to read the precautions before preparing the wire.
Length A 100 mm (3.94 in.) B 250 mm (9.84 in.) C 320 mm (1.05 ft.) D 450 mm (1.48 ft.) Tech Tips
The dimensions shown in the illustration are the length.
-
-
-
INSTALL BENCH TYPE REAR SEAT CUSHION COVER
Tech Tips
When installing a bench type rear seat cushion cover, refer to Precaution in order to prevent wrinkles from forming.
-
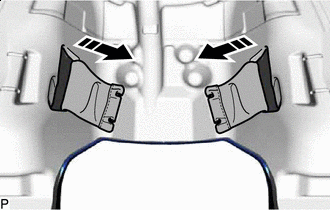

Install in this Direction Pass the 2 pieces of strap from the bench type rear seat cushion cover through to the rear side via the hole in the bench type rear seat cushion pad.
-
Attach the hooks.

Note
Be careful not to damage the bench type rear seat cushion cover.
-
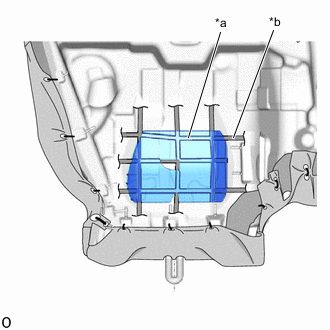
Using hog ring pliers, install 40 new hog rings in the order shown in the illustration.
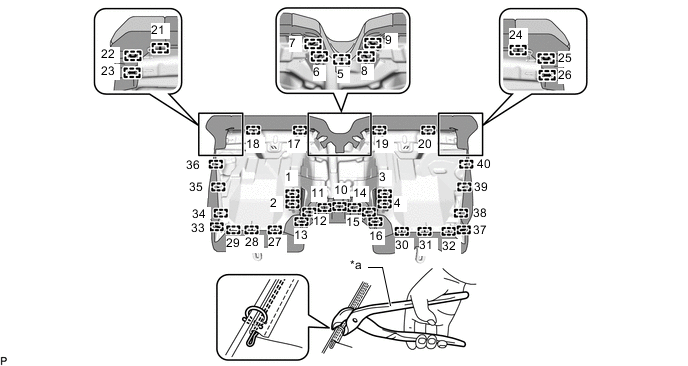
*a Hog Ring Pliers - - Note
-
Be careful not to damage the bench type rear seat cushion cover.
-
Be sure to securely install the hog rings as shown in the illustration while preventing wrinkles from forming on the bench type rear seat cushion cover.
-
-
-
INSTALL REAR SEAT CUSHION PAD LH
-
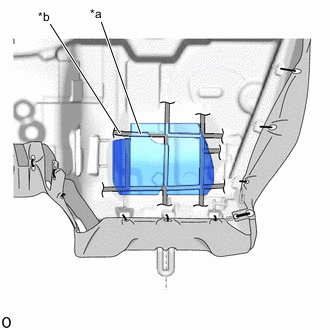
*a Groove *b Rib Remove the peeling paper on a new rear seat cushion pad LH trying not to touch the adhesional surface of the double-sided tape.
-
Align the groove of the rear seat cushion pad LH with the rib on the bench type rear seat cushion pad rear surface and install it.
-
-
INSTALL REAR SEAT CUSHION PAD RH
-
*a Groove *b Rib Remove the peeling paper on a new rear seat cushion pad RH trying not to touch the adhesional surface of the double-sided tape.
-
Align the groove of the rear seat cushion pad RH with the rib on the bench type rear seat cushion pad rear surface and install it.
-
-
INSTALL SEAT COVER WIRE
-
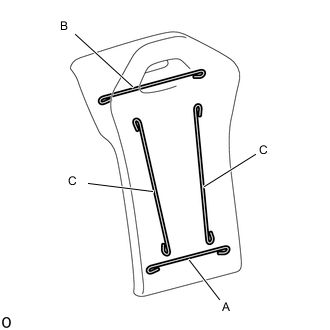
Install the 4 seat cover wires.
Tech Tips
-
Wire 1000 mm (3.28 ft.) or longer and shaped wire are available as supplied parts.
-
For wire 1000 mm (3.28 ft.) or less in length, cut or shape 1000 mm (3.28 ft.) wire into the dimensions shown in the illustration.
-
Make sure to read the precautions before preparing the wire.
Length A 250 mm (9.84 in.) B 370 mm (1.21 ft.) C 400 mm (1.31 ft.) Tech Tips
The dimensions shown in the illustration are the length.
-
-
-
INSTALL SEPARATE TYPE REAR SEATBACK COVER LH
Tech Tips
-
When installing a separate type rear seatback cover LH, refer to Precaution in order to prevent wrinkles from forming.
-
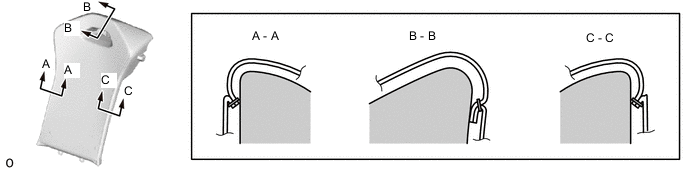
Fix the cover seam allowances in the same direction as shown in the illustration.
-
Set the separate type rear seatback cover LH on the separate type rear seatback pad LH.
-
Attach the hooks in the order shown in the illustration.
Note
Be careful not to damage the separate type rear seatback cover LH.
-
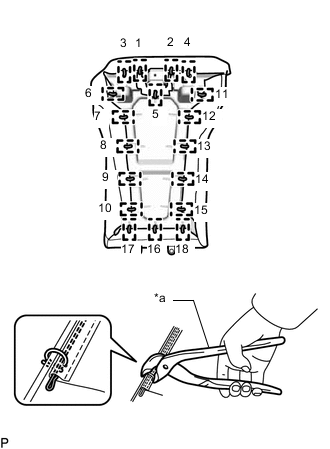
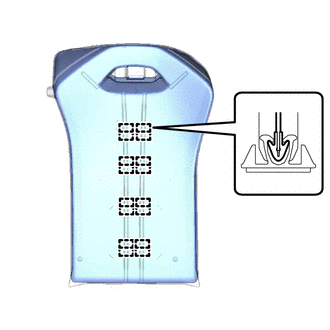
*a Hog Ring Pliers Using hog ring pliers, install the separate type rear seatback cover LH to the separate type rear seatback pad LH with 18 new hog rings in the order shown in the illustration.
Note
-
Be careful not to damage the separate type rear seatback cover LH.
-
Be sure to securely install the hog rings as shown in the illustration while preventing wrinkles from forming on the separate type rear seatback cover LH.
-
-
-
INSTALL SEPARATE TYPE REAR SEATBACK COVER RH
Tech Tips
Use the same procedure described for the LH side.