INSTRUMENT PANEL SPEAKER REMOVAL
CAUTION / NOTICE / HINT
Tech Tips
-
Use the same procedure for the RH and LH sides.
-
The procedure listed below is for the LH side.
PROCEDURE
-
REMOVE FRONT DOOR SCUFF PLATE LH
-
REMOVE FRONT DOOR OPENING TRIM COVER LH
-
REMOVE FRONT DOOR NO. 2 OPENING TRIM COVER LH
-
REMOVE FRONT PILLAR GARNISH LH
-
REMOVE NO. 1 INSTRUMENT PANEL SPEAKER PANEL SUB-ASSEMBLY
-
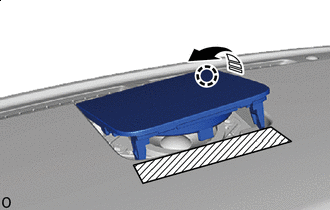
REMOVE FRONT NO. 1 SPEAKER ASSEMBLY
Note
Do not touch the cone part of the speaker.
-

Remove the 2 screws.
-
Disconnect the connector and remove the front No. 1 speaker assembly.
-
-
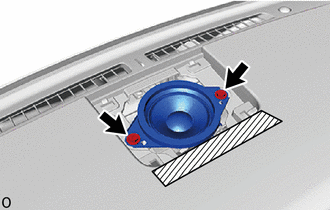
REMOVE NO. 1 SPEAKER OPENING COVER ASSEMBLY
-
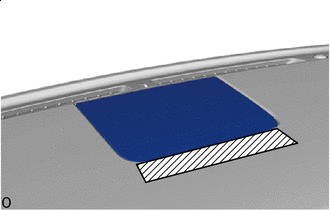

Protective tape Apply protective tape to the areas shown in the illustration to prevent damage in the following procedures.
-
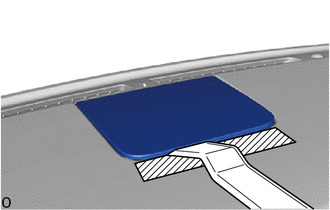
Insert the moulding remover B between the instrument safety pad sub-assembly in the position shown in the illustration and create a gap.
-
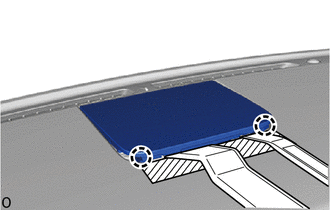
Using moulding remover A in the gap created in the previous procedure, detach the claws.
-
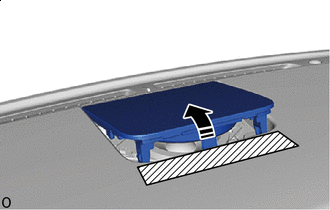

Remove in this Direction Move the No. 1 speaker opening cover assembly in the direction indicated by the arrow shown in the illustration.
-
Remove in this Direction Detach the claw in the direction indicated by the arrow shown in the illustration.
-

Remove in this Direction Detach the claw in the direction indicated by the arrow shown in the illustration and remove the No. 1 speaker opening cover assembly.
-
-
REMOVE FRONT NO. 2 SPEAKER ASSEMBLY
Note
Do not touch the cone part of the speaker.
-
Remove the 2 screws.
-
Disconnect the connector and remove the front No. 2 speaker assembly.
-