RADIO RECEIVER INSTALLATION
CAUTION / NOTICE / HINT
Tech Tips
-
Use the same procedure as for the RHD and LHD vehicles.
-
The procedure listed below is for the LHD vehicles.
-
A bolt without a torque specification is shown in the standard bolt chart.
PROCEDURE
-
PRECAUTION
Note
After replacing the radio receiver assembly, if the "New software is not compatible with the system. Contact your dealer." on-screen message is displayed on the multi-display, update the software of the navigation ECU.
-
INSTALL RADIO RECEIVER ASSEMBLY
-
INSTALL NO. 1 RADIO BRACKET
-
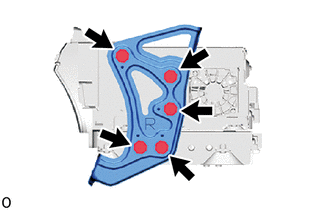
Install the No. 1 radio bracket with the 5 screws.
-
-
INSTALL NO. 2 RADIO BRACKET
-
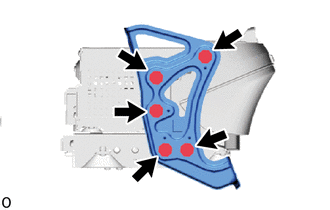
Install the No. 2 radio bracket with the 5 screws.
-
-
INSTALL NO. 1 NAVIGATION WIRE
-
INSTALL RADIO RECEIVER ASSEMBLY WITH BRACKET
-
Connect the connectors.
-
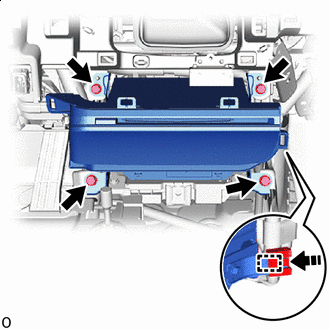

Install in this Direction Attach the clamp as indicated by the arrows in the shown in the illustration.
-
Install the radio receiver assembly with bracket with the 4 bolts.
-
-
INSTALL INTEGRATION CONTROL AND PANEL ASSEMBLY
-
CONNECT CABLE TO NEGATIVE BATTERY TERMINAL
Note
When disconnecting the cable, some systems need to be initialized after the cable is reconnected.
-
INSTALL NO. 2 DECK BOARD