ACTIVE NOISE CONTROL MICROPHONE INSTALLATION
PROCEDURE
-
INSTALL MICROPHONE WIRE
-
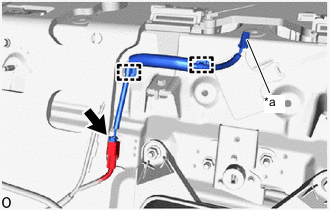
*a Connector color: Black (microphone side) Attach the clamps to install the microphone wire.
Note
The connectors used on the microphone side and vehicle wire harness side are the same shape. Make sure they are no mixed up when connecting.
-
Connect the connector.
-
-
INSTALL ACTIVE NOISE CONTROL MICROPHONE (for Rear Side)
-
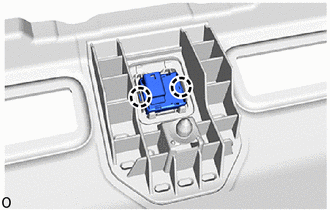
Attach the claws to install the active noise control microphone.
-
-
INSTALL PACKAGE TRAY TRIM PANEL ASSEMBLY
-
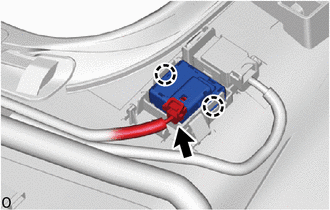
INSTALL ACTIVE NOISE CONTROL MICROPHONE (for Front Side)
-
for Glass Roof:
-
Attach the claws to install the active noise control microphone.
-
Connect the connector.
-
-
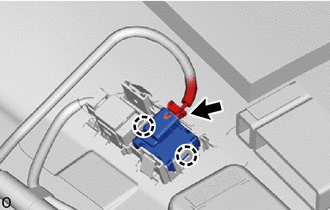
for Carbon Roof:
-
Attach the claws to install the active noise control microphone.
-
Connect the connector.
-
-
-
INSTALL ROOF HEADLINING ASSEMBLY
-
CONNECT CABLE TO NEGATIVE BATTERY TERMINAL
Note
When disconnecting the cable, some systems need to be initialized after the cable is reconnected.
-
INSTALL NO. 2 DECK BOARD
-
PERFORM DIAGNOSTIC SYSTEM CHECK
-
CHECK SRS WARNING LIGHT