FRONT BRAKE REASSEMBLY
CAUTION / NOTICE / HINT
Tech Tips
-
Use the same procedure for the RH and LH sides.
-
The procedure listed below is for the LH side.
PROCEDURE
-
TEMPORARILY TIGHTEN FRONT DISC BRAKE BLEEDER PLUG
Tech Tips
Fully tighten the front disc brake bleeder plug after bleeding the system.
-
INSTALL PISTON SEAL
-
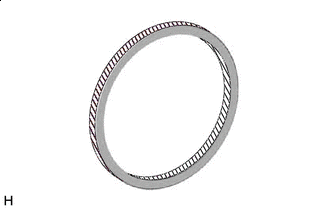

Lithium soap base glycol grease Apply lithium soap base glycol grease to the entire circumference of a 6 new piston seals.
-
Install the 6 piston seals to the disc brake cylinder assembly LH.
Note
Securely install the piston seal into the groove of the disc brake cylinder assembly LH.
-
-
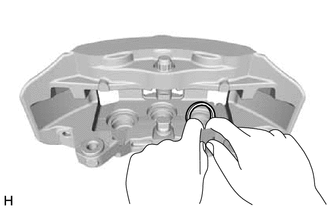
INSTALL FRONT DISC BRAKE PISTON
-

*1 Cylinder Boot *2 Front Disc Brake Piston Lithium Soap Base Glycol Grease Apply a light layer of lithium soap base glycol grease to the entire circumference of 6 new cylinder boots.
-
Install the 6 cylinder boots to the front disc brake piston.
Note
Securely install the cylinder boot into the groove of the front disc brake piston.
-
Apply a light layer of lithium soap base glycol grease to the contact surfaces of the front disc brake piston, and install it to the disc brake cylinder assembly LH.
Note
Do not forcibly install the front disc brake piston into the disc brake cylinder assembly LH.
-
-
INSTALL CYLINDER BOOT
-
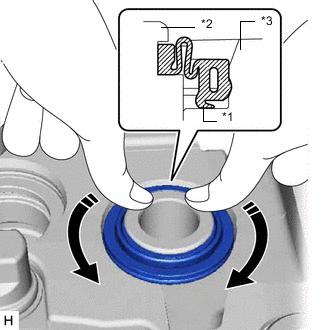
*1 Cylinder Boot *2 Front Disc Brake Piston *3 Disc Brake Cylinder Assembly LH Install the cylinder boot to the disc brake cylinder assembly LH as shown in the illustration.
Note
-
Securely install the cylinder boot into the groove of the front disc brake cylinder and front disc brake piston.
-
Do not damage the cylinder boot.
-
-
-
INSTALL DISC BRAKE FITTING KIT FRONT
-
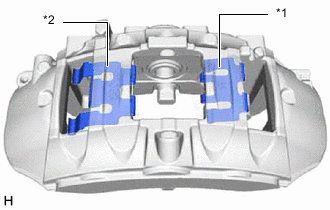
*1 No. 1 Anti-Rattle Spring *2 No. 2 Anti-Rattle Spring Install the No. 1 anti-rattle spring and No. 2 anti-rattle spring.
-
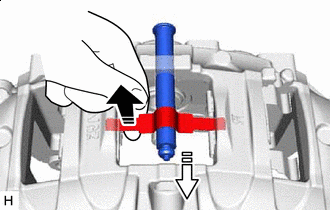

Install in this Direction (1) 
Install in this Direction (2) While pushing the anti-rattle spring upwards from the bottom, install the torque pin.
-
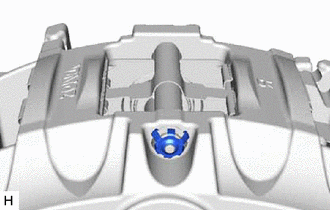
Install a new pin hold clip.
Note
Lightly pull on the torque pin to check that the pin hold clip is securely attached.
-