SHIFT CONTROL ACTUATOR REMOVAL

PROCEDURE
-
REMOVE PROPELLER WITH CENTER BEARING SHAFT ASSEMBLY
-
SUPPORT AUTOMATIC TRANSMISSION ASSEMBLY
-
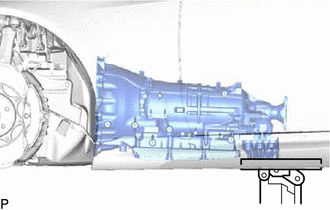
Using a transmission jack, support the automatic transmission assembly.
Note
Set the engine rear mounting member on the transmission jack to support the automatic transmission assembly.
-
-
REMOVE SHIFT CONTROL ACTUATOR ASSEMBLY
Note
If the shift control actuator assembly is removed, replace the shift control actuator seal.
-
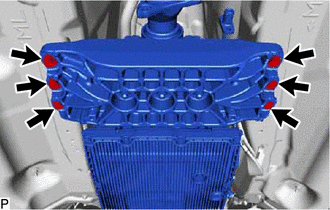
Remove the 6 bolts from the engine rear mounting member.
-
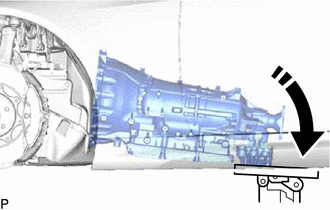

Tilt Slightly Slightly tilt the automatic transmission assembly.
Note
Tilt while paying attention to the wire harnesses.
-
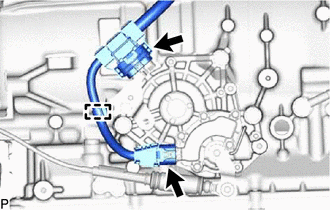
Disconnect the 2 connectors and detach the clamp.
-
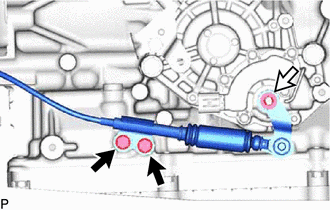

Bolt 
Nut and Spring Washer Remove the nut, spring washer and 2 bolts and disconnect the throttle link connecting rod assembly from the shift control actuator assembly.
-
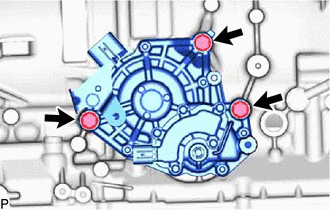
Remove the 3 bolts and shift control actuator assembly from the automatic transmission assembly.
Tech Tips
As the position of the shift control actuator assembly is detected automatically, initialization is not necessary after disconnecting and reconnecting the cable to the negative (-) battery terminal.
-
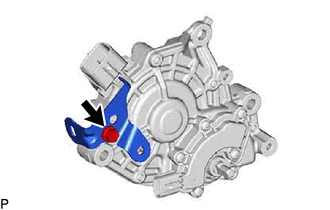
Remove the bolt and bracket from the shift control actuator assembly
-
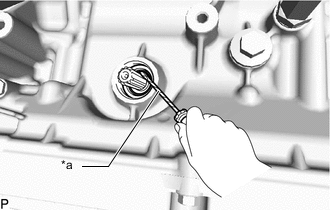
*a Protective Tape Using a screwdriver with its tip wrapped with protective tape, remove the shift control actuator seal from the automatic transmission assembly.
Note
Be careful not to damage the automatic transmission case.
Tech Tips
Tape the screwdriver tip before use.
-