EXHAUST PIPE GAS CONTROL ACTUATOR SUB-ASSEMBLY INSTALLATION
PROCEDURE
-
INSTALL EXHAUST PIPE GAS CONTROL ACTUATOR SUB-ASSEMBLY
-
New article:
-

*A for RH Side *B for LH Side *a Joint *d Valve Plate Align the joint of the exhaust pipe gas control actuator sub-assembly with the valve plate of the exhaust tailpipe assembly as shown in the illustration.
-
Install the 2 exhaust pipe gas control actuator sub-assemblies with the 6 bolts and 4 nuts.
- Torque:
- 21 N*m { 214 kgf*cm, 15 ft.*lbf }
Note
Install the same parts to their original positions.
-
-
Reuse:
-
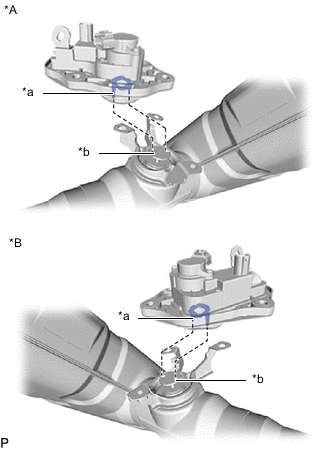
*A for RH Side *B for LH Side *a Joint *b Valve Plate Align the joint of the exhaust pipe gas control actuator sub-assembly with the valve plate of the exhaust tailpipe assembly as shown in the illustration.
-
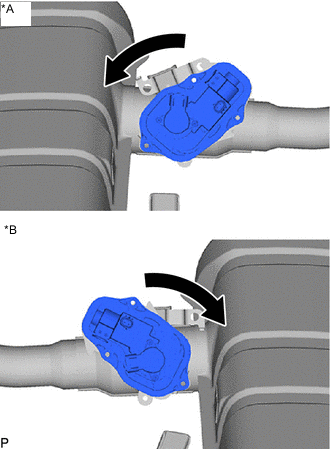
*A for RH Side *B for LH Side Turn the exhaust pipe gas control actuator sub-assembly as shown in the illustration.
-
Install the 2 exhaust pipe gas control actuator sub-assemblies with the 6 bolts and 4 nuts.
- Torque:
- 21 N*m { 214 kgf*cm, 15 ft.*lbf }
Note
Install the same parts to their original positions.
-
-
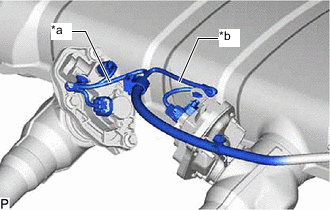
*a Black *b White Attach the 2 clamps and connect the 4 connectors as shown in the illustration.
-
-
INSPECT FOR EXHAUST GAS LEAK