EXHAUST PIPE REMOVAL
CAUTION / NOTICE / HINT
CAUTION:
To prevent burns, do not touch the engine, exhaust pipe or other high temperature components while the engine is hot.
PROCEDURE
-
REMOVE REAR FLOOR SIDE MEMBER COVER LH
-
Remove the 2 clips, 3 bolts, nut, screw and rear floor side member cover LH.
-
-
REMOVE REAR FLOOR SIDE MEMBER COVER RH
-
Remove the 2 clips, 3 bolts, nut, screw and rear floor side member cover RH.
-
-
REMOVE FRONT FENDER SEAL LH
-
Remove the 3 clips, grommet and front fender seal LH.
-
-
REMOVE FRONT FENDER SEAL RH
-
Remove the 3 clips, grommet and front fender seal RH.
-
-
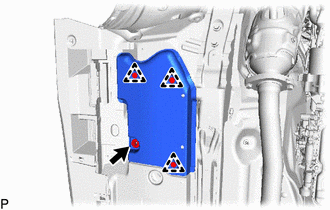
REMOVE FRONT FLOOR COVER LH
-
Remove the 4 grommets, 6 clips, nut, bolt and front floor cover LH.
-
-
REMOVE FRONT FLOOR COVER RH
-
Remove the 4 grommets, 6 clips, nut, bolt and front floor cover RH.
-
-
REMOVE FRONT SEAT ASSEMBLY
-
DISCONNECT HEATED OXYGEN SENSOR
-
REMOVE HEATED OXYGEN SENSOR (for Bank 1)
-
REMOVE HEATED OXYGEN SENSOR (for Bank 2)
-
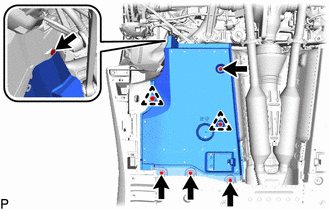
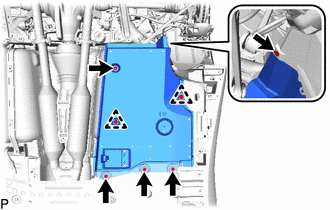
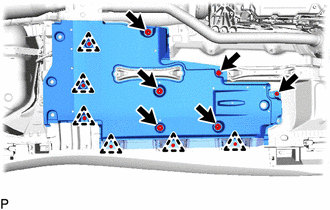
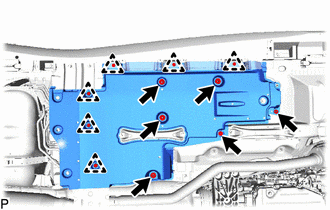
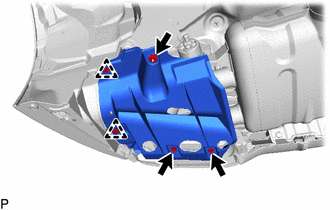
REMOVE FRONT CENTER FLOOR BRACE SUB-ASSEMBLY
-
Remove the 12 bolts and front center floor brace sub-assembly.
-
-
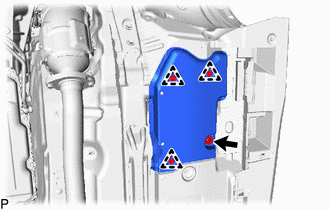
REMOVE NO. 2 DIFFERENTIAL SUPPORT PROTECTOR
-
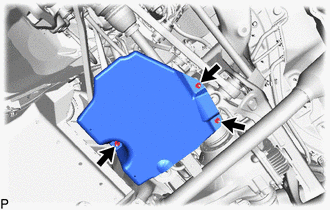
Remove the 3 nuts and No. 2 differential support protector.
-
-
REMOVE NO. 1 DIFFERENTIAL SUPPORT PROTECTOR
-
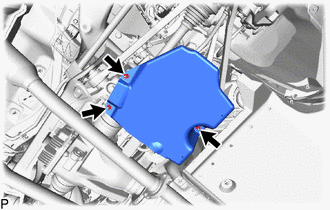
Remove the 3 nuts and No. 1 differential support protector.
-
-
REMOVE REAR NO. 4 BUMPER SIDE SUPPORT LH
-

Remove the 2 screws, 2 clips, grommet and rear No. 4 bumper side support LH.
-
-
REMOVE REAR NO. 4 BUMPER SIDE SUPPORT RH
-
Remove the 2 screws, 2 clips, grommet and rear No. 4 bumper side support RH.
-
-
REMOVE FRONT EXHAUST PIPE ASSEMBLY
-
Remove the 4 bolts and 4 nuts to disconnect the front exhasut pipe assembly from the exhaust manifold sub-assembly LH and exhaust manifold sub-assembly RH.
-
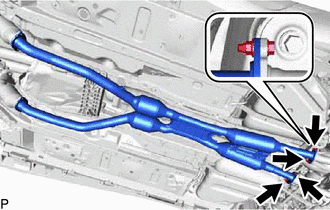
Remove the 4 bolts, 4 nuts and front exhaust pipe assembly from the exhaust tailpipe assembly.
-
Remove the 4 gaskets.
-
-
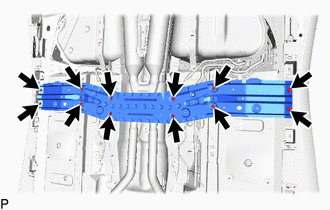
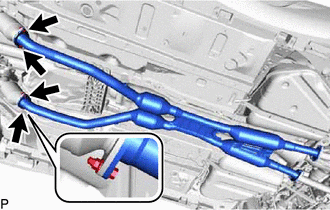
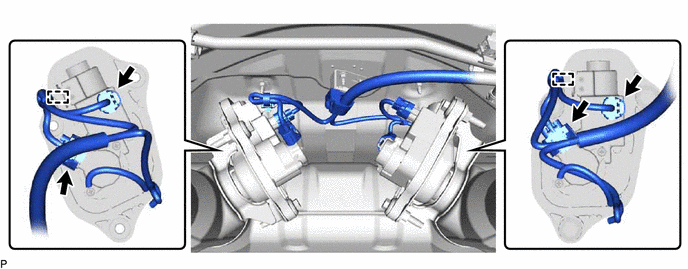
REMOVE EXHAUST TAILPIPE ASSEMBLY
CAUTION:
To prevent burns, do not touch the engine, exhaust pipe or other high temperature components while the engine is hot.
-
Detach the 2 clamps and disconnect the 4 connectors.
-
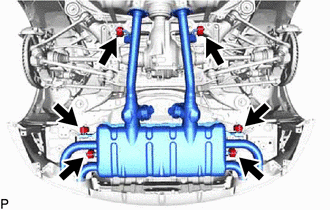
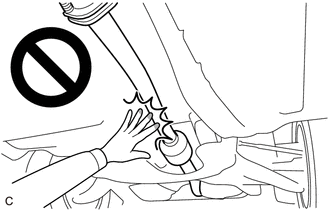
Remove the 6 exhaust pipe supports and exhaust tailpipe assembly.
-
-
REMOVE EXHAUST PIPE GAS CONTROL ACTUATOR SUB-ASSEMBLY
-
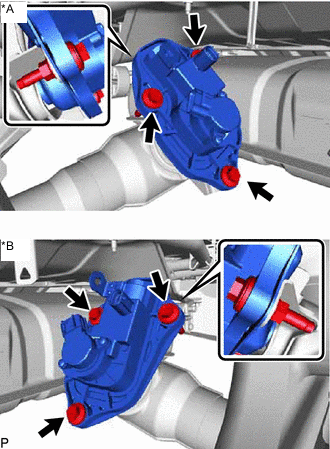
*A for RH Side *B for LH Side Remove the 6 bolts and 4 nuts.
-
Remove the 2 exhaust pipe gas control actuator sub-assemblies from the exhaust tailpipe assembly.
-