GLOVE BOX LIGHT INSTALLATION
CAUTION / NOTICE / HINT
Tech Tips
-
Use the same procedure for RHD and LHD vehicles.
-
The procedure listed below is for LHD vehicles.
PROCEDURE
-
INSTALL GLOVE BOX LIGHT ASSEMBLY
-
Set the glove box light assembly in place.
-
for LHD:
Rotate the glove box light assembly counterclockwise until it passes over the stopper and install it.
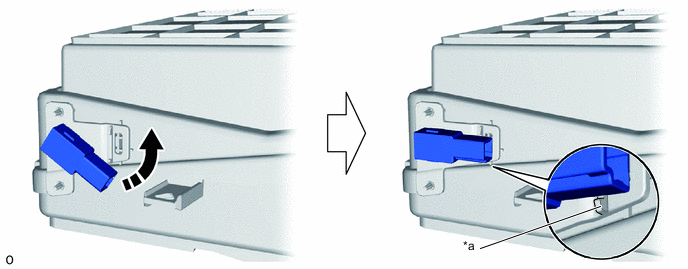
*a Stopper - - 
Counterclockwise - - -
for RHD:
Rotate the glove box light assembly clockwise until it passes over the stopper and install it.
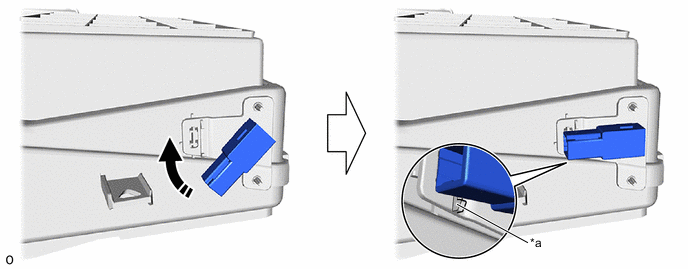
*a Stopper - - Clockwise - -
-
-
INSTALL GLOVE COMPARTMENT DOOR ASSEMBLY
-
INSTALL NO. 2 INSTRUMENT PANEL GARNISH SUB-ASSEMBLY
-
INSTALL LOWER NO. 2 INSTRUMENT PANEL AIRBAG ASSEMBLY
-
CONNECT CABLE TO NEGATIVE BATTERY TERMINAL
Note
When disconnecting the cable, some systems need to be initialized after the cable is reconnected.
-
INSTALL NO. 2 DECK BOARD
-
PERFORM DIAGNOSTIC SYSTEM CHECK
-
CHECK SRS WARNING LIGHT