LUGGAGE COMPARTMENT DOOR DISASSEMBLY
CAUTION / NOTICE / HINT
The necessary procedures (adjustment, calibration, initialization, or registration) that must be performed after parts are removed and installed, or replaced during luggage compartment door removal/installation are shown below.
| Replaced Part or Performed Procedure | Necessary Procedure | Effect/Inoperative Function when Necessary Procedure not Performed | Link |
|---|---|---|---|
| Rear television camera assembly |
|
Parking assist monitor system | Click here for Initialization Click here for Calibration |
PROCEDURE
-
REMOVE LUGGAGE COMPARTMENT DOOR COVER
-
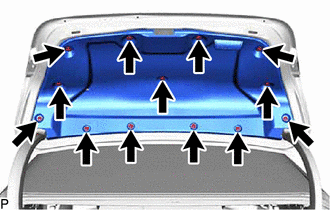
Using a clip remover, remove the 13 clips and luggage compartment door cover.
-
-
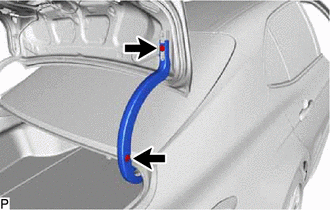
REMOVE LUGGAGE COMPARTMENT DOOR ASSIST GRIP
-
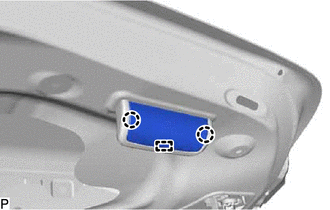
Disengage the 2 claws and guide.
-
Remove the 2 screws and luggage compartment door assist grip.
-
-
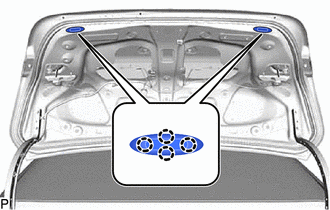
REMOVE LUGGAGE COMPARTMENT DOOR HINGE COVER LH
-
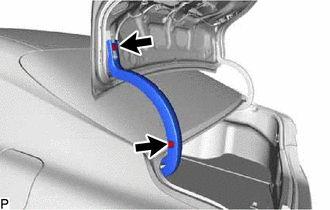
Remove the 2 clips and luggage compartment door hinge cover LH.
-
-
REMOVE LUGGAGE COMPARTMENT DOOR HINGE COVER RH
-
Remove the 2 clips and luggage compartment door hinge cover RH.
-
-
REMOVE LUGGAGE COMPARTMENT DOOR LOCK ASSEMBLY
-
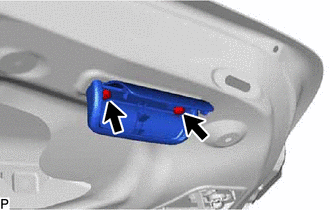
REMOVE LUGGAGE COMPARTMENT DOOR LOCK CYLINDER ASSEMBLY
-
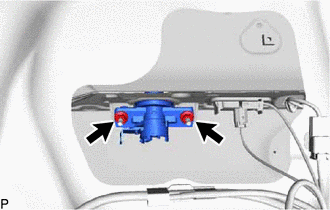
Remove the 2 nuts and luggage compartment door lock cylinder assembly.
-
-
REMOVE REAR LIGHT ASSEMBLY LH
-
REMOVE REAR LIGHT ASSEMBLY RH
Tech Tips
Use the same procedure as for the LH side.
-
REMOVE NO. 3 LUGGAGE COMPARTMENT DOOR OUTSIDE GARNISH
-
REMOVE LUGGAGE COMPARTMENT DOOR OUTSIDE GARNISH SUB-ASSEMBLY
-
REMOVE LUGGAGE ELECTRICAL KEY SWITCH
-
REMOVE LICENSE PLATE LIGHT ASSEMBLY (for LH Side)
-
REMOVE LICENSE PLATE LIGHT ASSEMBLY (for RH Side)
Tech Tips
Use the same procedure as for the LH side.
-
REMOVE REAR TELEVISION CAMERA ASSEMBLY WITH WIRE
-
REMOVE LUGGAGE COMPARTMENT DOOR CUSHION
-
Disengage the 8 claws to remove the 2 luggage compartment door cushions.
-