SLIDING ROOF HOUSING(for Panoramic Moon Roof) REMOVAL
CAUTION / NOTICE / HINT
The necessary procedures (adjustment, calibration, initialization or registration) that must be performed after parts are removed and installed, or replaced during sliding roof housing removal/installation are shown below.
| Replaced Part or Performed Procedure | Necessary Procedure | Effect/Inoperative Function when Necessary Procedure not Performed | Link |
|---|---|---|---|
|
Initialize panoramic moon roof system (for Sliding Roof) |
|
|
|
Initialize panoramic moon roof system (for Roof Sunshade) |
|
|
| Disconnect cable from negative battery terminal | Perform steering sensor zero point calibration | Lane departure alert system (w/ Steering Control) | |
| Pre-collision system | |||
| Memorize steering angle neutral point | Parking assist monitor system |
CAUTION:
Some of these service operations affect the SRS airbag system. Read the precautionary notices concerning the SRS airbag system before servicing.
PROCEDURE
-
REMOVE NO. 3 SLIDING ROOF SIDE GARNISH LH
-
Move the sunshade trim sub-assembly to the fully opened position.
-
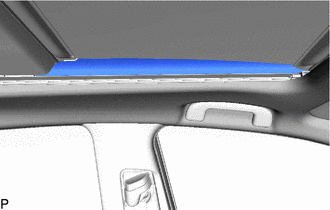
Remove the No. 3 sliding roof side garnish LH.
-
-
REMOVE NO. 3 SLIDING ROOF SIDE GARNISH RH
Tech Tips
Use the same procedure as for the LH side.
-
REMOVE NO. 4 SLIDING ROOF SIDE GARNISH LH
-
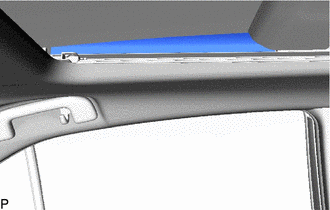
Remove the No. 4 sliding roof side garnish LH.
-
-
REMOVE NO. 4 SLIDING ROOF SIDE GARNISH RH
Tech Tips
Use the same procedure as for the LH side.
-
REMOVE NO. 2 SLIDING ROOF SIDE GARNISH LH
-
Move the sliding roof glass sub-assembly to the fully tilted up position.
-
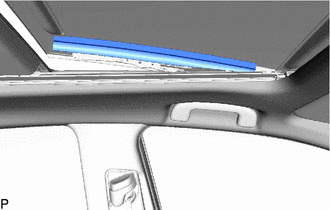
Remove the No. 2 sliding roof side garnish LH.
-
-
REMOVE NO. 2 SLIDING ROOF SIDE GARNISH RH
Tech Tips
Use the same procedure as for the LH side.
-
REMOVE SLIDING ROOF GLASS SUB-ASSEMBLY
-
Move the sliding roof glass sub-assembly to the fully closed position.
-
Using a T25 "TORX" socket wrench, remove the 6 screws and sliding roof glass sub-assembly.
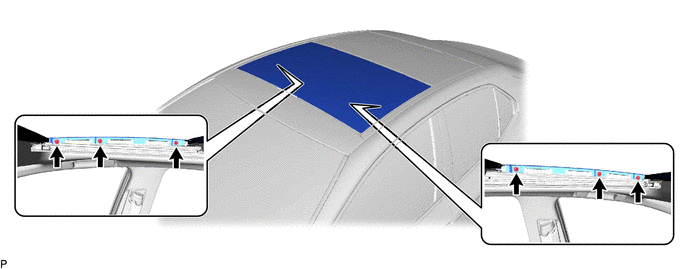
Note
To prevent the sliding roof glass sub-assembly and sliding roof drive gear assembly from becoming misaligned, move the sliding roof glass sub-assembly to the fully closed position before removing.
-
-
REMOVE CURTAIN SHIELD AIRBAG ASSEMBLY LH
-
REMOVE CURTAIN SHIELD AIRBAG ASSEMBLY RH
Tech Tips
Use the same procedure as for the LH side.
-
DISCONNECT SLIDING ROOF DRAIN HOSE
Tech Tips
Use the same procedure for all of the sliding roof drain hoses.
-
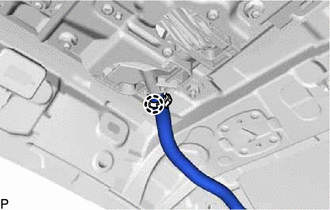
for Clamp Type:
-
Disengage the claw and disconnect the sliding roof drain hose.
-
-
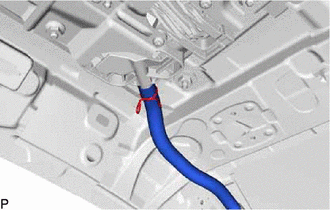
for Clip Type:
-
Expand the clip and disconnect the sliding roof drain hose.
-
-
-
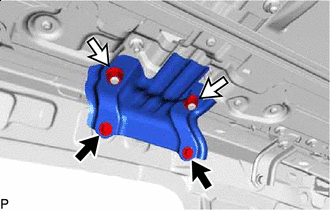
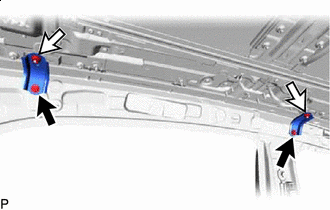
REMOVE FRONT SLIDING ROOF HOUSING MOUNTING BRACKET LH
-


Bolt 
Nut Remove the bolt, nut and front sliding roof housing mounting bracket LH.
-
-
REMOVE FRONT SLIDING ROOF HOUSING MOUNTING BRACKET RH
Tech Tips
Use the same procedure as for the LH side.
-
REMOVE CENTER SLIDING ROOF HOUSING MOUNTING BRACKET LH
-
Bolt Nut Remove the 2 bolts, 2 nuts and center sliding roof housing mounting bracket LH.
-
-
REMOVE CENTER SLIDING ROOF HOUSING MOUNTING BRACKET RH
Tech Tips
Use the same procedure as for the LH side.
-
REMOVE REAR SLIDING ROOF HOUSING MOUNTING BRACKET LH
-
Bolt Nut Remove the 2 bolts, 2 nuts and 2 rear sliding roof housing mounting brackets LH.
-
-
REMOVE REAR SLIDING ROOF HOUSING MOUNTING BRACKET RH
Tech Tips
Use the same procedure as for the LH side.
-
REMOVE SLIDING ROOF HOUSING ASSEMBLY
-
Remove the 20 nuts.
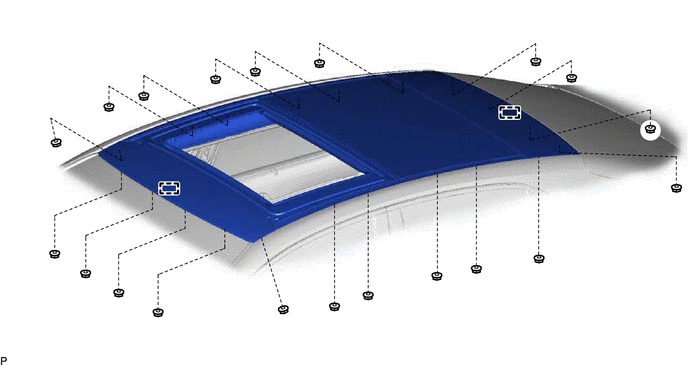
-
Disengage the 2 guides and remove the sliding roof housing assembly.
-