BLOWER UNIT REASSEMBLY
PROCEDURE
-
INSTALL NO. 1 BLOWER DAMPER SERVO SUB-ASSEMBLY (for 1-tier Type)
-
for LHD:
-
Install the No. 1 blower damper servo sub-assembly with the 2 screws.
-
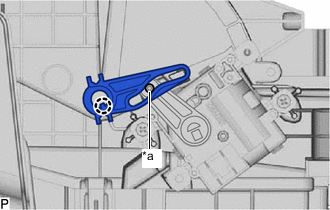
*a Link Connect the link of the No. 1 blower damper servo sub-assembly to the groove on the front door lever as shown in the illustration.
-
Engage the claw to install the front door lever.
-
-
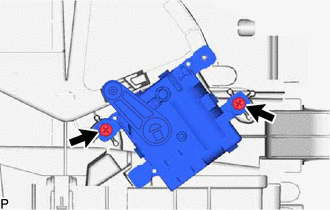
for RHD:
-
*a Link Connect the link of the No. 1 blower damper servo sub-assembly to the groove on the lever of the blower assembly as shown in the illustration.
-
Install the No. 1 blower damper servo sub-assembly with the 2 screws.
-
-
-
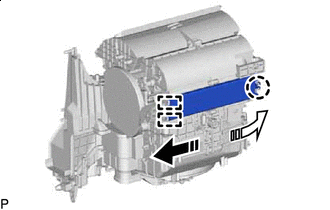
INSTALL NO. 1 BLOWER DAMPER SERVO SUB-ASSEMBLY (for 2-tier Type)
-

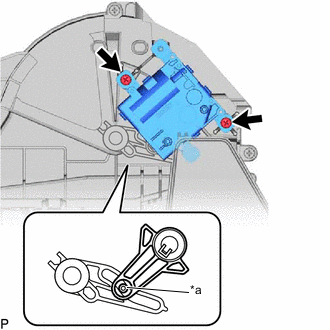
*a Link Connect the 2 links of the blower assembly to the 2 grooves on the plate of the No. 1 blower damper servo sub-assembly as shown in the illustration.
-
Install the No. 1 blower damper servo sub-assembly with the 2 screws.
-
-
INSTALL BLOWER MOTOR WITH FAN SUB-ASSEMBLY
-
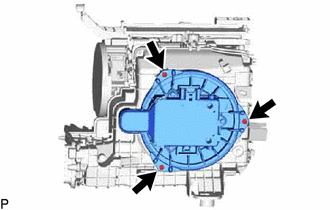
Install the blower motor with fan sub-assembly with the 3 screws.
Note
Replace the blower motor with fan sub-assembly if it has been dropped or subjected to a severe impact.
-
-
INSTALL CLEAN AIR FILTER
-
Engage the 2 guides on the cutout side of the air filter case and then engage the 2 guides as shown in the illustration to install the clean air filter.
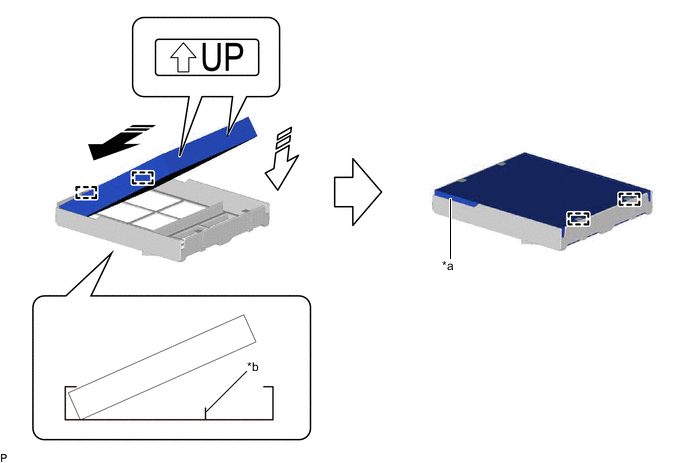
*a Cutout *b Rib 
Install in this Direction (1) 
Install in this Direction (2) Note
-
Make sure that the "UP" marks are facing the correct direction before installing the clean air filter.
-
Make sure that there is no clearance between the clean air filter and air filter case and that the clean air filter is not deformed.
-
-

Install in this Direction Install the air filter sub-assembly as shown in the illustration.
Note
Make sure that the "UP" mark is facing the correct direction before installing the air filter sub-assembly.
-
-
INSTALL AIR FILTER COVER PLATE
-
Install in this Direction (1) Install in this Direction (2) Engage the 2 guides and claw as indicated by the arrows, in the order shown in the illustration to install the air filter cover plate.
-