VACUUM PUMP(for A25A-FKS) DISASSEMBLY
PROCEDURE
-
REMOVE END COVER
-
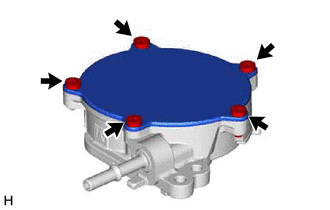
Using a T30 "TORX" socket wrench, remove the 5 screws and end cover.
Note
-
Hold the pump so that the pump installation surface and fitting parts will not be damaged.
-
As the housing deforms when force is applied, do not secure the housing with a tool such as a vise.
-
Securely fit the T30 "TORX" socket wrench to the screws.
-
Do not drop the end cover.
-
Do not damage the end cover.
-
-
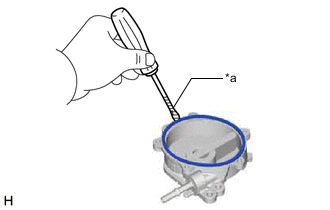
*a Protective Tape Using a screwdriver with its tip wrapped with protective tape, remove the vacuum pump cover O-ring.
Note
Do not damage the groove.
-
-
REMOVE VACUUM PUMP VANE
-
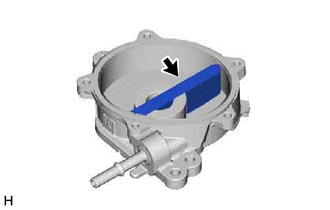
Remove the vacuum pump vane together with the 2 vacuum pump vane caps.
Note
-
When reusing the vacuum pump vane and vacuum pump vane caps, make sure to make a note of the installation position and orientation.
-
Do not drop the vacuum pump vane or vacuum pump vane caps.
-
-
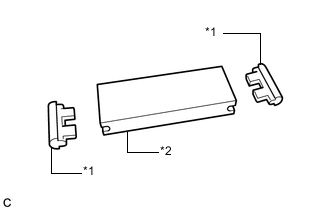
*1 Vacuum Pump Vane Cap *2 Vacuum Pump Vane Remove the 2 vacuum pump vane caps from the vacuum pump vane.
Note
-
When reusing the vacuum pump vane and vacuum pump vane caps, make sure to make a note of the installation positions and orientation.
-
Do not drop the vacuum pump vane and vacuum pump vane caps.
-
-