2GR-FKS DRIVE BELT INSTALLATION
PROCEDURE
-
INSTALL V-RIBBED BELT
Tech Tips
When reusing the V-ribbed belt, check the ribs and back of the V-ribbed belt for wear and cracks. If wear or a crack that reaches the core (at more than 1 point) is found, replace the V-ribbed belt.
-
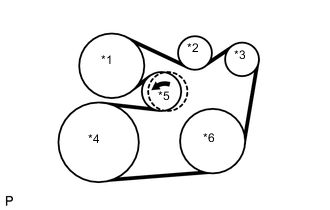
*1 Engine Water Pump Assembly *2 No. 2 Idler Pulley Sub-assembly *3 Generator Assembly *4 Crankshaft Pulley *5 V-ribbed Belt Tensioner Assembly *6 Compressor Assembly with Pulley Install the V-ribbed belt.
Note
-
Make sure to put the backside of the V-ribbed belt on the V-ribbed belt tensioner assembly pulley and No. 2 idler pulley sub-assembly.
-
Check that the V-ribbed belt is properly set to each pulley.
-
-
Turn the V-ribbed belt tensioner assembly counterclockwise and remove the 5 mm hexagon wrench.
-
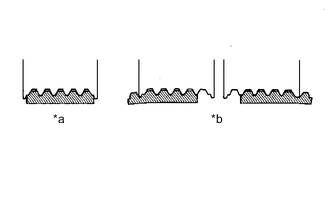
*a Correct *b Incorrect After installing the V-ribbed belt, check that it fits properly in the ribbed grooves. Confirm that the V-ribbed belt has not slipped out of the grooves on the bottom of the pulley by hand.
-
-
INSTALL FRONT FENDER APRON SEAL RH
-
INSTALL FRONT WHEEL RH