SHIFT LEVER INSTALLATION
PROCEDURE
-
INSTALL TRANSMISSION FLOOR SHIFT ASSEMBLY
-
Connect the shift lock control ECU connector.
-
Engage the clamp to connect the wire harness to the transmission floor shift assembly.
-
Connect the transmission control switch connector.
-
Engage the clamp to connect the wire harness to the transmission floor shift assembly.
-
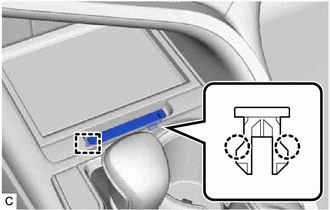
Install the clip to the No. 1 console box duct.
-
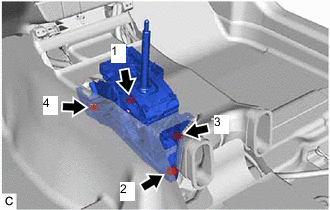
Temporarily install the transmission floor shift assembly to the vehicle body with the 4 bolts.
-
Tighten the 4 bolts in the order shown in the illustration.
- Torque:
- 12 N*m { 122 kgf*cm, 9 ft.*lbf }
-
-
CONNECT TRANSMISSION CONTROL CABLE ASSEMBLY
Note
Before connecting the transmission control cable assembly, check that the shift lever is in N.
-
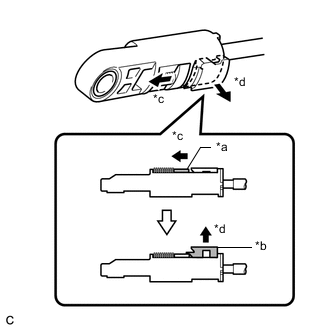
*a Slider *b Lock Piece *c Slide *d Pull Slide the slider of the transmission control cable assembly in the direction indicated by the arrow in the illustration and pull the lock piece outward.
-
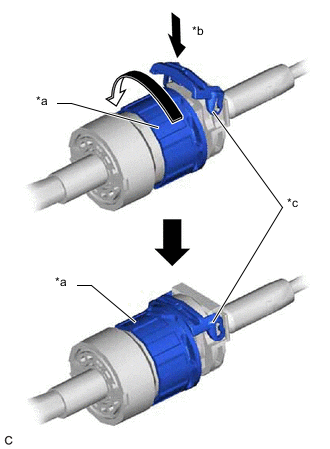
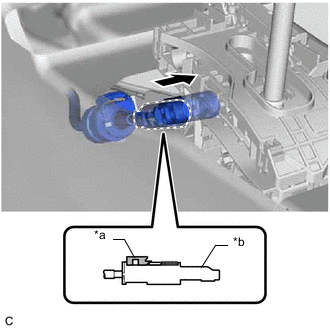
*a Lock Nut *b Push in *c Stopper Turn the lock nut of the transmission control cable assembly counterclockwise. While holding the lock nut, push in the stopper.
-
*a Stopper Connect the transmission control cable assembly to the transmission floor shift assembly.
Note
After installation, check that the outer part of the stopper is as shown in the illustration.
-
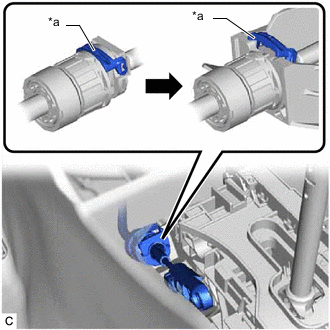
*a Lock Piece *b Adjuster Case Connect the transmission control cable assembly to the transmission floor shift assembly.
Note
-
Check that the lock piece is pulled out.
-
Push the end of the transmission control cable assembly all the way to the base of the transmission floor shift assembly pin.
-
Connect the transmission control cable assembly so that the lock piece faces the driver side.
-
-
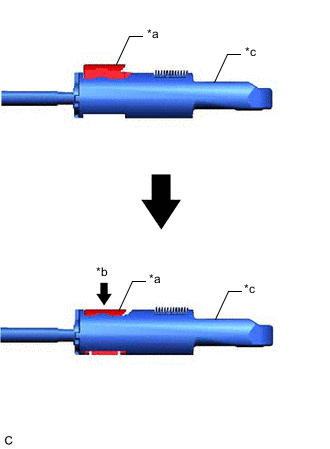
*a Lock Piece *b Push in *c Adjuster Case Push the lock piece into the adjuster case.
Note
-
Check that the shift lever is in N.
-
Securely push in the lock piece until the slider lock is engaged.
-
-
After adjusting the shift lever position, check the position and operation of the shift lever. If there is a problem, adjust the shift lever position again.
-
-
INSTALL CONSOLE BOX ASSEMBLY
-
INSTALL SHIFT LEVER KNOB SUB-ASSEMBLY
-
INSTALL SHIFT LOCK RELEASE BUTTON COVER
-
Engage the 2 claws and guide to install the shift lock release button cover to the rear upper console panel sub-assembly.
-
-
INSPECT SHIFT LEVER POSITION
-
ADJUST SHIFT LEVER POSITION