REAR COMBINATION LIGHT ASSEMBLY(w/ Rear No. 2 Seat) REMOVAL
CAUTION / NOTICE / HINT
Tech Tips
-
Use the same procedure for the RH side and LH side.
-
The following procedure is for the LH side.
PROCEDURE
-
REMOVE REAR NO. 2 SEAT ASSEMBLY
-
REMOVE REAR DOOR SCUFF PLATE
-
REMOVE REAR DOOR INSIDE SCUFF PLATE
-
REMOVE REAR SEAT OUTER TRACK BRACKET COVER LH (for LH Side)
-
REMOVE REAR SEAT OUTER TRACK BRACKET COVER RH (for RH Side)
-
REMOVE FRONT DECK SIDE TRIM COVER
-
REMOVE REAR SEAT SIDE GARNISH
-
REMOVE NO. 1 LUGGAGE COMPARTMENT TRIM HOOK (for LH Side)
-
REMOVE ROPE HOOK ASSEMBLY (for LH Side)
-
REMOVE NO. 1 LUGGAGE COMPARTMENT LIGHT ASSEMBLY (for LH Side)
-
REMOVE NO. 1 LUGGAGE COMPARTMENT TRIM HOOK (for RH Side)
-
REMOVE ROPE HOOK ASSEMBLY (for RH Side)
Tech Tips
Use the same procedure as for the LH side.
-
REMOVE NO. 1 LUGGAGE COMPARTMENT LIGHT ASSEMBLY (for RH Side)
-
REMOVE NO. 2 AIR CONDITIONING CONTROL ASSEMBLY (for LH Side)
-
REMOVE COOLER (NO. 2 ROOM TEMP. SENSOR) THERMISTOR (for LH Side)
-
REMOVE DECK TRIM SIDE PANEL ASSEMBLY LH (for LH Side)
-
REMOVE DECK TRIM SIDE PANEL ASSEMBLY RH (for RH Side)
-
REMOVE REAR LIGHT COVER
-
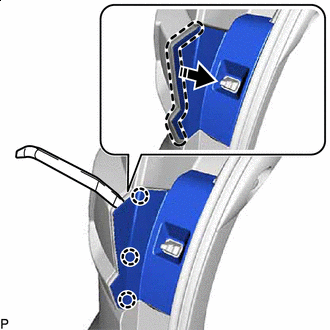

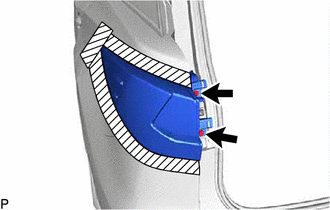
Insert Moulding Remover Here 
Remove in this Direction Using a moulding remover, disengage the 3 claws as shown in the illustration.
-
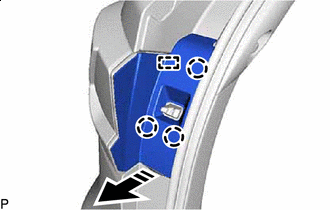
Remove in this Direction Disengage the 3 claws and guide to remove the rear light cover as shown in the illustration.
-
-
REMOVE REAR COMBINATION LIGHT ASSEMBLY
-
Disconnect the connector.
-
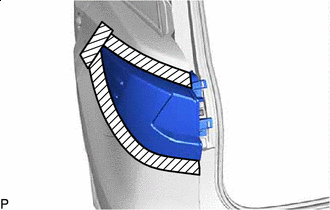

Protective Tape Apply protective tape around the rear combination light assembly as shown in the illustration.
-
Remove the 2 screws.
-
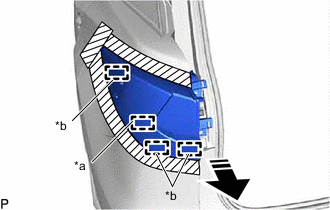
*a Pin *b Guide Remove in this Direction Pull the rear combination light assembly toward the rear of the vehicle as shown in the illustration to disengage the pin and 3 guides and separate the rear combination light assembly.
Note
To prevent the rear combination light assembly from falling when disengaging the pin, lightly hold the rear combination light assembly.
-
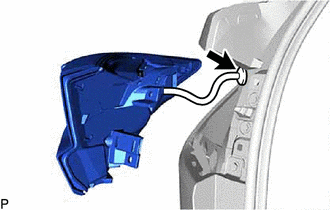
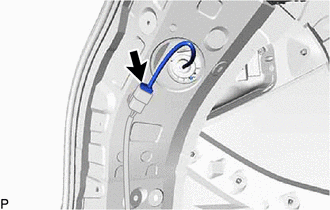
Disengage the grommet to remove the rear combination light assembly.
-