WASHER NOZZLE(for Front Side) REMOVAL
CAUTION / NOTICE / HINT
Tech Tips
-
Use the same procedure for the RH side and LH side.
-
The following procedure is for the LH side.
PROCEDURE
-
REMOVE HOOD INSULATOR (w/ Heater)
-
REMOVE WASHER NOZZLE SUB-ASSEMBLY (w/o Heater)
-
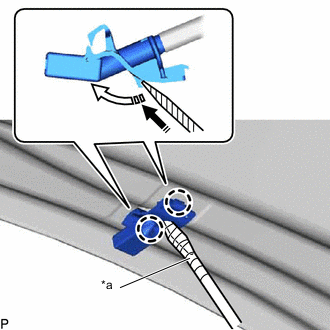
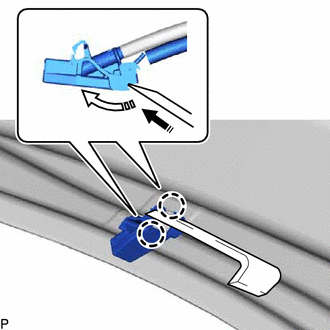
*a Protective Tape 
Remove in this Direction (1) 
Remove in this Direction (2) Using a screwdriver, disengage the 2 claws as indicated by the arrows, in the order shown in the illustration to separate the washer nozzle sub-assembly.
Note
Be careful not to damage the windshield glass.
Tech Tips
Tape the screwdriver tip before use.
-
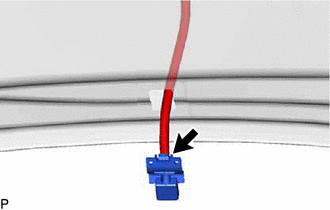
Disconnect the washer hose to remove the washer nozzle sub-assembly.
Note
Washer nozzle sub-assemblies cannot be reused.
-
-
REMOVE WASHER NOZZLE SUB-ASSEMBLY (w/ Heater)
-
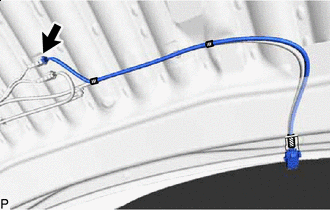

Tape Disconnect the connector.
-
Remove the tape and disconnect the wire harness of the washer nozzle sub-assembly from the washer hose.
-
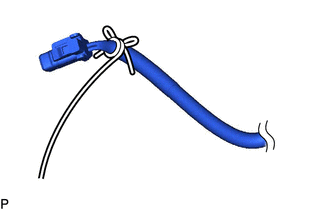
Tie a string to the wire harness of the washer nozzle sub-assembly.
-
Remove in this Direction (1) Remove in this Direction (2) Using a moulding remover, disengage the 2 claws as indicated by the arrows, in the order shown in the illustration to separate the washer nozzle sub-assembly.
Note
Be careful not to damage the windshield glass.
-
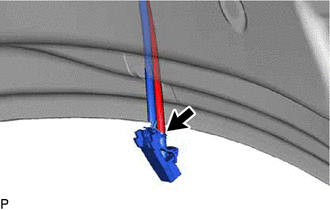
Disconnect the washer hose.
-
Pull the washer nozzle sub-assembly from the hood sub-assembly to remove it.
Note
-
Washer nozzle sub-assemblies cannot be reused.
-
Leave the string inside the hood sub-assembly.
-
-
Remove the string from the wire harness of the washer nozzle sub-assembly.
-