REAR NO. 2 SEAT ASSEMBLY REMOVAL
CAUTION / NOTICE / HINT
The necessary procedures (adjustment, calibration, initialization, or registration) that must be performed after parts are removed and installed, or replaced during rear No. 2 seat assembly/reassembly are shown below.
| Replaced Part or Performed Procedure | Necessary Procedure | Effect/Inoperative Function when Necessary Procedure not Performed | Link |
|---|---|---|---|
|
Initial position memorization | Rear power seat function |
CAUTION:
Wear protective gloves. Sharp areas on the seat frame may injure your hands.
PROCEDURE
-
REMOVE TONNEAU COVER ASSEMBLY
-
REMOVE DECK BOARD ASSEMBLY
-
REMOVE REAR NO. 4 FLOOR BOARD
-
REMOVE DECK SIDE TRIM BOX LH
-
REMOVE NO. 1 DECK BOARD
-
DISCONNECT REAR NO. 2 SEAT ASSEMBLY
-
REMOVE REAR DECK FLOOR BOX
-
REMOVE REAR FLOOR FINISH PLATE
-
REMOVE REAR NO. 3 SPEAKER ASSEMBLY (w/ Woofer)
-
REMOVE NO. 2 DECK FLOOR BRACKET LH (w/ Woofer)
-
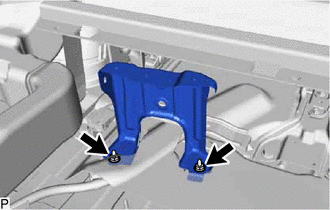
Remove the 2 nuts and No. 2 deck floor bracket LH.
-
-
REMOVE FRONT DECK FLOOR BOX
-
REMOVE REAR NO. 2 SEAT ASSEMBLY
-
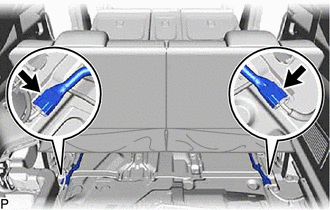
Disconnect the 2 connectors.
-
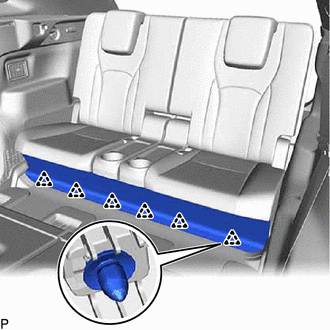
Disengage the 6 clips.
-
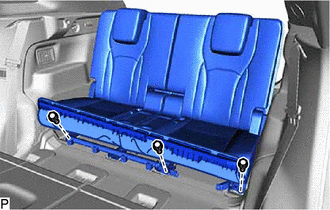
Remove the 3 bolts on the front side of the rear No. 2 seat assembly.
-
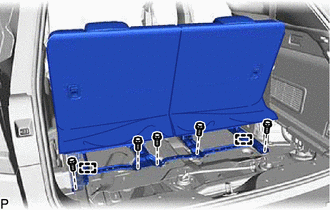
Remove the 5 bolts on the rear side of the rear No. 2 seat assembly.
-
Disengage the 2 pins and remove the rear No. 2 seat assembly.
Note
Be careful not to damage the rear No. 2 seat assembly, vehicle body or vehicle interior.
-