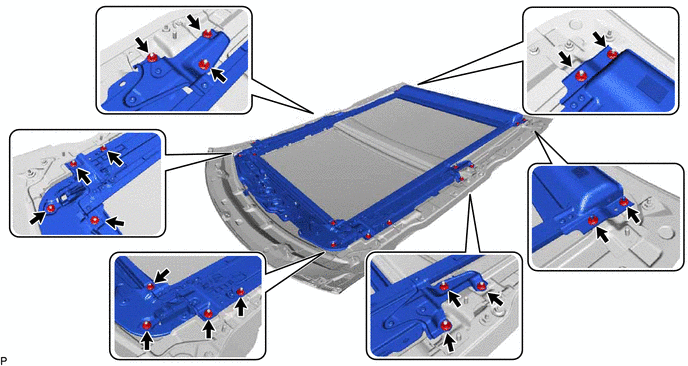
SLIDING ROOF HOUSING(for Panoramic Moon Roof) DISASSEMBLY
PROCEDURE
-
REMOVE ROOM LIGHT BRACKET
-
Remove the 4 nuts.
-
Disengage the clamp to remove the room light bracket.
-
-
REMOVE NO. 2 ROOF WIRE
-
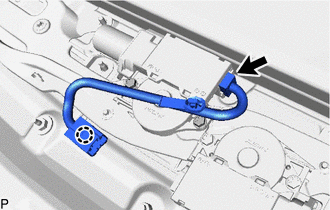
Disconnect the connector.
-
Disengage the claw to remove the No. 2 roof wire.
-
-
REMOVE SLIDING ROOF DRIVE GEAR ASSEMBLY (for Sliding Roof)
-

Remove the 2 bolts and sliding roof drive gear assembly.
-
-
REMOVE SLIDING ROOF DRIVE GEAR ASSEMBLY (for Roof Sunshade)
-
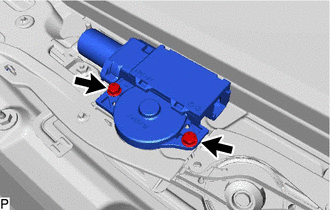
Remove the 2 bolts and sliding roof drive gear assembly.
-
-
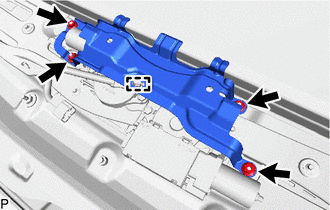
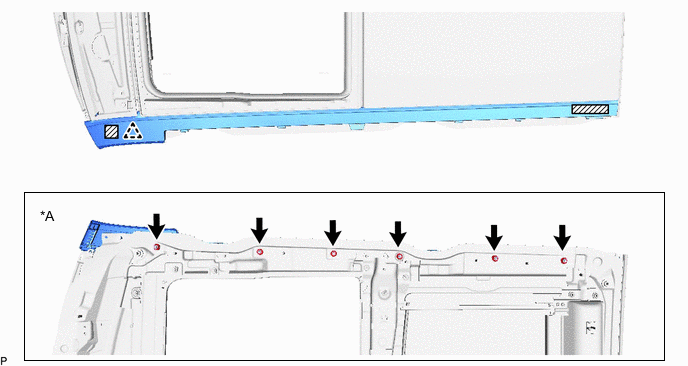
REMOVE SLIDE ROOF RAIL SUB-ASSEMBLY
-
Remove the 18 nuts and slide roof rail sub-assembly.
-
-
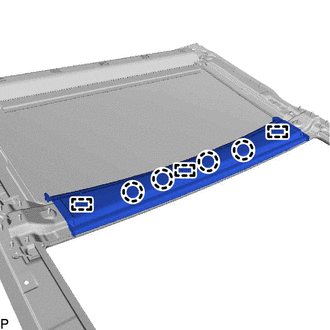
REMOVE SUNSHADE TRIM SUB-ASSEMBLY
-


Slide Slide the sunshade trim sub-assembly as shown in the illustration.
Standard Area Dimension a 30 mm (1.18 in.) -

Using a T25 "TORX" socket wrench, remove the 2 screws.
-
Disengage the 2 claws and 2 guides.
-
Using a T25 "TORX" socket wrench, remove the 4 screws and sunshade trim sub-assembly.
-
-
REMOVE NO. 2 SLIDE ROOF PANEL SUB-ASSEMBLY
-


Nut 
"TORX" Screw Remove the 4 nuts.
-
Using a T25 "TORX" socket wrench, remove the 2 screws and No. 2 slide roof panel sub-assembly.
-
-
REMOVE NO. 1 SLIDE ROOF PANEL SUB-ASSEMBLY
-

Double-sided Tape Using a T25 "TORX" socket wrench, remove the screw.
-
Disengage the 6 clips and guide to remove the No. 1 slide roof panel sub-assembly.
-
-
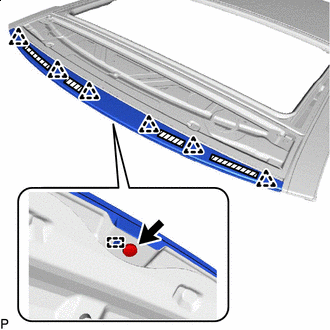
REMOVE NO. 1 SLIDING ROOF SIDE GARNISH LH
-
Remove the 6 nuts.
*A Back Side - - Double-sided Tape - - -
Disengage the clip and remove the No. 1 sliding roof side garnish LH.
-
-
REMOVE NO. 1 SLIDING ROOF SIDE GARNISH RH
Tech Tips
Use the same procedure as for the LH side.
-
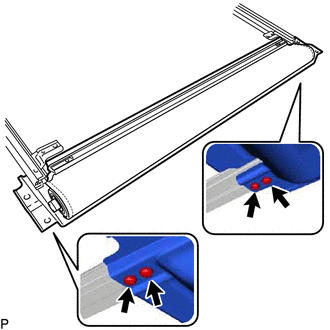
REMOVE REAR SLIDING ROOF GARNISH
-
Disengage the 4 claws and 3 guides to remove the rear sliding roof garnish from the sliding roof housing panel.
-