AIR CONDITIONING FILTER INSTALLATION
PROCEDURE
-
INSTALL CLEAN AIR FILTER
-
Engage the 4 guides as indicated by the arrows, in the order shown in the illustration to install the clean air filter to the air filter case.
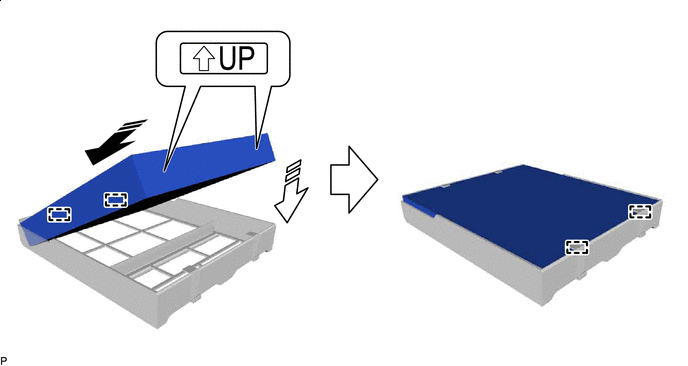

Install in this Direction (1) 
Install in this Direction (2) Note
Make sure that the "UP" marks are facing the correct direction before installing the clean air filter.
-
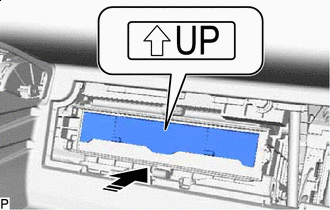
Install in this Direction Install the air filter sub-assembly as shown in the illustration.
Note
Make sure that the "UP" mark is facing the correct direction before installing the air filter sub-assembly.
-
-
INSTALL AIR FILTER COVER PLATE
-
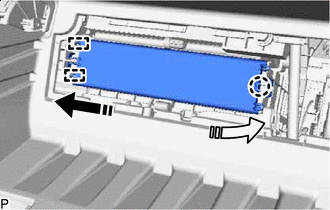
Install in this Direction (1) Install in this Direction (2) Engage the 2 guides and claw as indicated by the arrows, in the order shown in the illustration to install the air filter cover plate.
-
-
INSTALL INSTRUMENT LOWER COVER
-
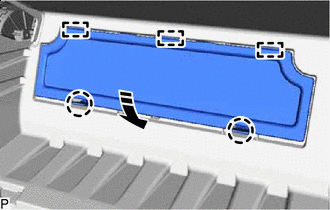
Install in this Direction Engage the 3 guides and 2 claws to install the instrument lower cover as shown in the illustration.
-
-
INSTALL GLOVE COMPARTMENT DOOR ASSEMBLY
-
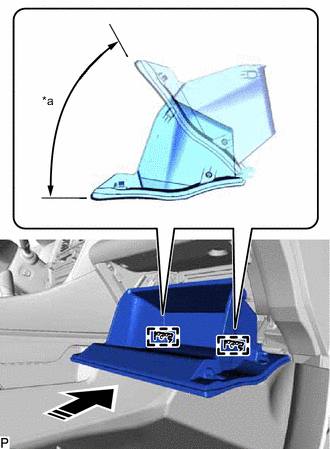
*a 52.5° Install in this Direction With the glove compartment door assembly opened approximately 52.5° from its closed position, engage the 2 hinges horizontally.
Note
Engaging the hinges from an upward angle will deform the hinges. Be sure to install the glove compartment door assembly horizontally.
-
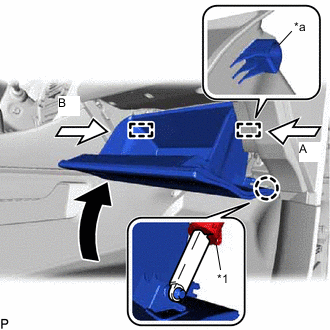
*1 Glove Compartment Door Stopper Sub-assembly *a Stopper Slightly bend the stoppers (A) and (B) in the directions indicated by the arrows shown in the illustration and engage the stoppers to install the glove compartment door assembly.
-
Engage the claw to connect the glove compartment door stopper sub-assembly.
-