TRANSFER ASSEMBLY INSTALLATION

PROCEDURE
-
INSTALL TRANSFER ASSEMBLY (for U661F)
-
Install 4 new transfer and transaxle setting stud bolts to the automatic transaxle assembly positions shown in the illustration.
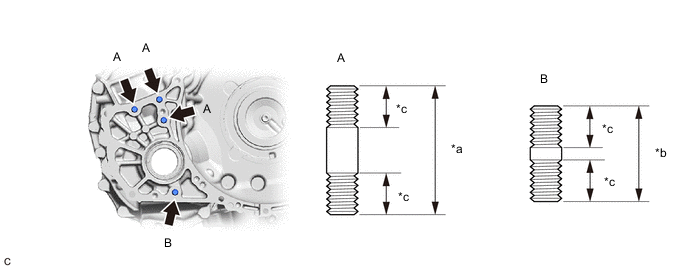
*a 69 mm (2.72 in.) *b 49 mm (1.93 in.) *c 22 mm (0.866 in.) - - - Torque:
- 39.2 N*m { 400 kgf*cm, 29 ft.*lbf }
Note
Install the sealed side of the transfer and transaxle setting stud bolt to the automatic transaxle assembly.
-
Install the transfer assembly to the automatic transaxle assembly with the 8 nuts.
- Torque:
- 68.6 N*m { 700 kgf*cm, 51 ft.*lbf }
Note
-
Install the transfer assembly to the automatic transaxle assembly horizontally.
-
Do not touch the transfer assembly oil seals during installation.
-
-
INSTALL TRANSFER ASSEMBLY (for U881F)
-
Install 4 new transfer and transaxle setting stud bolts to the automatic transaxle assembly positions shown in the illustration.
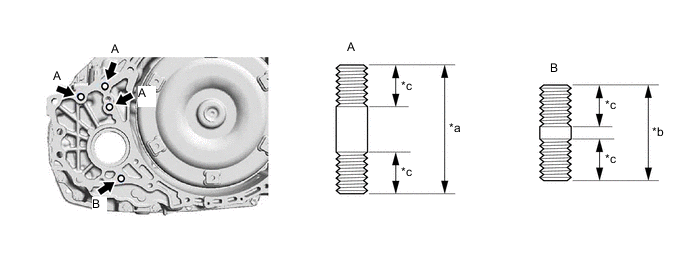
*a 69 mm (2.72 in.) *b 49 mm (1.93 in.) *c 22 mm (0.866 in.) - - - Torque:
- 39.2 N*m { 400 kgf*cm, 29 ft.*lbf }
Note
Install the sealed side of the transfer and transaxle setting stud bolt to the automatic transaxle assembly.
-
Install the transfer assembly to the automatic transaxle assembly with the 8 nuts.
- Torque:
- 68.6 N*m { 700 kgf*cm, 51 ft.*lbf }
Note
-
Install the transfer assembly to the automatic transaxle assembly horizontally.
-
Do not touch the transfer assembly oil seals during installation.
-
-
INSTALL AUTOMATIC TRANSAXLE ASSEMBLY (for 8AR-FTS)
-
INSTALL AUTOMATIC TRANSAXLE ASSEMBLY (for 2GR-FKS)