FRONT ACCELERATION SENSOR(for RHD) REMOVAL
PROCEDURE
-
REMOVE FRONT DOOR SCUFF PLATE LH (for LH Side)
w/o Rear No. 2 Seat: Click here
w/ Rear No. 2 Seat: Click here
-
REMOVE COWL SIDE TRIM BOARD LH (for LH Side)
-
REMOVE INSTRUMENT PANEL GARNISH LH (for LH Side)
-
REMOVE NO. 2 INSTRUMENT PANEL UNDER COVER SUB-ASSEMBLY (for LH Side)
-
REMOVE LOWER NO. 1 INSTRUMENT PANEL FINISH PANEL (for LH Side)
-
REMOVE GLOVE COMPARTMENT DOOR ASSEMBLY (for LH Side)
-
REMOVE ECU INTEGRATION BOX LH (for LH Side)
-
REMOVE FRONT DOOR SCUFF PLATE RH (for RH Side)
Tech Tips
Use the same procedure as for the LH side.
w/o Rear No. 2 Seat: Click here
w/ Rear No. 2 Seat: Click here
-
REMOVE COWL SIDE TRIM BOARD RH (for RH Side)
-
REMOVE NO. 1 INSTRUMENT PANEL UNDER COVER SUB-ASSEMBLY (for RH Side)
-
REMOVE ACCELERATION SENSOR
-
for LH Side:
-
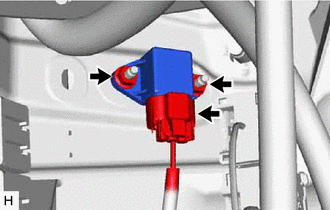
Disconnect the connector from the acceleration sensor.
-
Remove the 2 nuts and acceleration sensor.
Note
-
Avoid any impact to the acceleration sensor.
-
Do not drop the acceleration sensor. If it is dropped, replace it with a new one.
-
-
-
for RH Side:
-
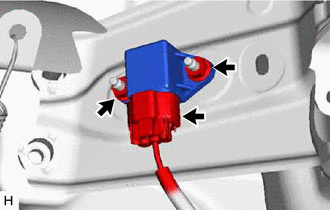
Disconnect the connector from the acceleration sensor.
-
Remove the 2 nuts and acceleration sensor.
Note
-
Avoid any impact to the acceleration sensor.
-
Do not drop the acceleration sensor. If it is dropped, replace it with a new one.
-
-
-