LUGGAGE COMPARTMENT DOOR OUTSIDE GARNISH REASSEMBLY
PROCEDURE
-
INSTALL LUGGAGE COMPARTMENT DOOR OUTSIDE GARNISH PROTECTOR (for Side)
Tech Tips
Use the same procedure for the RH side and LH side.
-
Clean the luggage compartment door outside garnish protector (for side) installation surface.
-
Using a piece of cloth, rub the double-sided tape off the luggage compartment door outside garnish sub-assembly.
Note
-
Installing the luggage compartment door outside garnish protector (for side) with some double-sided tape remaining may cause poor adhesion.
-
Removing with a screwdriver, etc. may cause damage or poor adhesion.
-
-
Using a non-residue solvent, clean the attachment surface.
-
-
Remove the peeling paper from a new luggage compartment door outside garnish protector (for side).
Tech Tips
After removing the peeling paper, keep the exposed adhesive free from foreign matter.
-
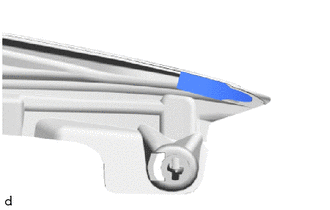
Install the luggage compartment door outside garnish protector (for side) as shown in the illustration.
Note
Press the luggage compartment door outside garnish protector (for side) firmly to install it.
-
-
INSTALL LUGGAGE COMPARTMENT DOOR OUTSIDE GARNISH PROTECTOR (for Center)
-
Clean the luggage compartment door outside garnish protector (for center) installation surface.
-
Using a piece of cloth, rub the double-sided tape off the luggage compartment door outside garnish sub-assembly.
Note
-
Installing the luggage compartment door outside garnish protector (for center) with some double-sided tape remaining may cause poor adhesion.
-
Removing with a screwdriver, etc. may cause damage or poor adhesion.
-
-
Using a non-residue solvent, clean the attachment surface.
-
-
Remove the peeling paper from a new luggage compartment door outside garnish protector (for center).
Tech Tips
After removing the peeling paper, keep the exposed adhesive free from foreign matter.
-
Install the luggage compartment door outside garnish protector (for center) as shown in the illustration.
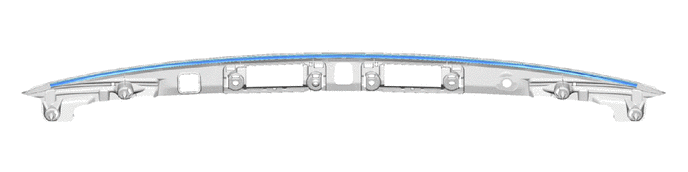
Note
Press the luggage compartment door outside garnish protector (for center) firmly to install it.
-