WINDSHIELD OUTSIDE MOULDING INSTALLATION
CAUTION / NOTICE / HINT
Tech Tips
-
Use the same procedure for the RH side and LH side.
-
The following procedure is for the LH side.
PROCEDURE
-
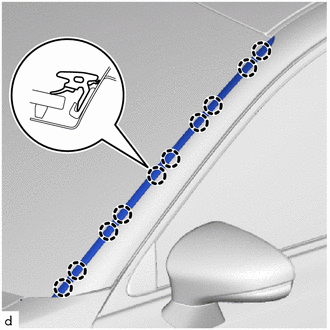
INSTALL NO. 1 WINDSHIELD OUTSIDE MOULDING CLIP
-

Using an air riveter or a hand riveter with a nose piece, install 5 new rivets.
Tech Tips
If the mandrel of the rivet does not come off on the first operation of the rivet gun, slide the rivet gun forward on the mandrel and operate it again.
Note
-
Do not pry the rivet with the riveter, as this will cause damage to the riveter and mandrel.
-
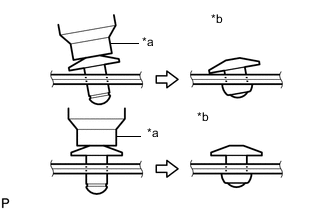
*a Riveter *b Incorrect Confirm that the rivets are seated properly against the vehicle body.
-
Do not tilt the riveter when installing the rivet to the vehicle body.
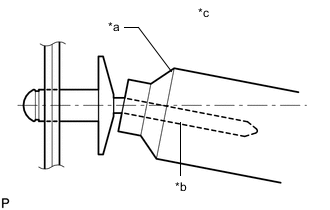
*a Riveter *b Mandrel *c Incorrect -
-


Install in this Direction Engage the claw to install a new No. 1 windshield outside moulding clip as shown in the illustration.
Tech Tips
Use the same procedure for each No. 1 windshield outside moulding clips.
-
-
INSTALL WINDSHIELD OUTSIDE MOULDING
-
Engage the claws to install the windshield outside moulding.
-
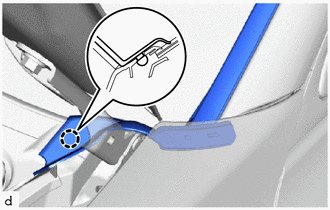
Engage the claw.
-