REAR BUMPER REASSEMBLY
PROCEDURE
-
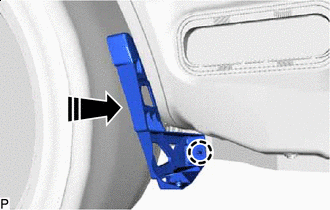
INSTALL NO. 2 REAR BUMPER SIDE SUPPORT LH
-

Install in this Direction Engage the claws to install the No. 2 rear bumper side support LH as shown in the illustration.
Tech Tips
Do not forcibly engage the clip.
-
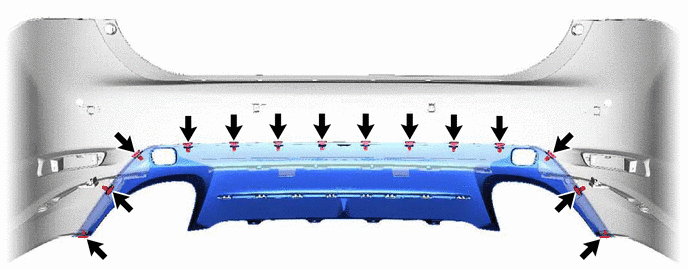
Install the 4 clips as shown in the illustration.
-
-
INSTALL NO. 2 REAR BUMPER SIDE SUPPORT RH
Tech Tips
Use the same procedure as for the LH side.
-
INSTALL REAR BUMPER UPPER RETAINER LH
-
Install in this Direction Engage the claws to install the rear bumper upper retainer LH as shown in the illustration.
-
-
INSTALL REAR BUMPER UPPER RETAINER RH
Tech Tips
Use the same procedure as for the LH side.
-
INSTALL REAR COMBINATION LIGHT ASSEMBLY LH
-
INSTALL REAR COMBINATION LIGHT ASSEMBLY RH
Tech Tips
Use the same procedure as for the LH side.
-
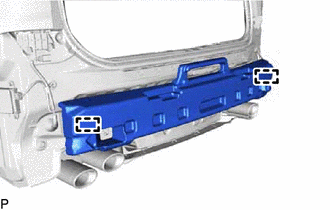
INSTALL REAR BUMPER REINFORCEMENT SUB-ASSEMBLY
-
Install the rear bumper reinforcement sub-assembly with the 8 bolts.
- Torque:
- 20 N*m { 204 kgf*cm, 15 ft.*lbf }
-
-
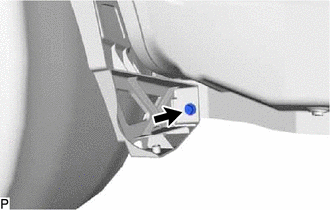
INSTALL REAR BUMPER LOWER SIDE RETAINER RH
-
Install in this Direction Engage the claw to install the rear bumper lower side retainer RH as shown in the illustration.
-
Install the clip.
-
-
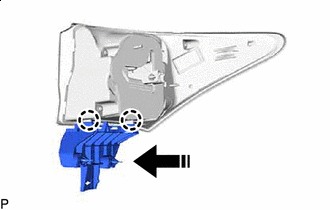
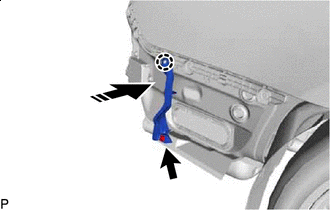
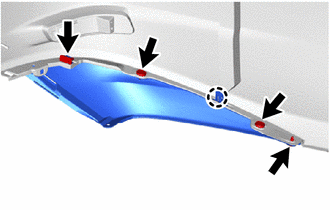
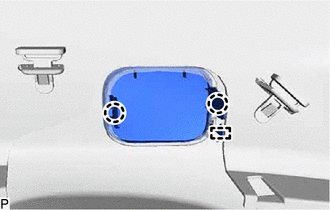
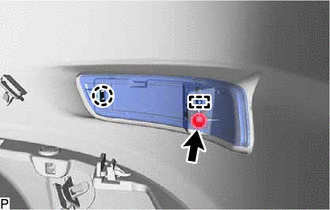
INSTALL REAR BUMPER SIDE SUPPORT LH
-
Install in this Direction Engage the claw to install the rear bumper side support LH as shown in the illustration.
-
Install the screw.
-

Install the screw.
-
Install the rear fender liner LH with the grommet.
-
-
INSTALL REAR BUMPER SIDE SUPPORT RH
Tech Tips
Use the same procedure as for the LH side.
-
INSTALL REAR BUMPER ENERGY ABSORBER
-
Engage the guides to install the rear bumper energy absorber.
-
-
INSTALL NO. 2 MOULDING TAPE
Tech Tips
-
Use the same procedure for the RH side and LH side.
-
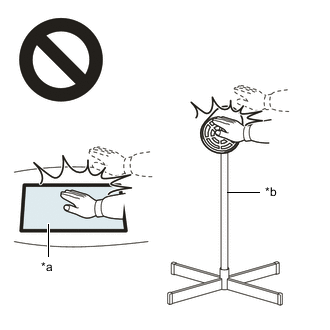
When installing the No. 2 moulding tape, heat the rear bumper cover using an infrared light.
Heating Temperature Item Temperature Rear Bumper Cover 20 to 30°C (68 to 86°F)
3 to 5 minutes
No. 2 Moulding Tape 20 to 30°C (68 to 86°F)
3 to 5 minutes
Note
Do not heat the rear bumper cover and No. 2 moulding tape excessively.
-
Clean the rear bumper cover surface.
-
Using a piece of cloth, rub the double-sided tape off the rear bumper cover.
Note
-
Installing the No. 2 moulding tape while old double-sided tape remains can cause adhesion failure.
-
Using a screwdriver or similar tool to remove the old tape can damage the surface and cause adhesion failure.
-
-
Using a non-residue solvent, clean the attachment surface.
-
-
Using an infrared light, heat the rear bumper cover and No. 2 moulding tape.
-
Remove the peeling paper from a new No. 2 moulding tape.
Tech Tips
After removing the peeling paper, keep the exposed adhesive free from foreign matter.
-
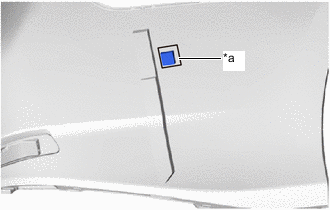
*a Mark-off Line Align the No. 2 moulding tape with the mark-off line of the rear bumper cover.
Note
Press the No. 2 moulding tape firmly to install it.
-
-
INSTALL REAR BUMPER PROTECTOR LH
Tech Tips
When installing the rear bumper protector LH, heat the rear bumper cover using an infrared light.
Heating Temperature Item Temperature Rear Bumper Cover 20 to 30°C (68 to 86°F)
3 to 5 minutes
Rear Bumper Protector LH 20 to 30°C (68 to 86°F)
3 to 5 minutes
Note
Do not heat the rear bumper cover and rear bumper protector LH excessively.
-
Clean the rear bumper cover surface.
-
Using a piece of cloth, rub the double-sided tape off the rear bumper cover.
Note
-
Installing the rear bumper protector LH while old double-sided tape remains can cause adhesion failure.
-
Using a screwdriver or similar tool to remove the old tape can damage the surface and cause adhesion failure.
-
-
Using a non-residue solvent, clean the attachment surface.
-
-
Using an infrared light, heat the rear bumper cover and rear bumper protector LH.
-
Remove the peeling paper from a new rear bumper protector LH.
Tech Tips
After removing the peeling paper, keep the exposed adhesive free from foreign matter.
-
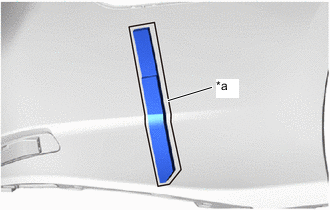
*a Mark-off Line Align the rear bumper protector LH with the mark-off line of the rear bumper cover.
Note
Press the rear bumper protector LH firmly to install it.
-
-
INSTALL REAR BUMPER PAD LH
Tech Tips
When installing the rear bumper pad LH, heat the rear bumper cover using an infrared light.
Heating Temperature Item Temperature Rear Bumper Cover 20 to 30°C (68 to 86°F)
3 to 5 minutes
Rear Bumper Pad LH 20 to 30°C (68 to 86°F)
3 to 5 minutes
Note
Do not heat the rear bumper cover and rear bumper pad LH excessively.
-
Clean the rear bumper cover surface.
-
Using a piece of cloth, rub the double-sided tape off the rear bumper cover.
Note
-
Installing the rear bumper pad LH while old double-sided tape remains can cause adhesion failure.
-
Using a screwdriver or similar tool to remove the old tape can damage the surface and cause adhesion failure.
-
-
Using a non-residue solvent, clean the attachment surface.
-
-
Using an infrared light, heat the rear bumper cover and rear bumper pads LH.
-
Remove the peeling paper from a new rear bumper pad LH.
Tech Tips
After removing the peeling paper, keep the exposed adhesive free from foreign matter.
-
*a Mark-off Line Align the rear bumper pad LH with the mark-off line of the rear bumper cover.
Note
Press the rear bumper pad LH firmly to install it.
-
-
INSTALL REAR SPOILER COVER LH
-
Engage the claw to install the rear spoiler cover LH.
-
Install the outside moulding retainer and 3 clips.
-
-
INSTALL REAR SPOILER COVER RH
Tech Tips
Use the same procedure as for the LH side.
-
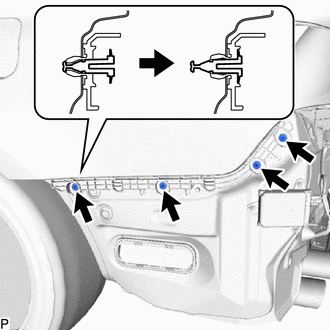
INSTALL REAR BUMPER CENTER EXTENSION SUB-ASSEMBLY
-
Install the rear bumper center extension sub-assembly.
-
Install the 12 outside moulding retainers and 2 clips.
-
-
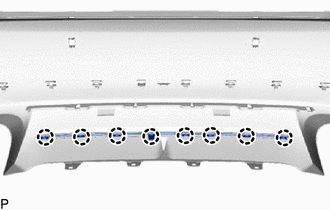
INSTALL NO. 1 ULTRASONIC SENSOR RETAINER (w/ LEXUS Parking Assist-sensor System)
-
INSTALL NO. 1 ULTRASONIC SENSOR (w/ LEXUS Parking Assist-sensor System)
-
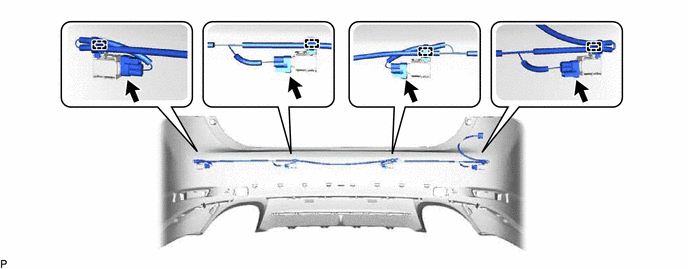
INSTALL NO. 3 LUGGAGE ROOM WIRE (w/ LEXUS Parking Assist-sensor System)
-
Engage the clamps to install the No. 3 luggage room wire.
-
Connect the 4 connectors.
-
-
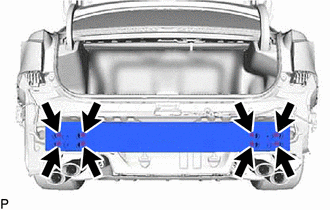
INSTALL REAR BUMPER BAR
-
Engage the claws to install the rear bumper bar.
-
-
INSTALL REAR BUMPER PIECE LH
-
Engage the hook and claws to install the rear bumper piece LH.
-
-
INSTALL REAR BUMPER PIECE RH
Tech Tips
Use the same procedure as for the LH side.
-
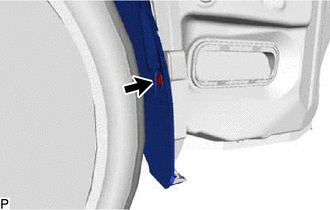
INSTALL REFLEX REFLECTOR ASSEMBLY LH
-
Engage the guide and claw to install the reflex reflector assembly LH.
-
Install the screw.
-
-
INSTALL REFLEX REFLECTOR ASSEMBLY RH
Tech Tips
Use the same procedure as for the LH side.
-
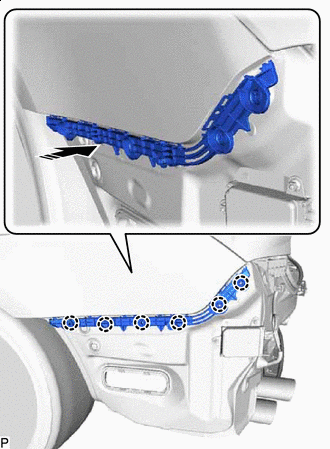
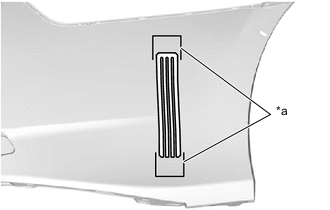
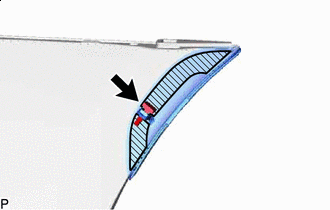
INSTALL REAR BUMPER SIDE MOULDING SUB-ASSEMBLY LH
Tech Tips
When installing the rear bumper side moulding sub-assembly LH, heat the rear bumper cover and rear bumper side moulding sub-assembly LH using an infrared light.
Heating Temperature Item Temperature Rear Bumper Cover 20 to 30°C (68 to 86°F)
3 to 5 minutes
Rear Bumper Side Moulding Sub-assembly LH 20 to 30°C (68 to 86°F)
3 to 5 minutes
CAUTION:
-
Do not touch the infrared light or the heated portions of the components.
-
Touching the infrared light could result in burns.
-
Touching the heated portions of the components and remaining in contact for a long time could result in burns.
*a Heated Portions *b Infrared Light Note
Do not heat the rear bumper cover and rear bumper side moulding sub-assembly LH excessively.
-
Clean the rear bumper cover surface.
-
Using a piece of cloth, rub the double-sided tape off the rear bumper cover.
Note
-
Installing the rear bumper side moulding sub-assembly LH while old double-sided tape remains can cause adhesion failure.
-
Using a screwdriver or similar tool to remove the old tape can damage the surface and cause adhesion failure.
-
-
Using a non-residue solvent, clean the attachment surface.
-
-
Remove the peeling paper on a new rear bumper side moulding sub-assembly LH.
Tech Tips
After removing the peeling paper, keep the exposed adhesive free from foreign matter.
-

Double-sided Tape Install the rear bumper side moulding sub-assembly LH.
Note
Press the rear bumper side moulding sub-assembly LH firmly to install it.
-
Install the clip.
-
-
INSTALL REAR BUMPER SIDE MOULDING SUB-ASSEMBLY RH
Tech Tips
Use the same procedure as for the LH side.