FRONT BUMPER DISASSEMBLY
CAUTION / NOTICE / HINT
The necessary procedures (adjustment, calibration, initialization, or registration) that must be performed after parts are removed, installed, or replaced during the front bumper assembly removal/installation are shown below.
| Replacement Part or Procedure | Necessary Procedure | Effect/Inoperative when not Performed | Link |
|---|---|---|---|
| Removal/installation of front bumper assembly | Adjust millimeter wave radar sensor assembly |
|
PROCEDURE
-
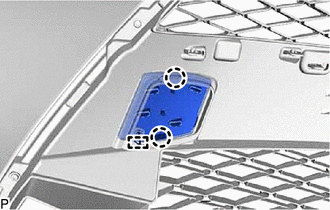
REMOVE RADIATOR GRILLE PROTECTOR
-
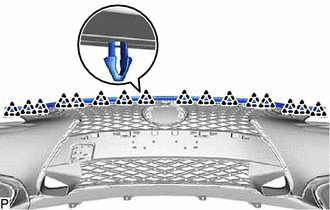
Disengage the clips to remove the radiator grille protector.
-
-
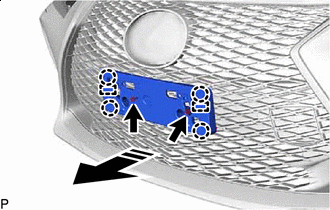
REMOVE FRONT BUMPER EXTENSION MOUNTING BRACKET (for Type A)
-

Remove in this Direction Remove the 2 screws.
-
Disengage the claw and guide to remove the radiator grille (or front panel) emblem.
-
-
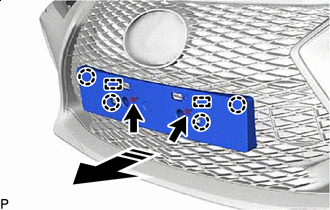
REMOVE FRONT BUMPER EXTENSION MOUNTING BRACKET (for Type B)
-
Remove in this Direction Remove the 2 screws.
-
Disengage the claws and guides to remove the front bumper extension mounting bracket as shown in the illustration.
-
-
REMOVE MILLIMETER WAVE RADAR SENSOR ASSEMBLY (w/ Dynamic Radar Cruise Control System)
-
REMOVE RADIATOR GRILLE (OR FRONT PANEL) EMBLEM
-
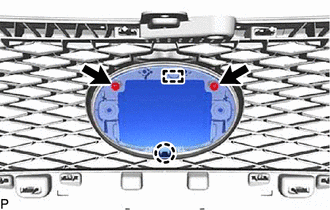
Remove the 2 screws.
-
Disengage the claw and guide to remove the radiator grille garnish.
-
-
REMOVE FRONT BUMPER HOLE COVER LH
-
Disengage the claws and hook to remove the front bumper hole cover LH.
-
-
REMOVE HEADLIGHT WASHER COVER LH
-
REMOVE HEADLIGHT WASHER COVER RH
Tech Tips
Use the same procedure as for the LH side.
-
REMOVE HEADLIGHT WASHER ACTUATOR SUB-ASSEMBLY LH
-
REMOVE HEADLIGHT WASHER ACTUATOR SUB-ASSEMBLY RH
Tech Tips
Use the same procedure as for the LH side.
-
REMOVE NO. 2 WASHER BRACKET
-
REMOVE WASHER BRACKET
Tech Tips
Use the same procedure as for the No. 2 washer bracket.
-
REMOVE WASHER HOSE
-
Disengage the clamps to remove the washer hose.
-
-
REMOVE NO. 1 ULTRASONIC SENSOR (w/ LEXUS Parking Assist-sensor System)
-
REMOVE NO. 1 ULTRASONIC SENSOR RETAINER (w/ LEXUS Parking Assist-sensor System)
-
REMOVE RADIATOR GRILLE SUB-ASSEMBLY
-
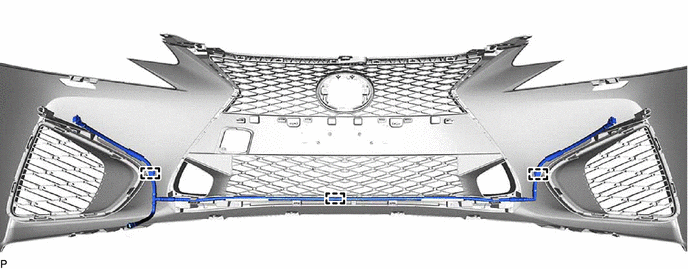
REMOVE NO. 4 ENGINE ROOM WIRE (w/ LEXUS Parking Assist-sensor System)
-
Disengage the clamps to remove the No. 4 engine room wire.
Tech Tips
Use the same procedure for the RH side and LH side.
-
-
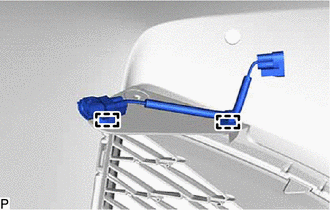
REMOVE WIRING HARNESS CONNECTOR (w/o LEXUS Parking Assist-sensor System)
-
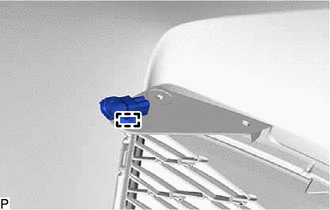
Disengage the clamp to remove the wiring harness connector.
Tech Tips
Use the same procedure for the RH side and LH side.
-
-
REMOVE NO. 2 RADIATOR GRILLE GARNISH
-
Disengage the claws to remove the No. 2 radiator grille garnish.
-
-
REMOVE NO. 1 RADIATOR GRILLE GARNISH
Tech Tips
Use the same procedure as for the No. 2 radiator grille garnish.
-
REMOVE FRONT FENDER LINER RETAINER
-
Disengage the claw to remove the front fender liner retainer.
Tech Tips
Use the same procedure for the RH side and LH side.
-
-
REMOVE NO. 1 MOULDING TAPE
-
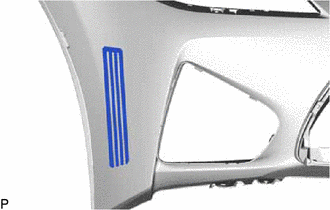
Peel off the double-sided tape to remove the No. 1 moulding tape.
Tech Tips
Use the same procedure for the RH side and LH side.
-
-
REMOVE FRONT BUMPER ENERGY ABSORBER
-
Disengage the guides to remove the front bumper energy absorber.
-
-
REMOVE FRONT ENERGY ABSORBER MOUNTING REINFORCEMENT LH
-
Disengage the claws and guides to remove the front energy absorber mounting reinforcement LH.
-
-
REMOVE FRONT ENERGY ABSORBER MOUNTING REINFORCEMENT RH
Tech Tips
Use the same procedure as for the LH side.
-
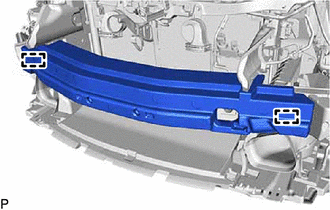
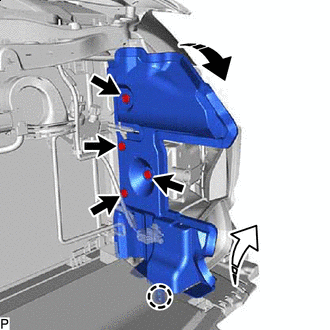
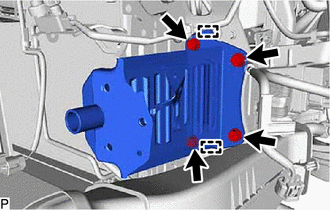
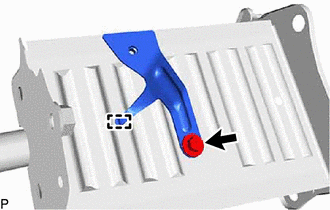
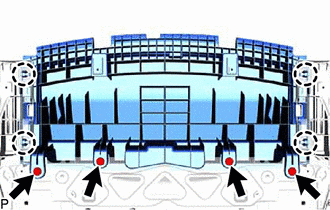
REMOVE FRONT BUMPER REINFORCEMENT
-

*a guide *b Clamp Disengage the clamp to separate the thermistor assembly.
-
Remove the 6 bolts.
-
Disengage the guides to remove the front bumper reinforcement.
-
-
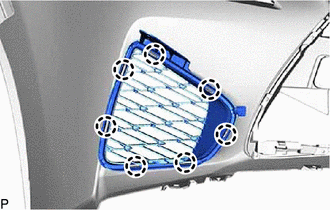
REMOVE RADIATOR GRILLE SIDE AIR GUIDE LH
Remove in this Direction (1) 
Remove in this Direction (2)
-
Remove the 4 clips.
-
Disengage the claw to remove the radiator grille side air guide LH as shown in the illustration.
-
-
REMOVE RADIATOR GRILLE SIDE AIR GUIDE RH
Tech Tips
Use the same procedure as for the LH side.
-
SEPARATE FRONT FENDER LINER LH
-

Remove the 5 screws.
-
Remove the 2 bolts.
-
Remove the 4 clips.
-
Fold back the front fender liner LH to the extent that the windshield washer jar assembly can be separated.
-
-
REMOVE INLET ENGINE OIL COOLER AIR DUCT
-
SEPARATE WINDSHIELD WASHER JAR ASSEMBLY
-
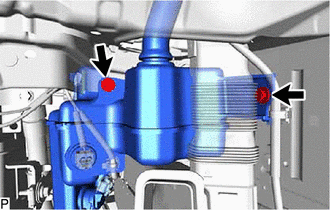
Remove the 2 bolts.
-
Remove the bolt.
-
Disengage the guide to separate the windshield washer jar assembly.
-
-
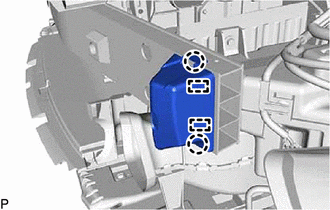
REMOVE FRONT BUMPER MOUNTING REINFORCE SUB-ASSEMBLY LH
-
Remove the 4 bolts.
-
Disengage the guides to remove the front bumper mounting reinforcement sub-assembly LH.
-
-
REMOVE FRONT BUMPER MOUNTING REINFORCE SUB-ASSEMBLY RH
Tech Tips
Use the same procedure as for the LH side.
-
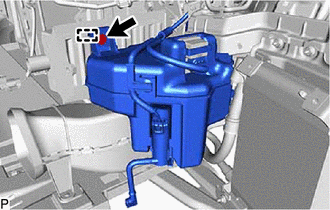
REMOVE WINDSHIELD WASHER BRACKET ASSEMBLY
-
Remove the bolt.
-
Disengage the guide to remove the windshield washer bracket assembly.
-
-
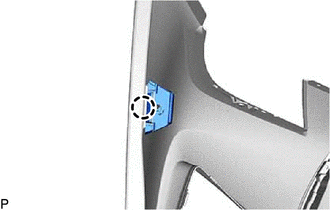
REMOVE FRONT BUMPER SIDE RETAINER LH
-
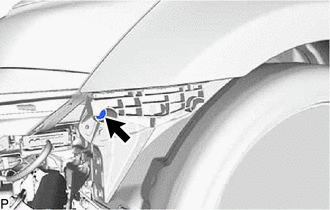
Remove the bolt.
-
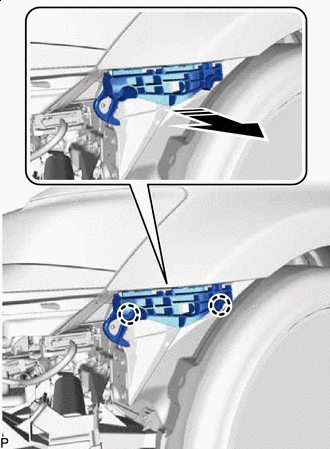
Remove in this Direction Disengage the claws to remove the front bumper side retainer LH as shown in the illustration.
-
-
REMOVE FRONT BUMPER SIDE RETAINER RH
Tech Tips
Use the same procedure as for the LH side.
-
REMOVE NO. 1 ENGINE UNDER COVER ASSEMBLY
-
REMOVE RADIATOR SUPPORT OPENING COVER
-
Remove the 4 clips.
-
Disengage the claws to remove the radiator support opening cover.
-