FRONT BUMPER REMOVAL
CAUTION / NOTICE / HINT
The necessary procedures (adjustment, calibration, initialization, or registration) that must be performed after parts are removed, installed, or replaced during the front bumper assembly removal/installation are shown below.
| Replacement Part or Procedure | Necessary Procedure | Effect/Inoperative when not Performed | Link |
|---|---|---|---|
| Removal/installation of front bumper assembly | Adjust millimeter wave radar sensor assembly |
|
PROCEDURE
-
REMOVE COOL AIR INTAKE DUCT SEAL
-
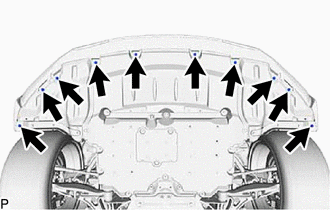
Remove the 9 clips.
-
Disengage the guides to remove the cool air intake duct seal.
-
-
REMOVE FRONT BUMPER ASSEMBLY
-
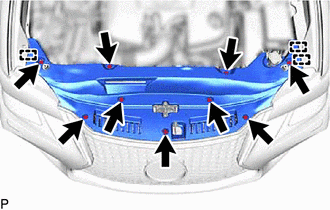
Remove the 10 screws.
-
w/ Dynamic Radar Cruise Control System:
-
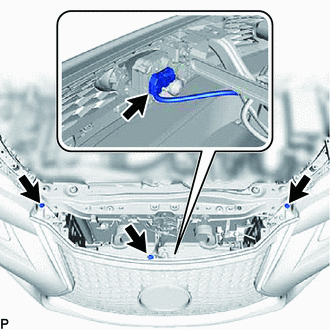
Remove the bolt.
-
Remove the 2 clips.
-
Disconnect the connector.
-
-
w/o Dynamic Radar Cruise Control System:
-
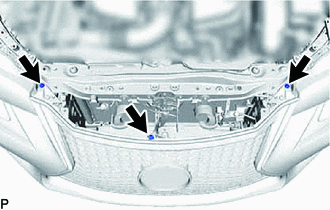
Remove the bolt.
-
Remove the 2 clips.
-
-
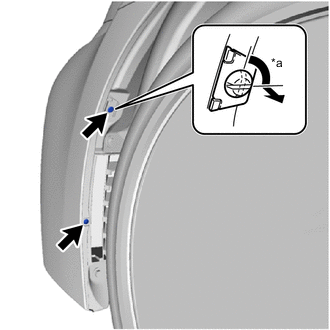
*a 90° Using a screwdriver, turn the pin 90 degrees to remove the pin hold clip.
Tech Tips
-
When removing the pin hold clip, turn the steering wheel right and left to ensure enuogh space to work.
-
Use the same procedure for the RH side and LH side.
-
-
Remove the clip.
Tech Tips
Use the same procedure for the RH side and LH side.
-
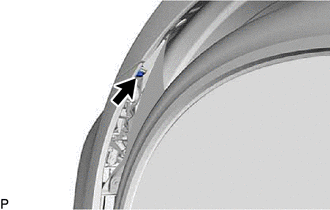
Fold back a part of edge of the front fender liner as shown in the illustration, and remove the screw.
Tech Tips
Use the same procedure for the RH side and LH side.
-
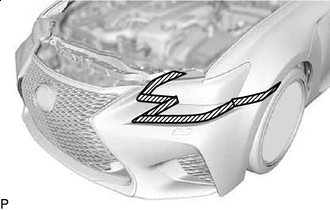

Protective Tape Apply protective tape around the front bumper assembly.
Tech Tips
Use the same procedure for the RH side and LH side.
-
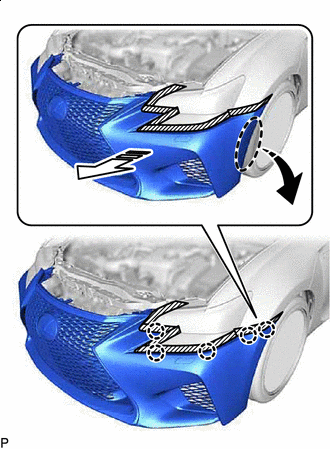

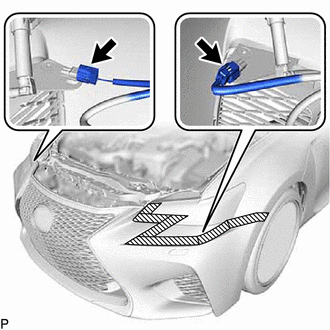
Place Hands Here 
Remove in this Direction (1) 
Remove in this Direction (2) Disengage the claws as shown in the illustration.
Tech Tips
Use the same procedure for the RH side and LH side.
-
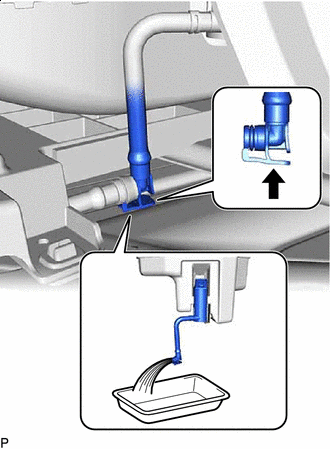

Push Disconnect the washer hose and drain the washer fluid.
Tech Tips
Use a container to collect the washer fluid
-
w/ LEXUS Parking Assist-sensor System:
-
Disconnect the 2 connectors.
-
-
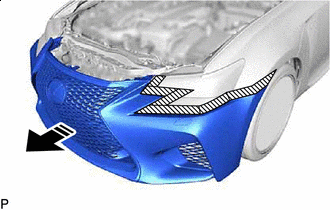
Remove in this Direction Remove the front bumper assembly as shown in the illustration.
-