ROOF HEADLINING INSTALLATION
PROCEDURE
-
INSTALL ROOF HEADLINING
-
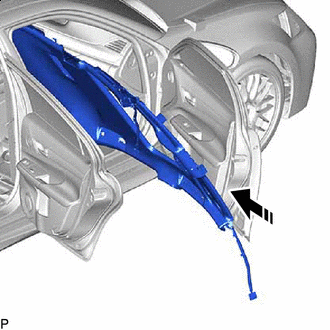

Install in this Direction Insert the roof headlining into the cabin from the front passenger side door.
Note
-
Check that the corners of the roof headlining assembly are not folded, twisted or otherwise deformed and that none of the mounted parts have fallen off.
-
Make sure that the roof headlining assembly does not get caught on anything as it may become bent or damaged.
-
Do not damage the roof headlining assembly or vehicle interior.
-
-
w/ Sliding Roof:
-
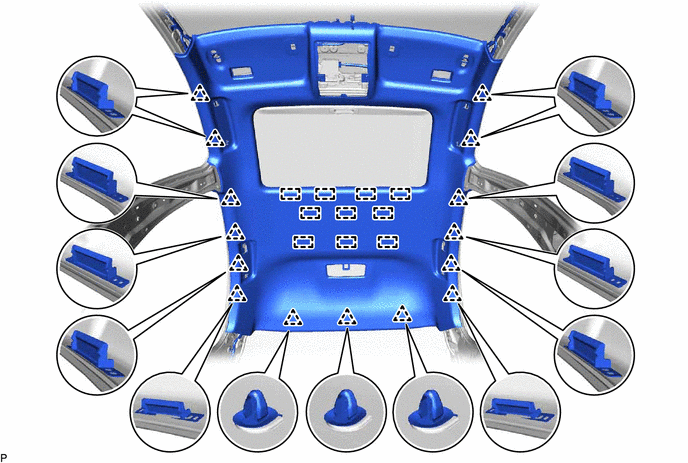
Engage the hook-and-loop fasteners and clips to install the roof headlining.
-
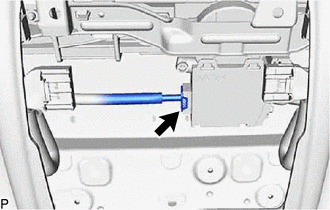
Connect the connector.
-
-
w/o Sliding Roof:
-
Engage the hook-and-loop fasteners and clips to install the roof headlining.

-
-
w/ Camera Heater:
-
Connect the connector.
-
-
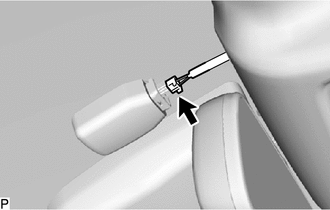
w/ Rain Sensor:
-
Connect the connector.
-
-
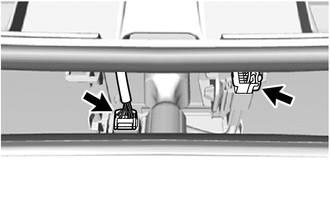
w/ Lane Departure Alert System:
-
Connect the 2 connectors.
-
-
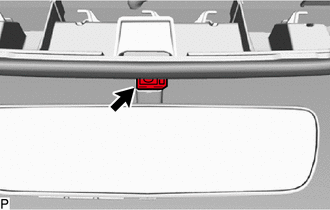
w/o Lane Departure Alert System:
-
Connect the connector.
-
-
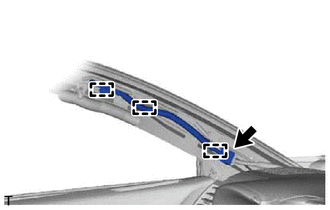
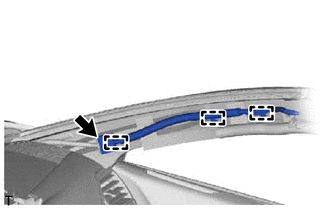
for Front Pillar LH Side:
-
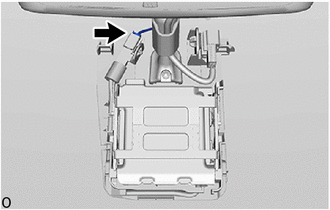
Engage the clamps.
-
Connect the connector.
-
-
for Front Pillar RH Side:
-
Engage the clamps.
-
Connect the connector.
-
-
-
INSTALL ASSIST GRIP COVER
Tech Tips
Use the same procedure, install every assist grip cover.
-
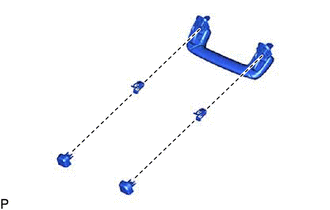
Install the 2 assist grip covers and 2 clips to the assist grip.
-
-
INSTALL REAR ASSIST GRIP ASSEMBLY LH
-
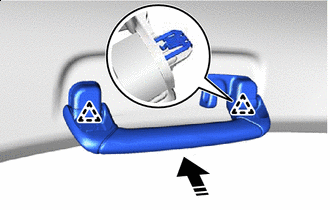
Install in this Direction Engage the clips to install the rear assist grip assembly LH.
-
-
INSTALL REAR ASSIST GRIP ASSEMBLY RH
Tech Tips
Use the same procedure as for the LH side.
-
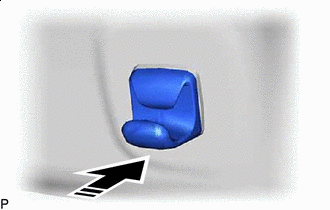
INSTALL ASSIST GRIP SUB-ASSEMBLY
Tech Tips
Use the same procedures as for the opposite side.
-
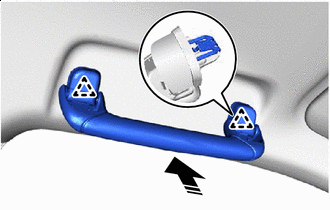
Install in this Direction Engage the clips to install the assist grip sub-assembly.
-
-
INSTALL VISOR HOLDER
-
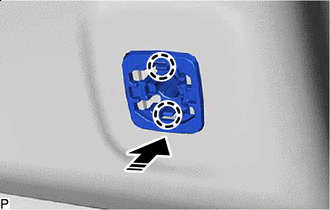
Install in this Direction Engage the claws to install the base as shown in the illustration.
-
Install in this Direction Install the holder as shown in the illustration.
-
-
INSTALL VISOR ASSEMBLY LH
-
INSTALL VISOR ASSEMBLY RH
Tech Tips
Use the same procedure as for the LH side.
-
INSTALL VISOR BRACKET COVER
-
INSTALL VANITY LIGHT ASSEMBLY
-
INSTALL MAP LIGHT ASSEMBLY
-
INSTALL SPOT LIGHT ASSEMBLY
-
INSTALL RAIN SENSOR COVER (w/ Rain Sensor)
-
INSTALL INNER REAR VIEW MIRROR STAY HOLDER COVER (w/o Lane Departure Alert System)
-
INSTALL NO. 1 FORWARD RECOGNITION COVER (w/ Lane Departure Alert System)
-
INSTALL NO. 2 FORWARD RECOGNITION COVER (w/ Lane Departure Alert System)
-
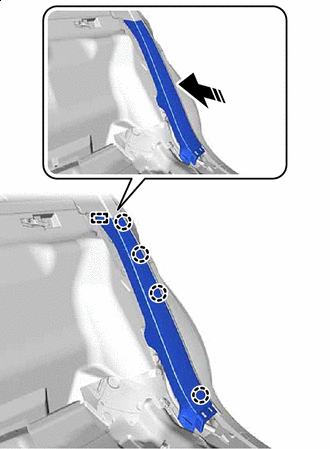
INSTALL ROOF SIDE INNER GARNISH LH (w/ Rear Sunshade)
-
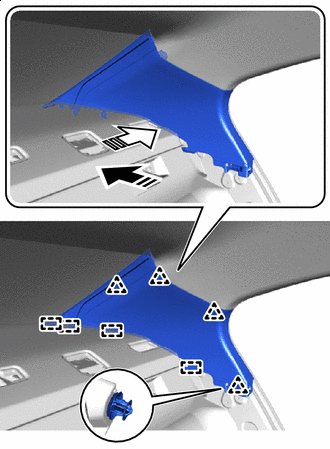
Install in this Direction (1) 
Install in this Direction (2) Engage the guides and clips to install the roof side inner garnish LH as shown in the illustration.
-
-
INSTALL ROOF SIDE INNER GARNISH RH (w/ Rear Sunshade)
Tech Tips
Use the same procedure as for the LH side.
-
INSTALL ROOF SIDE INNER GARNISH LH (w/o Rear Sunshade)
-
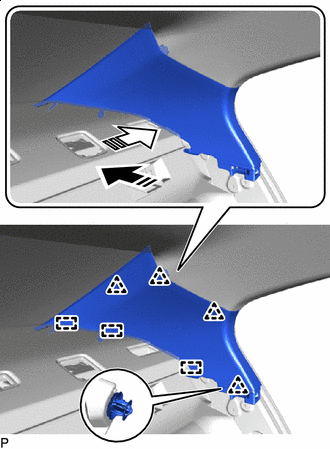
Install in this Direction (1) Install in this Direction (2) Engage the guides and clips to install the roof side inner garnish LH as shown in the illustration.
-
-
INSTALL ROOF SIDE INNER GARNISH RH (w/o Rear Sunshade)
Tech Tips
Use the same procedure as for the LH side.
-
INSTALL REAR SEAT SIDE GARNISH LH
-
Install in this Direction Engage the guide and claws to install the rear seat side garnish LH as shown in the illustration.
-
-
INSTALL REAR SEAT SIDE GARNISH RH
Tech Tips
Use the same procedure as for the LH side.
-
INSTALL CENTER PILLAR UPPER GARNISH LH
-
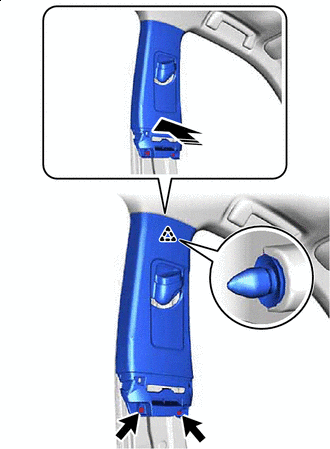
Install in this Direction Engage the clip to install the center pillar upper garnish LH as shown in the illustration.
-
Install the 2 screws.
-
-
INSTALL CENTER PILLAR UPPER GARNISH RH
Tech Tips
Use the same procedure as for the LH side.
-
INSTALL CENTER PILLAR LOWER GARNISH LH
-
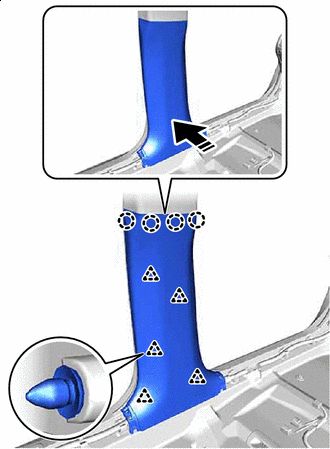
Install in this Direction Engage the clips and claws to install the center pillar lower garnish LH as shown in the illustration.
-
-
INSTALL CENTER PILLAR LOWER GARNISH RH
Tech Tips
Use the same procedure as for the LH side.
-
INSTALL REAR DOOR SCUFF PLATE LH
-
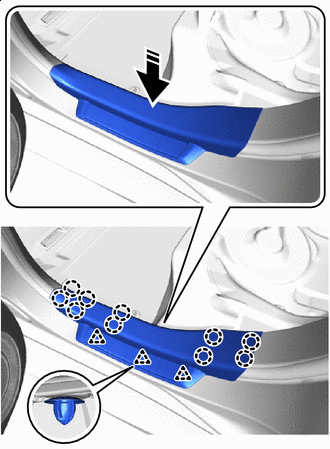
Install in this Direction Engage the clips and claws to install the rear door scuff plate LH as shown in the illustration.
-
-
INSTALL REAR DOOR SCUFF PLATE RH
Tech Tips
Use the same procedure as for the LH side.
-
INSTALL INSTRUMENT PANEL SAFETY PAD
-
INSTALL REAR SEAT ASSEMBLY
-
INSTALL FRONT SEAT ASSEMBLY LH
-
INSTALL FRONT SEAT ASSEMBLY RH
Tech Tips
Use the same procedure as for the LH side.