ROOF HEADLINING REASSEMBLY
PROCEDURE
-
INSTALL NO. 1 ROOF WIRE (w/ Sliding Roof)
-
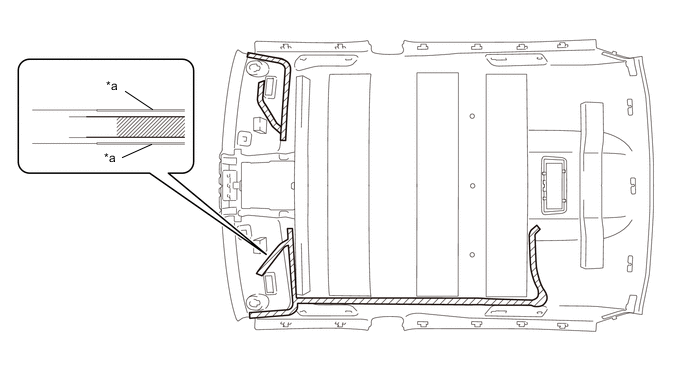
Apply double-sided tape as shown in the illustration.
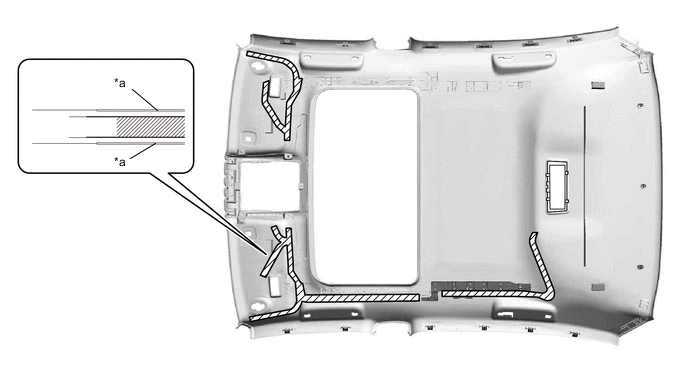
*a Marking - - 
Double-sided Tape - - Note
Apply the supports with uniform loading, and without protruding from the roof headlining markings.
-
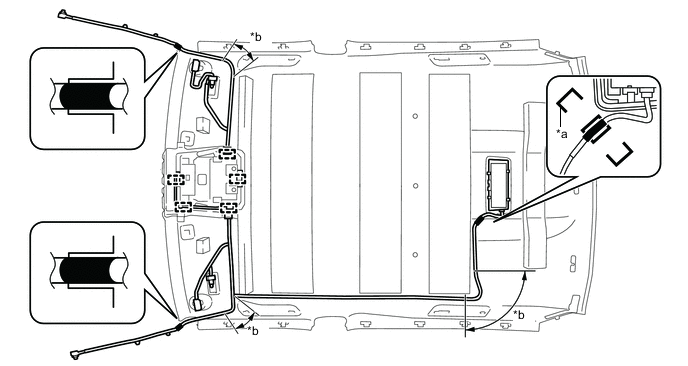
Line up the No. 1 roof wire positioning tape and the roof headlining markings.
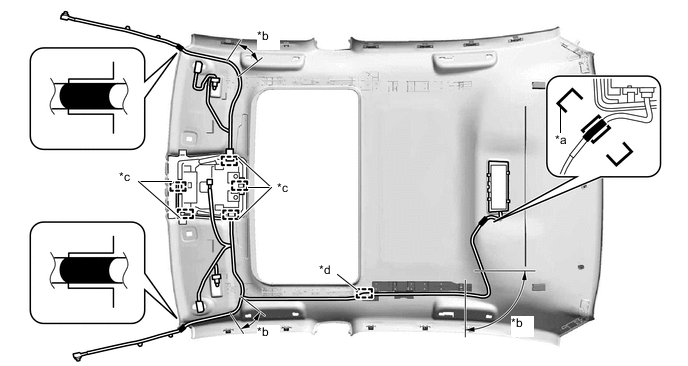
*a Marking *b Adjustment Area *c Clamp *d Guide 
Positioning Tape - - -
Engage the clamps.
-
Engage the guide.
-
Install the No. 1 roof wire on the double-sided tape.
Tech Tips
Use the Adjustment Area to accommodate any excess length of the No. 1 roof wire.
-
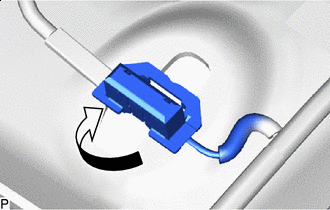

Turn Turn the visor connectors approximately 90° clockwise to connect the visor connector as shown in the illustration.
Tech Tips
Use the same procedures for the opposite side.
-
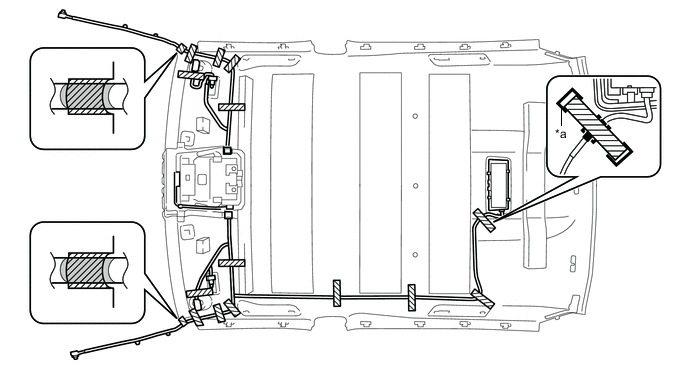
Align 15 new adhesive tapes with the markings of the roof headlining and install them.
*a Marking - - Adhesive Tape - - -

*A w/ Rain Sensor for LHD *B w/ Rain Sensor for RHD *C w/ LKA/LDA system *D w/o LKA/LDA system *E w/ Camera Heater Engage the guides to connect the wire harness connectors.
-
-
INSTALL NO. 1 ROOF WIRE (w/o Sliding Roof)
-
Apply double-sided tape as shown in the illustration.
*a Marking - - Double-sided Tape - - Note
Apply the supports with uniform loading, and without protruding from the roof headlining markings.
-
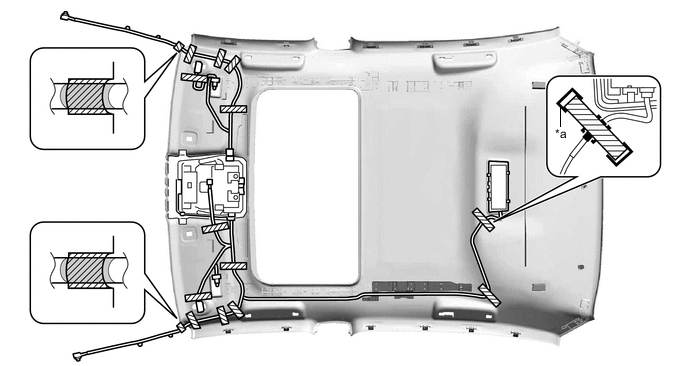
Line up the No. 1 roof wire positioning tape and the roof headlining markings.
*a Marking *b Adjustment Area Positioning Tape - - -
Engage the clamps.
-
Install the No. 1 roof wire on the double-sided tape.
Tech Tips
Use the Adjustment Area to accommodate any excess length of the No. 1 roof wire.
-
Turn Turn the visor connectors approximately 90° clockwise to connect the visor connector as shown in the illustration.
Tech Tips
Use the same procedures for the opposite side.
-
Align 16 new adhesive tapes with the markings of the roof headlining and install them.
*a Marking - - Adhesive Tape - - -
*A w/ Rain Sensor for LHD *B w/ Rain Sensor for RHD *C w/ LKA/LDA system *D w/o LKA/LDA system *E w/ Camera Heater Engage the guides to connect the wire harness connectors.
-