FRONT CONSOLE BOX REASSEMBLY
CAUTION / NOTICE / HINT
Tech Tips
-
Use the same procedure as for the LHD and RHD vehicles.
-
The procedure listed below is for the LHD vehicles.
PROCEDURE
-
INSTALL NO. 2 BOX SIDE PANEL
-
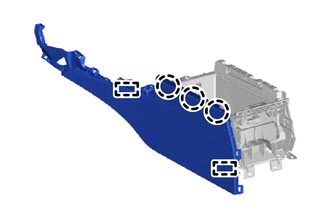
Engage the guides and claws to install the No. 2 box side panel.
-
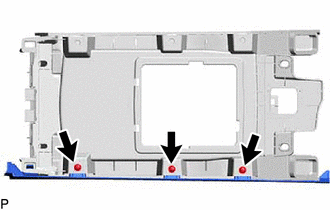
Install the 3 screws.
-
-
INSTALL NO. 1 BOX SIDE PANEL
-
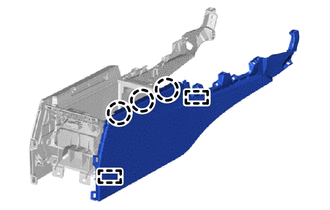
Engage the guides and claws to install the No. 1 box side panel.
-
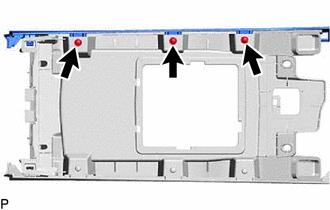
Install the 3 screws.
-
-
INSTALL LOWER CONSOLE COVER
-
Engage the guides and claws to install the lower console cover.
-
-
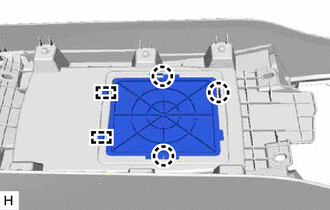
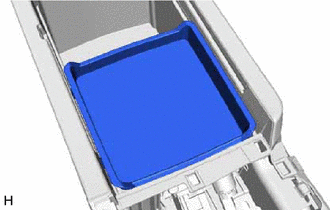
INSTALL NO. 2 CONSOLE BOX CUSHION
-
Install a new No. 2 console box cushion.
Tech Tips
Peel off the backing paper from the double-sided tape before installing the No. 2 console box cushion.
-
-
INSTALL CONSOLE BOX WIRE
-
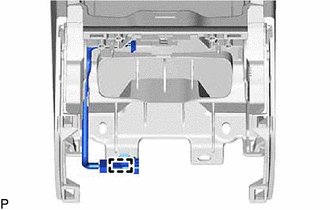
Engage the clamp to install the console box wire.
-
-
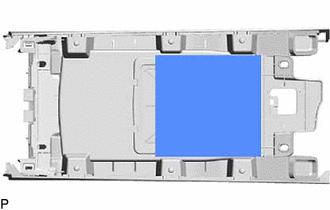
INSTALL CONSOLE BOX ILLUMINATION LIGHT ASSEMBLY
-
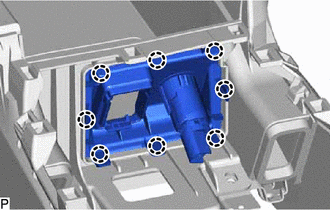
INSTALL NO. 5 CONSOLE BOX MOUNTING BRACKET
-
Engage the claws to install the No. 5 console box mounting bracket.
-
-
INSTALL LOWER CONSOLE BOX POCKET
-
Engage the claws to install the lower console box pocket.
-
-
INSTALL UPPER CONSOLE BOX SUB-ASSEMBLY
-
Install the upper console box sub-assembly.
-
-
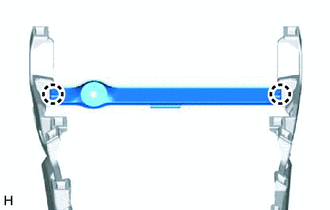
INSTALL CONSOLE COMPARTMENT DOOR HINGE SUB-ASSEMBLY
-
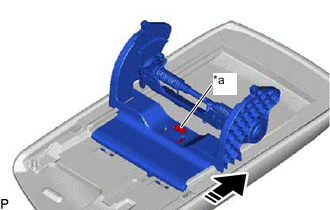
*a Release Knob 
Install in this Direction Push the release knob and install the console compartment door hinge sub-assembly as shown in the illustration.
-
-
INSTALL CONSOLE COMPARTMENT DOOR LOCK SUB-ASSEMBLY
-
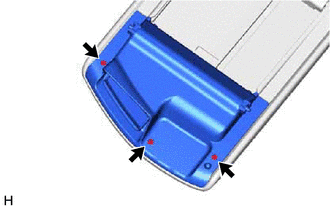
Install the console compartment door lock sub-assembly with the 3 screws.
-
-
INSTALL REAR CONSOLE ARMREST ASSEMBLY
-
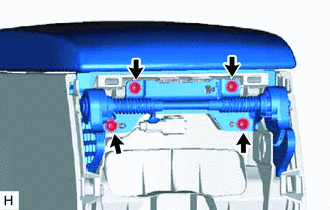
Install the rear console armrest assembly with the 4 screws.
-