ULTRASONIC SENSOR(for Rear Side) REMOVAL
PROCEDURE
-
REMOVE REAR BUMPER ASSEMBLY
-
REMOVE NO. 1 ULTRASONIC SENSOR
Tech Tips
Use the same procedure for each No. 1 ultrasonic sensor.
-
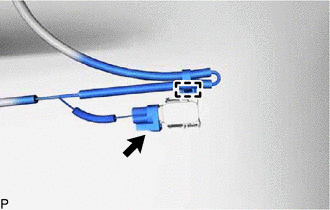
Disconnect the connector.
-
Disengage the clamp to separate the wire harness.
-
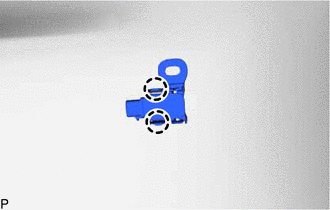
Disengage the claws to remove the No. 1 ultrasonic sensor.
-
-
REMOVE NO. 1 ULTRASONIC SENSOR RETAINER
Tech Tips
-
Perform this step only when necessary.
-
Use the same procedure for each No. 1 ultrasonic sensor retainer.
-
Using an infrared light, warm the No. 1 ultrasonic sensor retainer.
CAUTION:
-
Do not touch the infrared light or the heated portions of the components.
-
Touching the infrared light could result in burns.
-
Touching the heated portions of the components and remaining in contact for a long time could result in burns.
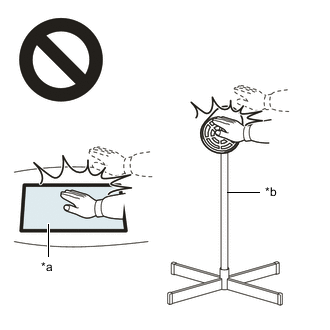
*a Heated Portions *b Infrared Light Heating Temperature Item Temperature No. 1 Ultrasonic Sensor Retainer 40 to 60°C (104 to 140°F)
3 to 5 minutes
-
-
Remove the No. 1 ultrasonic sensor retainer.
-
-
REMOVE NO. 1 ULTRASONIC SENSOR CLIP
Tech Tips
Use the same procedure for each No. 1 ultrasonic sensor clip.
-

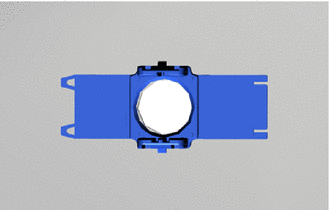
*a Protective Tape Using a screwdriver with its tip wrapped in protective tape, disengage the claw to remove the No. 1 ultrasonic sensor clip from the No. 1 ultrasonic sensor as shown in the illustration.
-