ULTRASONIC SENSOR(for Front Side) INSTALLATION
PROCEDURE
-
INSTALL NO. 1 ULTRASONIC SENSOR RETAINER
Tech Tips
-
Perform this step only when necessary.
-
If a No. 1 ultrasonic sensor retainer has been removed, replace it with a new one. Install the No. 1 ultrasonic sensor with a new No. 1 ultrasonic sensor retainer as a set.
-
Use the same procedure for both sides.
-
Clean the front bumper cover surface.
-
Remove any remaining double-sided tape from the front bumper cover.
-
Wipe off any tape adhesive residue with cleaner.
-
-
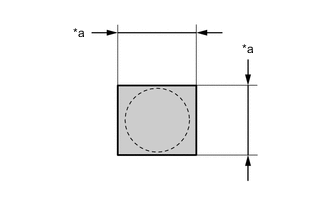
*a 16 mm (0.63 in.) Cover the sensor installation hole with a 16 mm (0.63 in.) square piece of tape.
-

Primer Using a brush or felt, apply primer or equivalent to the No. 1 ultrasonic sensor retainer installation area.
Note
-
Use a clean brush or felt.
-
If primer adheres, it may leave faint stains, so when using a liquid type primer, protect the painted areas with tape.
-
Do not touch the front bumper cover until the primer has dried.
Suggested Drying Time 10 minutes or more (at 23°C (73°F)) -
-
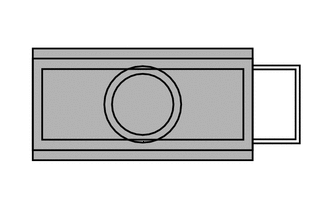
Peel off the release paper from the 2 No. 1 ultrasonic sensor retainers.
-
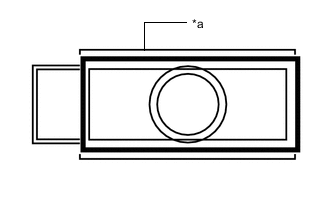
*a Protrusion of the mark Align the No. 1 ultrasonic sensor retainer with the mark on the front bumper cover and install it as shown in the illustration.
Note
The double-sided tape of a No. 1 ultrasonic sensor retainer will deteriorate if it is detached. Make sure to replace the No. 1 ultrasonic sensor retainer with a new one when reattachment is necessary.
Tech Tips
-
Align the connector with the protrusion of the mark and connect it.
-
Press the No. 1 ultrasonic sensor retainer with a force of 30 N (3.0 kgf) for 3 seconds and install the No. 1 ultrasonic sensor retainer firmly so that there is no clearance between the No. 1 ultrasonic sensor retainer and front bumper cover.
-
-
-
INSTALL NO. 1 ULTRASONIC SENSOR
Tech Tips
Use the same procedure for both sides.
-
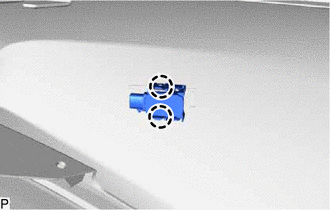
Engage the claws to install the No. 1 ultrasonic sensor.
-
Connect the connector.
-
-
INSTALL FRONT BUMPER ASSEMBLY
-
ADJUST MILLIMETER WAVE RADAR SENSOR