NOISE FILTER REMOVAL
CAUTION / NOTICE / HINT
The necessary procedures (adjustment, calibration, initialization, or registration) that must be performed after parts are removed, installed, or replaced during the radio setting condenser removal/installation are shown below.
| Replacement Part or Procedure | Necessary Procedure | Effect/Inoperative when not Performed | Link |
|---|---|---|---|
| Disconnect cable from negative battery terminal | Correct the steering angle neutral point | Parking assist monitor system | |
| Lane departure alert system (w/ Steering Control) | |||
| Pre-crash safety system | |||
| Adaptive high beam system | |||
| Reset power trunk lid | Power trunk lid system |
PROCEDURE
-
REMOVE PACKAGE TRAY TRIM PANEL ASSEMBLY
-
REMOVE RADIO SETTING CONDENSER (for High Mounted Stop Light)
Note
If it is necessary to replace the radio setting condenser or terminal cover, both parts must be replaced as they are supplied as a set.
-

Using a screwdriver, disengage the claws to remove the terminal cover with wire harness from the condenser.
-
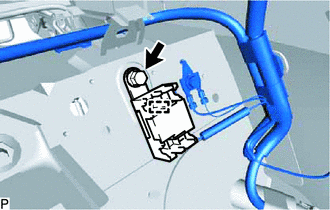
Remove the bolt.
-
Disengage the clamp from the vehicle body to remove the condenser.
-
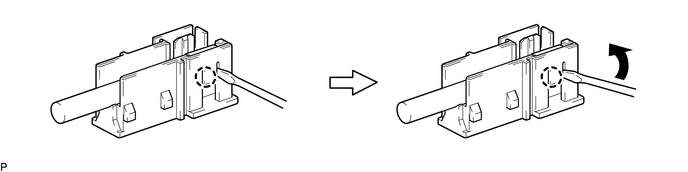
Using a screwdriver, bend back and break off the claw as shown in the illustration.
-
Remove the 2 terminal covers from the wire harness.
-
-
REMOVE RADIO SETTING CONDENSER (for Window Defogger)
Note
When the terminal cover is removed, the radio setting condenser must be replaced because the terminal cover and condenser are supplied as a set.
-
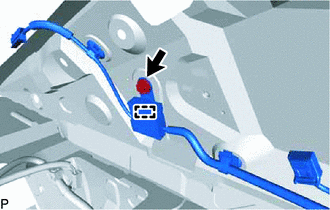
Remove the bolt.
-
Disengage the clamp to disconnect the radio setting condenser with wire harness from the vehicle body.
-
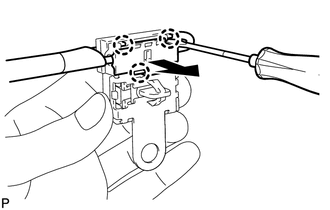
Using a screwdriver, disengage the claws to remove the terminal cover with wire harness from the condenser.
-
Using a screwdriver, bend back and break off the claw as shown in the illustration.

-
Remove the terminal cover from the wire harness.
-