CAMSHAFT TIMING CONTROL MOTOR REMOVAL
CAUTION / NOTICE / HINT
The necessary procedures (adjustment, calibration, initialization, or registration) that must be performed after parts are removed, installed, or replaced during the camshaft timing control motor with EDU assembly LH and camshaft timing control motor with EDU assembly RH removal/installation are shown below.
| Replacement Part or Procedure | Necessary Procedure | Effect/Inoperative when not Performed | Link |
|---|---|---|---|
| Replacement of camshaft timing control motor with EDU assembly | Inspection After Repair |
|
|
| Disconnect cable from negative battery terminal | Memorize steering angle neutral point | Parking assist monitor system | |
| Lane departure alert system (w/ Steering Control) | |||
| Pre-crash safety system | |||
| Adaptive high beam system | |||
| Reset power trunk lid | Power trunk lid system |
PROCEDURE
-
PRECAUTION
Note
After turning the engine switch off, waiting time may be required before disconnecting the cable from the negative (-) battery terminal. Therefore, make sure to read the disconnecting the cable from the negative (-) battery terminal notices before proceeding with work.
-
DISCONNECT CABLE FROM NEGATIVE BATTERY TERMINAL
Note
When disconnecting the cable, some systems need to be initialized after the cable is reconnected.
Tech Tips
Disconnect the cable from the negative (-) battery terminal so that the maximum retard angle of the camshaft timing control motor with EDU assembly will be learned when the cable is reconnected.
-
REMOVE V-BANK COVER SUB-ASSEMBLY
-
REMOVE CAMSHAFT TIMING CONTROL MOTOR WITH EDU ASSEMBLY LH
-
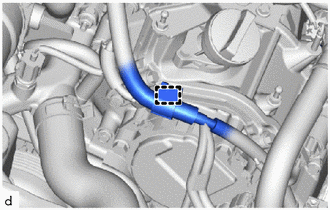
Disengage the clamp.
-

Disengage the clamp.
-
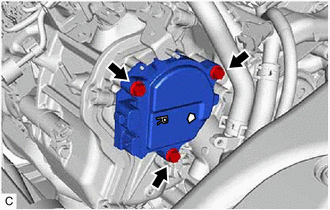
Disconnect the 2 camshaft timing control motor with EDU assembly LH connectors.
-
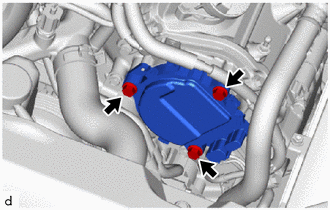
Remove the 3 bolts and camshaft timing control motor with EDU assembly LH from the timing chain cover assembly.
Note
If the camshaft timing control motor with EDU assembly LH has been struck or dropped, replace it.
-
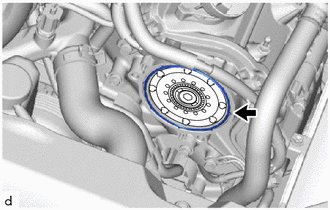
Remove the O-ring from the timing chain cover assembly.
-
-
DISCONNECT VENTILATION HOSE
-
REMOVE AIR CLEANER CAP WITH AIR CLEANER HOSE
-
REMOVE COOL AIR INTAKE DUCT SEAL
-
REMOVE ENGINE ROOM ECU COVER
-
DISENGAGE ENGINE WIRE
-
Disengage the wire harness from the engine room ECU box.
-
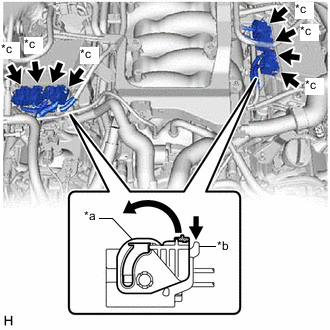
*a Lock Lever *b Lock *c Connector (with Lock) Push the lock and move the lock lever of each connector (with lock) as shown in the illustration and disconnect the 6 connectors (with lock) from the 2 injector drivers.
-
Disconnect the 2 injector driver connectors.
-
for LHD:
-
Remove the 6 bolts and 4 nuts.
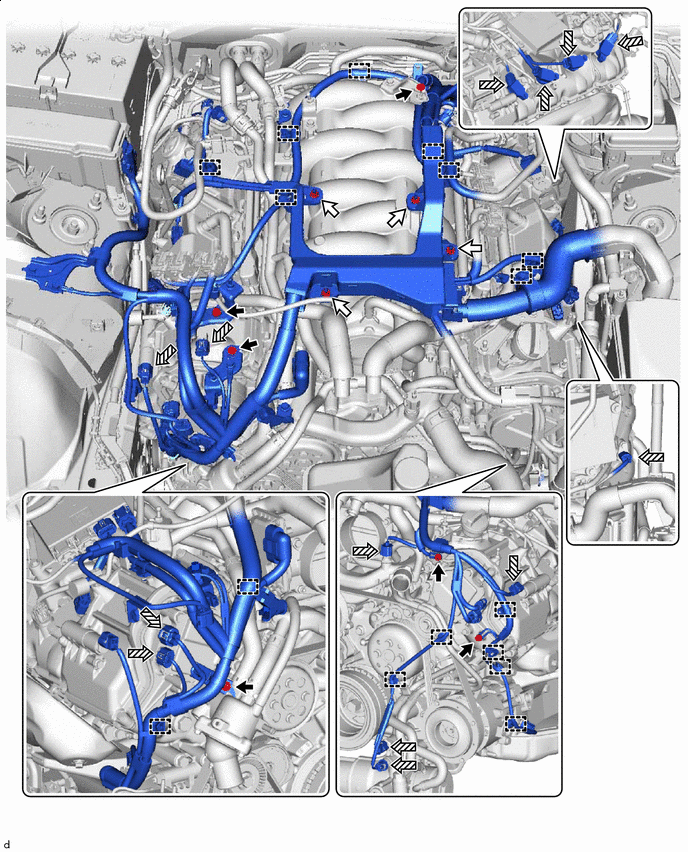

Bolt 
Nut 
Connector - - -
Disengage the 16 clamps.
-
Disconnect the 13 connectors.
-
-
for RHD:
-
Remove the 6 bolts and 4 nuts.
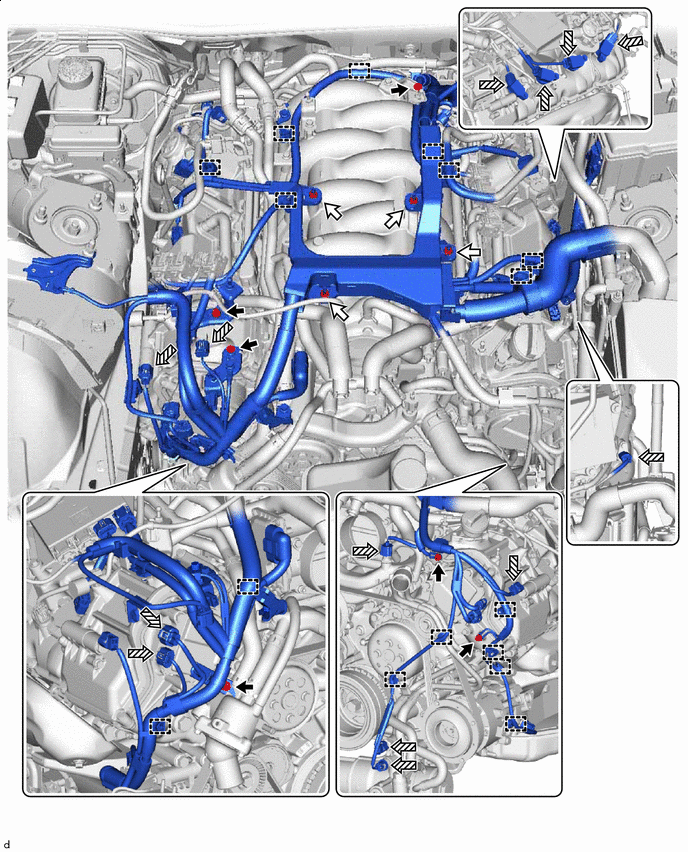
Bolt Nut Connector - - -
Disengage the 16 clamps.
-
Disconnect the 13 connectors.
-
-
-
REMOVE CAMSHAFT TIMING CONTROL MOTOR WITH EDU ASSEMBLY RH
-
Remove the 3 bolts and camshaft timing control motor with EDU assembly RH from the timing chain cover assembly.
Note
If the camshaft timing control motor with EDU assembly RH has been struck or dropped, replace it.
-
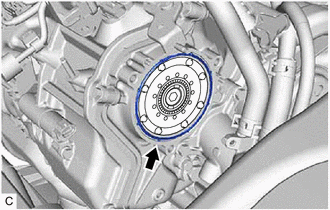
Remove the O-ring from the timing chain cover assembly.
-