ECM REMOVAL
CAUTION / NOTICE / HINT
The necessary procedures (adjustment, calibration, initialization, or registration) that must be performed after parts are removed, installed, or replaced during the ECM removal/installation are shown below.
| Replacement Part or Procedure | Necessary Procedure | Effect/Inoperative when not Performed | Link |
|---|---|---|---|
| Replacement of ECM | Vehicle Identification Number (VIN) registration | MIL comes on / MIL does not come on |
|
| ECU communication ID registration (Immobiliser system) | Engine start function | See the Service Bulletin for the registration method. | |
| Disconnect cable from negative battery terminal | Memorize steering angle neutral point | Parking assist monitor system | |
| Lane departure alert system (w/ Steering Control) | |||
| Pre-crash safety system | |||
| Adaptive high beam system | |||
| Reset power trunk lid | Power trunk lid system |
Note
-
Perform the Vehicle Identification Number (VIN) registration when replacing the ECM.
-
w/ Canister Pump Module:
-
w/o Canister Pump Module:
-
Before replacing the ECM, refer to Service Bulletin.
PROCEDURE
-
PRECAUTION
Note
After turning the engine switch off, waiting time may be required before disconnecting the cable from the negative (-) battery terminal. Therefore, make sure to read the disconnecting the cable from the negative (-) battery terminal notices before proceeding with work.
-
DISCONNECT CABLE FROM NEGATIVE BATTERY TERMINAL
Note
When disconnecting the cable, some systems need to be initialized after the cable is reconnected.
-
REMOVE COOL AIR INTAKE DUCT SEAL
-
REMOVE ENGINE ROOM ECU COVER
Note
-
Remove all water on and around the engine room ECU cover.
-
With the engine room ECU cover open, be careful to avoid contamination by foreign matter or by water from rain, etc.
-
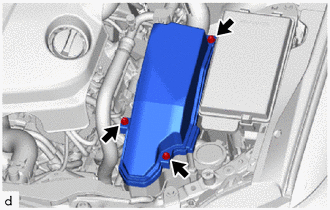
Remove the 3 bolts and engine room ECU cover.
-
-
DISCONNECT WIRE HARNESS
-
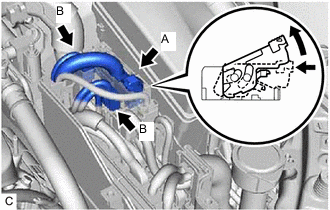
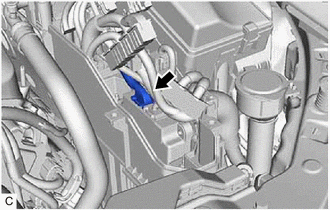
Push the lock and move the lock lever of connector (with lock) as shown in the illustration and disconnect the connector (A) (with lock) from the engine room ECU box.
-
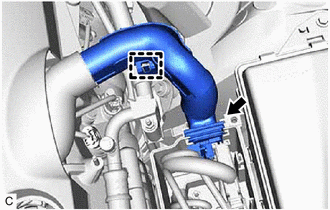
Disconnect the 2 engine wire harness connectors (B).
-
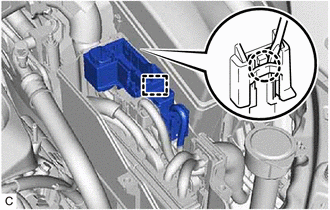
Using a screwdriver, disengage the claw.
-
Disengage the guide and disconnect the connector holder from the engine room ECU box.
-
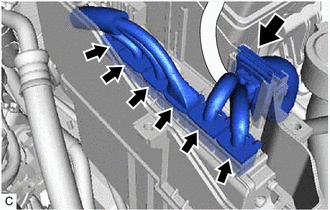
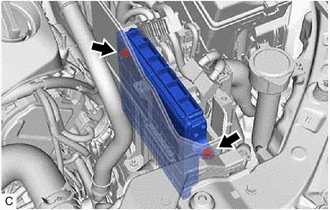
Disconnect the 6 ECM connectors and separate the wire harness from the engine room ECU box.
Note
After disconnecting the ECM connectors, make sure that dirt, water or other foreign matter does not contact the connecting parts of the ECM connectors.
-
Disconnect the transmission control ECU assembly connector.
-
Disengage the wire harness clamp.
-
Separate the wire harness from the engine room ECU box.
-
-
REMOVE ECM
-
Remove the 2 nuts and ECM from the engine room ECU box.
Note
-
If the ECM has been struck or dropped, replace it.
-
Pull the engine control ECU straight out to remove it.
-
-
-
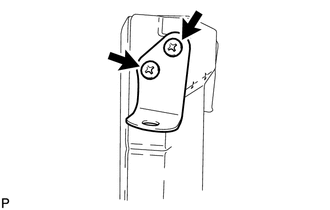
REMOVE NO. 1 ECM BRACKET
-
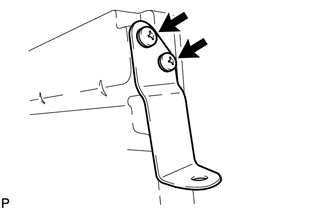
Remove the 2 screws and No. 1 ECM bracket from the ECM.
-
-
REMOVE NO. 2 ECM BRACKET
-
Remove the 2 screws and No. 2 ECM bracket from the ECM.
-