REAR DISC BRAKE PAD REMOVAL

CAUTION / NOTICE / HINT
Note
After replacing the rear disc brake pads, the brake pedal may feel soft due to clearance between the rear disc brake pads and rear disc. Depress the brake pedal several times until the brake pedal feels firm.
Tech Tips
-
Use the same procedure for the RH side and LH side.
-
The following procedure is for the LH side.
PROCEDURE
-
REMOVE REAR WHEEL
-
REMOVE REAR DISC BRAKE PAD
Note
Be sure to inspect the rear disc when replacing the rear disc brake pads with new ones.
-
Disconnect the pad wear indicator wire connector from the rear speed sensor.
-
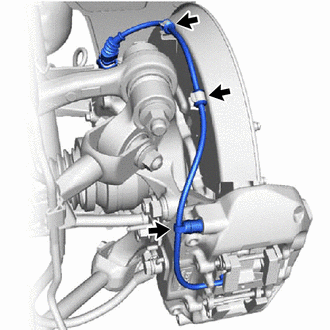
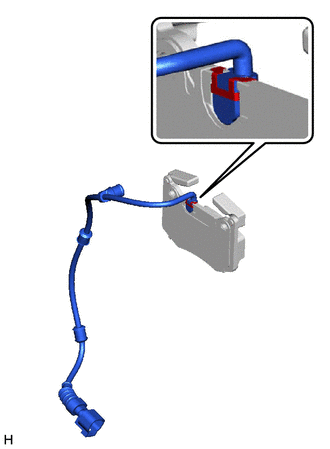
Disconnect the pad wear indicator wire assembly from the 2 clamps of rear disc brake dust cover.
-
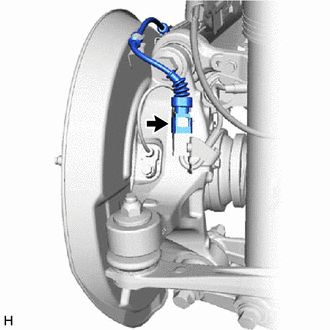
Disconnect the bleeder plug cap portion of the pad wear indicator wire assembly from the rear disc brake bleeder plug.
-
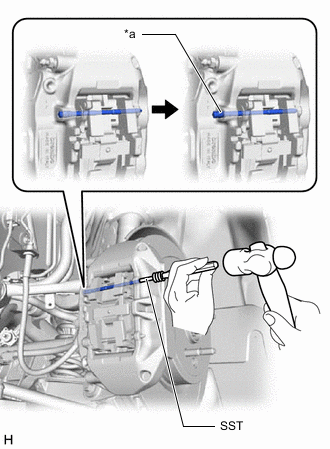
*a Ring Using SST and a hammer, disengage the ring of the pad guide pin (upper) and push out the pad guide pin (upper) from the rear disc brake cylinder assembly.
- SST
- 09719-77040
Note
-
Keep SST aligned with the pad guide pin (upper).
-
Do not damage the surface of the rear disc brake cylinder assembly.
-
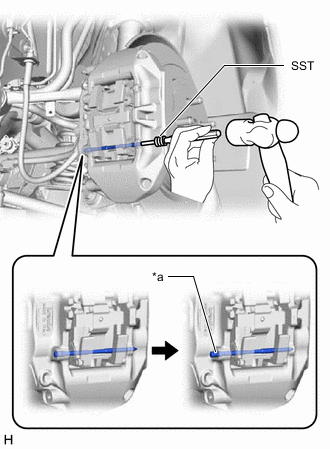
*a Ring Using SST and a hammer, disengage the ring of the pad guide pin (lower) and push out the pad guide pin (lower) from the rear disc brake cylinder assembly.
- SST
- 09719-77040
Note
-
Keep SST aligned with the pad guide pin (lower).
-
Do not damage the surface of the rear disc brake cylinder assembly.
-
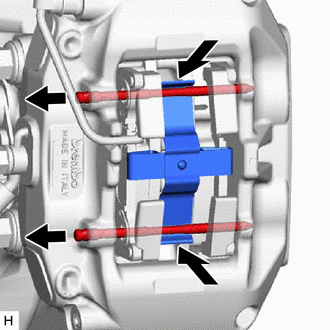
While pushing the rear disc brake anti-rattle spring as shown in the illustration, remove the 2 pad guide pins.
-
Remove the rear disc brake anti-rattle spring.
-
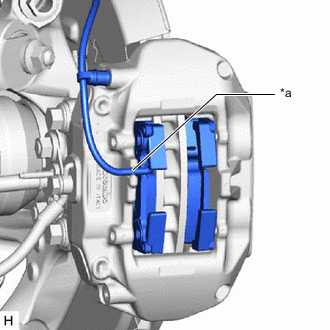
*a Notch Disengage the pad wear indicator wire assembly from the notch of the rear disc brake cylinder assembly.
-
Remove the 2 rear disc brake pads from the rear disc brake cylinder assembly.
-
Remove the pad wear indicator retainer and pad wear indicator wire assembly from the rear disc brake pad.
-
-
REMOVE REAR DISC BRAKE ANTI-SQUEAL SHIM KIT
-
Remove the rear disc brake anti-squeal shim from each rear disc brake pad.
-