PARK / NEUTRAL POSITION SWITCH REMOVAL
PROCEDURE
-
REMOVE PROPELLER SHAFT WITH CENTER BEARING ASSEMBLY
-
DISCONNECT FLOOR SHIFT GEAR SHIFTING ROD SUB-ASSEMBLY
-
Move the shift lever to N.
-
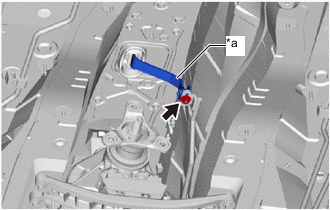
*a Lever Remove the nut from the lever of the transmission floor shift assembly.
-
Disconnect the floor shift gear shifting rod sub-assembly from the lever of the transmission floor shift assembly.
-
-
SUPPORT AUTOMATIC TRANSMISSION ASSEMBLY
-
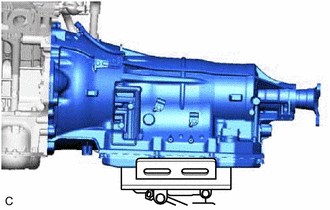
Support the automatic transmission assembly with a transmission jack.
Note
-
In order to protect the automatic transmission oil pan sub-assembly, place attachments on the transmission jack.
-
Make sure that the attachments and automatic transmission oil pan sub-assembly are centered on the transmission jack.
-
To prevent the automatic transmission oil pan sub-assembly from being deformed, do not place any attachments under the automatic transmission oil pan sub-assembly.
-
-
-
INSTALL ENGINE UNDER COVER AIR GUIDE BRACKET
-

Remove the 2 bolts and engine under cover air guide bracket from the vehicle body.
-
-
DISCONNECT REAR ENGINE MOUNTING MEMBER
-
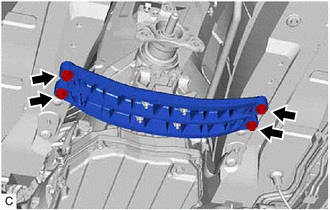
Remove the 4 bolts and disconnect the rear engine mounting member from the vehicle body.
-
-
REMOVE PARK/NEUTRAL POSITION SWITCH
-
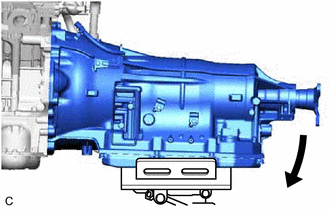
Tilt down the automatic transmission assembly.
Note
Make sure that the vehicle body do not contact the engine assembly when tilting the automatic transmission assembly.
-
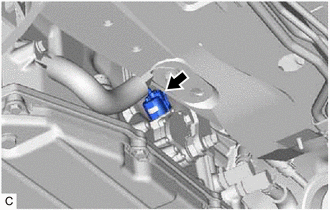
Disconnect the park/neutral position switch connector.
-
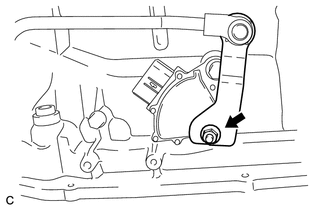
Remove the nut, spring washer and transmission control shaft lever RH from the manual valve lever shaft.
-
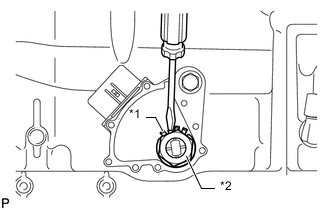
*1 Lock Washer *2 Lock Nut Using a screwdriver, bend back the tabs of the lock washer and remove the lock nut and lock washer from the park/neutral position switch.
-
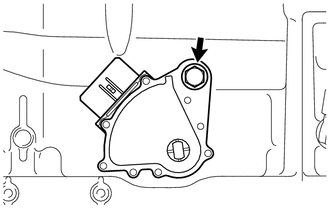
Remove the bolt and park/neutral position switch from the automatic transmission assembly.
Tech Tips
Make sure that the manual valve lever shaft has not been rotated prior to installing the park/neutral position switch as the detent spring may become detached from the manual valve lever shaft.
-