PCV VALVE INSTALLATION
PROCEDURE
-
INSTALL PCV VALVE (VENTILATION VALVE SUB-ASSEMBLY)
-
Clean and degrease the threads of the PCV valve (ventilation valve sub-assembly) and threaded hole of the case separator.
-
Apply adhesive to 2 or 3 threads of the PCV valve (ventilation valve sub-assembly).
Adhesive Toyota Genuine Adhesive 1324, Three Bond 1324 or equivalent Note
To prevent contamination by foreign matter, install immediately after applying adhesive.
-
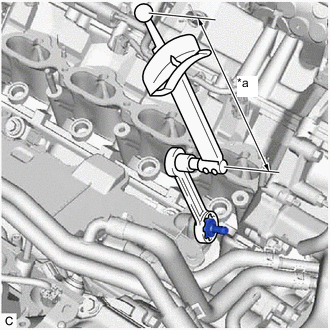
*a Torque Wrench Fulcrum Length Using a 22 mm ball joint lock nut wrench, install the PCV valve (ventilation valve sub-assembly) to the case separator.
- Torque:
- Specified tightening torque
- 5.0 N*m { 51 kgf*cm, 44 in.*lbf }
Note
Do not start the engine for at least 1 hour after installation.
Tech Tips
-
Calculate the torque wrench reading when changing the fulcrum length of the torque wrench.
-
When using a 22 mm ball joint lock nut wrench (fulcrum length of 151 mm (5.94 in.)) + torque wrench (fulcrum length of 185 mm (7.28 in.)):
3.0 N*m (31 kgf*cm, 27 in.*lbf)
-
Connect the ventilation hose assembly to the PCV valve (ventilation valve sub-assembly) and slide the clip to secure it.
-
-
INSTALL NO. 1 ENGINE COVER SUB-ASSEMBLY
-
INSTALL INTAKE AIR SURGE TANK ASSEMBLY