BACK DOOR OUTSIDE GARNISH INSTALLATION
Info Added 2017-10-06 ![]()
PROCEDURE
-
INSTALL NO. 2 BACK DOOR GARNISH RETAINER (w/o Rear View Monitor System)
-
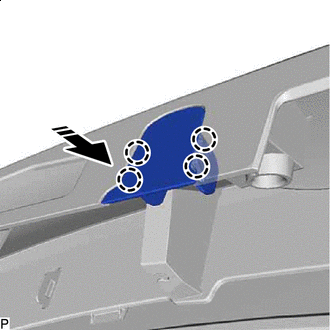

Install in this Direction Engage the claws to install the No. 2 back door garnish retainer as shown in the illustration.
-
-
INSTALL BACK DOOR OUTSIDE GARNISH SUB-ASSEMBLY
-
Remove the release paper from the back door outside garnish seal.
-
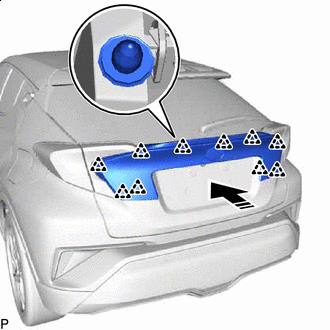
Install in this Direction Engage the clips to install the back door garnish as shown in the illustration.
-
Install the 4 bolts.
- Torque:
- 4.9 N*m { 50 kgf*cm, 43 in.*lbf }
-
-
INSTALL BACK DOOR TRIM PANEL ASSEMBLY
-
INSTALL BACK DOOR SIDE GARNISH LH
-
INSTALL BACK DOOR SIDE GARNISH RH
Tech Tips
Use the same procedure as for the LH side.
-
INSTALL BACK DOOR TRIM UPPER PANEL ASSEMBLY
-
INSTALL TONNEAU COVER ASSEMBLY (w/ Tonneau Cover)
-
INSTALL PACKAGE TRAY TRIM PANEL ASSEMBLY (w/ Package Tray Trim)