GRILLE SHUTTER REASSEMBLY
Info Added 2017-10-06 ![]()
PROCEDURE
-
INSTALL NO. 4 RADIATOR GRILLE SEAL
Tech Tips
When installing the No. 4 radiator grille seal, heat the radiator shutter sub-assembly using a heat light.
Heating Temperature Item Temperature Radiator Shutter Sub-assembly 20 to 30°C (68 to 86°F) Note
Do not heat the radiator shutter sub-assembly excessively.
-
Clean the radiator shutter sub-assembly surface.
-
Using a heat light, heat the radiator shutter sub-assembly surface.
-
Remove the double-sided tape from the radiator shutter sub-assembly.
-
Wipe off any tape adhesive residue with cleaner.
-
-
Using a heat light, heat the radiator shutter sub-assembly.
-
Remove the release paper from a new No. 4 radiator grille seal.
Tech Tips
After removing the release paper, keep the exposed adhesive free from foreign matter.
-
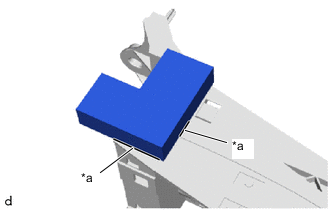
*a Line Install the No. 4 radiator grille seal as shown in the illustration.
Tech Tips
Install a No. 4 radiator grille seal along the line on the radiator shutter sub-assembly.
-
-
INSTALL RADIATOR GRILLE SEAL
Tech Tips
When installing the radiator grille seal, heat the radiator shutter sub-assembly using a heat light.
Heating Temperature Item Temperature Radiator Shutter Sub-assembly 20 to 30°C (68 to 86°F) Note
Do not heat the radiator shutter sub-assembly excessively.
-
Clean the radiator shutter sub-assembly surface.
-
Using a heat light, heat the radiator shutter sub-assembly surface.
-
Remove the double-sided tape from the radiator shutter sub-assembly.
-
Wipe off any tape adhesive residue with cleaner.
-
-
Using a heat light, heat the radiator shutter sub-assembly.
-
Remove the release paper from a new radiator grille seal.
Tech Tips
After removing the release paper, keep the exposed adhesive free from foreign matter.
-
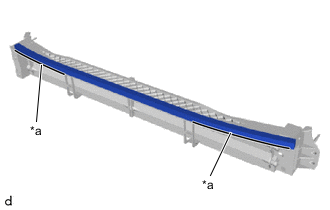
*a Line Install the radiator grille seal as shown in the illustration.
Tech Tips
Install a radiator grille seal along the line on the radiator shuttersub-assembly.
-
-
INSTALL NO. 3 RADIATOR GRILLE SEAL
Tech Tips
When installing the No. 3 radiator grille seal, heat the radiator shutter sub-assembly using a heat light.
Heating Temperature Item Temperature Radiator Shutter Sub-assembly 20 to 30°C (68 to 86°F) Note
Do not heat the radiator shutter sub-assembly excessively.
-
Clean the radiator shutter sub-assembly surface.
-
Using a heat light, heat the radiator shutter sub-assembly surface.
-
Remove the double-sided tape from the radiator shutter sub-assembly.
-
Wipe off any tape adhesive residue with cleaner.
-
-
Using a heat light, heat the radiator shutter sub-assembly.
-
Remove the release paper from a new No. 3 radiator grille seal.
Tech Tips
After removing the release paper, keep the exposed adhesive free from foreign matter.
-
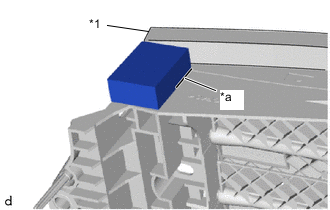
*1 Radiator Grille Seal *a Line Install the No. 3 radiator grille seal as shown in the illustration.
Tech Tips
Install a No. 3 radiator grille seal along the line on the radiator shutter sub-assembly.
-
-
INSTALL SWING GRILLE ACTUATOR ASSEMBLY
-
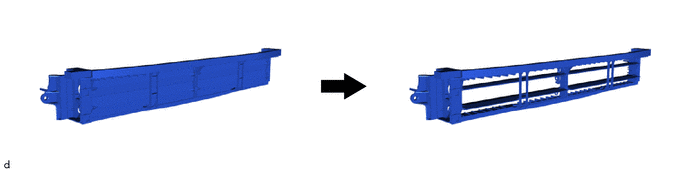
When installing a new swing grille actuator assembly:
-
Open the grille shutter fin as shown in the illustration.
-
-
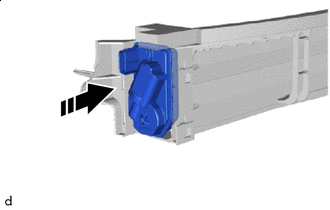

Install in this Direction Install the swing grille actuator assembly as shown in the illustration.
-
-
INSTALL MOTOR COVER
-
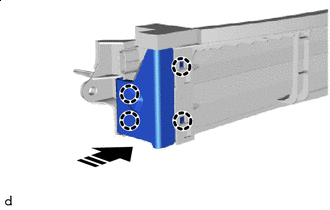
Install in this Direction Engage the claws as shown in the illustration to install the motor cover.
-