AUTOMATIC TRANSAXLE ASSEMBLY REMOVAL
CAUTION / NOTICE / HINT
Note
If automatic transaxle parts are replaced, refer to Parts Replacement Compensation Table to determine if any additional operations are necessary Click here.
PROCEDURE
-
REMOVE NO. 1 EXHAUST PIPE SUPPORT BRACKET SUB-ASSEMBLY
-
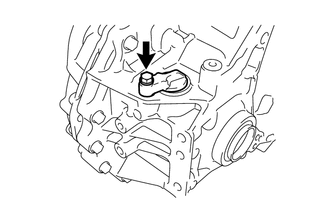
REMOVE DRIVE PLATE AND TORQUE CONVERTER ASSEMBLY SETTING BOLT
-
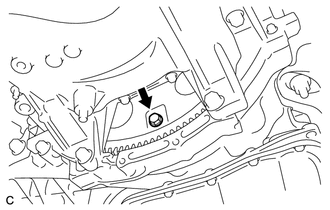
Turn the crankshaft to gain access to the 6 drive plate and torque converter assembly setting bolts and remove each bolt while holding the crankshaft pulley bolt with a wrench.
Tech Tips
There will be one black colored bolt.
-
-
REMOVE ENGINE ASSEMBLY WITH TRANSAXLE
-
REMOVE TRANSMISSION OIL COOLER (w/ ATF Warmer)
-
REMOVE OIL COOLER HOSE (w/ ATF Warmer)
-
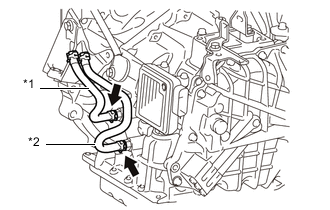
*1 No. 1 Oil Cooler Outlet Hose *2 No. 1 Oil Cooler Inlet Hose Slide the 2 clamps and remove the No. 1 oil cooler inlet hose and No. 1 oil cooler outlet hose from the automatic transaxle assembly.
-
-
REMOVE FRONT FRAME ASSEMBLY
-
REMOVE TCM
-
SEPARATE WIRE HARNESS
-
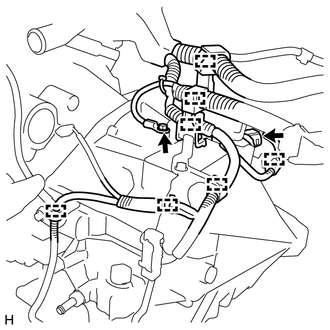
Remove the bolt and disconnect the connector and 7 clamps from the automatic transaxle assembly.
-
-
REMOVE AUTOMATIC TRANSAXLE ASSEMBLY
-
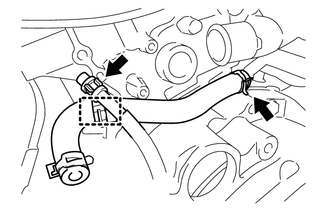
Disconnect the breather plug and remove the clamp. (w/ ATF Warmer)
-
Slide the clamp and remove the No. 4 water by-pass hose from the water inlet pipe. (w/ ATF Warmer)
-
Using a transmission jack attachment, set the automatic transaxle assembly on a transmission jack.
Note
-
Secure the automatic transaxle assembly to the transmission jack using a suitable adapter, such as a rope or attachment.
-
To prevent the automatic transaxle oil pan sub-assembly from deforming, do not place any attachments onto the automatic transaxle oil pan sub-assembly of the automatic transaxle assembly.
-
Hold the engine assembly with a suitable adapter, such as a rope, during the operation.
-
-
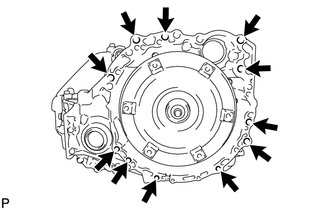
Remove the 11 bolts and automatic transaxle assembly.
Note
To prevent damage to the knock pins, do not pry between the automatic transaxle assembly and engine assembly.
-
-
REMOVE FRONT ENGINE MOUNTING BRACKET
-
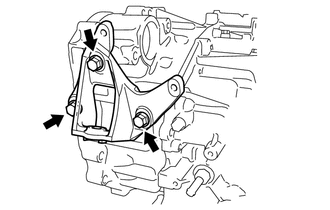
Remove the 3 bolts and front engine mounting bracket from the automatic transaxle assembly.
-
-
REMOVE WIRE HARNESS CLAMP BRACKET
-
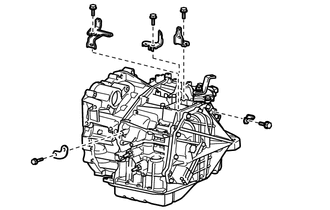
Remove the 5 bolts and 5 wire harness clamp brackets from the automatic transaxle assembly.
-
-
REMOVE NO. 1 TRANSMISSION CONTROL CABLE BRACKET
-
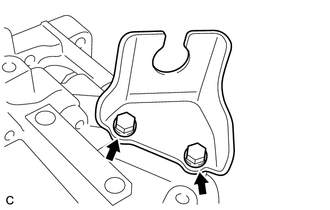
Remove the 2 bolts and No. 1 transmission control cable bracket from the automatic transaxle assembly.
-
-
REMOVE SPEEDOMETER DRIVEN HOLE (ATM) COVER SUB-ASSEMBLY
-
Remove the bolt and speedometer driven hole (ATM) cover sub-assembly from the automatic transaxle assembly.
-
Remove the O-ring from the speedometer driven hole (ATM) cover sub-assembly.
-
-
REMOVE TORQUE CONVERTER ASSEMBLY
-
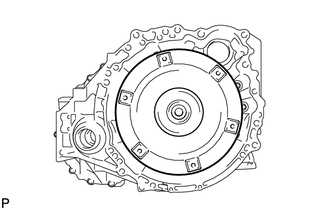
Remove the torque converter assembly from the automatic transaxle assembly.
-
-
INSPECT TORQUE CONVERTER ASSEMBLY