SLIDING ROOF HOUSING(for Glass Roof) DISASSEMBLY
PROCEDURE
-
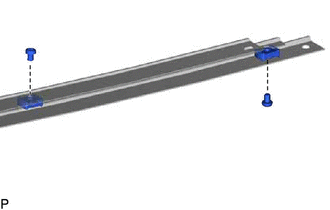
REMOVE SLIDING ROOF DRIVE GEAR SUB-ASSEMBLY
-
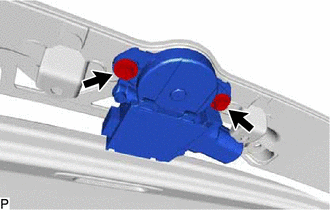
Remove the 2 bolts and sliding roof drive gear sub-assembly.
-
-
REMOVE NO. 4 SUNSHADE TRIM SUB-ASSEMBLY
-
Using a T25 "TORX" socket wrench, remove the 2 screws and 2 No. 1 sliding roof sunshade stoppers.
Tech Tips
Use the same procedure for the RH side and the LH side.
-
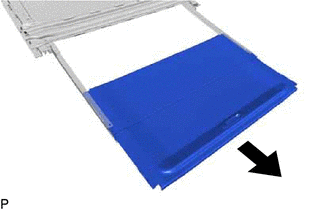
Slide and remove the No. 3 sunshade trim sub-assembly with No. 4 sunshade trim sub-assembly as shown in the illustration.
-
Remove the No. 4 sunshade trim sub-assembly from the No. 3 sunshade trim sub-assembly.
-
-
REMOVE NO. 1 SUNSHADE TRIM SUB-ASSEMBLY
-

Using a T25 "TORX" socket wrench, remove the 2 screws and 2 No. 1 sliding roof sunshade stoppers.
Tech Tips
Use the same procedure for the RH side and the LH side.
-
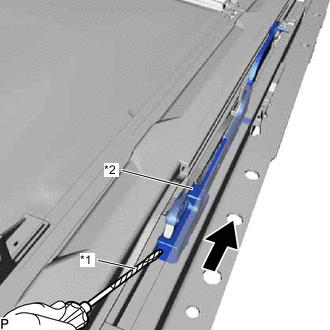
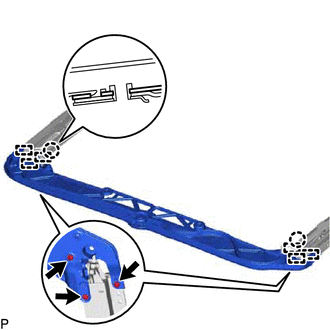
Text in Illustration *1 Protective Tape *2 Sliding Roof Rear Shoe Link Sub-assembly Using a screwdriver, slide the sliding roof rear shoe link sub-assembly in the direction indicated by the arrow in the illustration to fully open position.
Tech Tips
-
Tape the screwdriver tip before use.
-
Use the same procedure for the RH side and the LH side.
-
-
Using a T25 "TORX" socket wrench, remove the 6 screws.
-
Disengage the 2 claws and 6 guides, and remove the sliding roof cable guide casing.
-
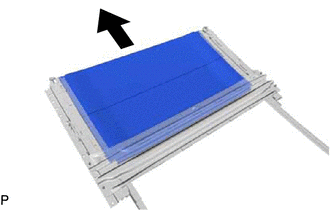
Slide and remove the No. 1 sunshade trim sub-assembly with No. 2 sunshade trim sub-assembly as shown in the illustration.
-
Remove the No. 1 sunshade trim sub-assembly from No. 2 sunshade trim sub-assembly.
-