REAR NO. 1 SEAT ASSEMBLY DISASSEMBLY
CAUTION / NOTICE / HINT
Wear protective gloves. Sharp areas on the parts may injure your hands.
Use the same procedure for the RH and LH sides.
The procedure listed below is for the LH side.
PROCEDURE
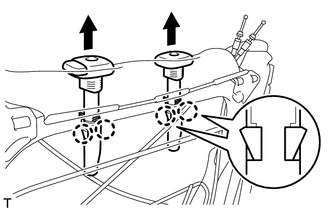
REMOVE REAR SEAT HEADREST ASSEMBLY
Operate the rear back lock control lever RH and raise the seatback.
Remove the rear seat headrest assembly.
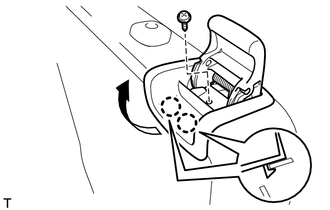
REMOVE REAR SEAT NO. 2 LEG SIDE COVER
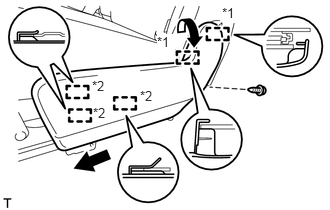
Remove the screw.
Pull the cover to detach the 2 hooks labeled A.
Slide the cover to detach the 3 hooks labeled B and remove the rear seat No. 2 leg side cover.
Table 1. Text in Illustration *1
Hook A
*2
Hook B
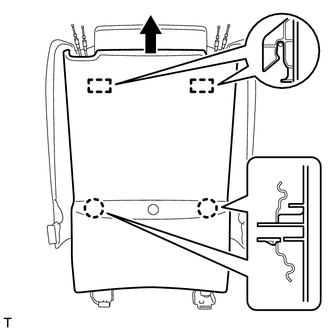
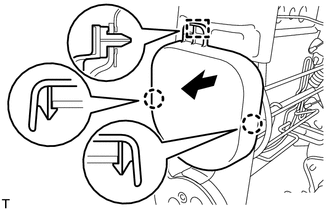
REMOVE REAR SEAT TRACK COVER LH
-
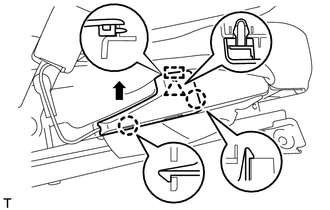
Detach the 2 claws and clip.
Detach the guide and remove the rear seat track cover LH.
-
REMOVE REAR SEAT 3 POINT TYPE INNER BELT ASSEMBLY LH
REMOVE REAR SEAT LEG SIDE COVER LH
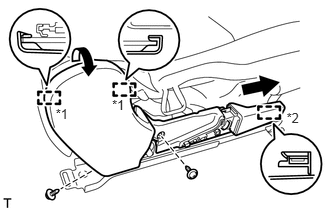
Remove the 2 screws.
Pull the cover to detach the 2 hooks labeled A.
Slide the cover to detach the hook labeled B and remove the rear seat leg side cover LH.
Table 2. Text in Illustration *1
Hook A
*2
Hook B
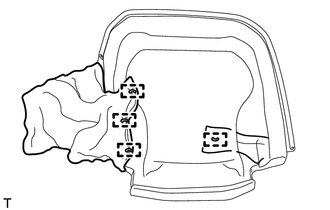
REMOVE REAR NO. 1 SEAT CUSHION COVER WITH PAD
-
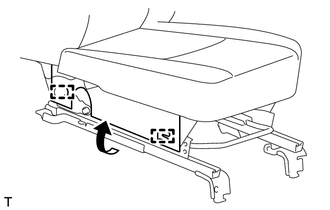
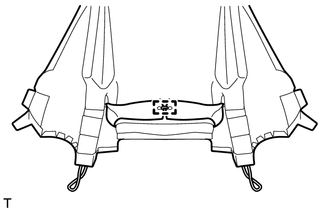
Detach the 2 hooks and open the cover.
Detach the 2 seatback cover rubber bands.
Pull the 2 seatback cover rubber bands through the 2 seat cushion cover rubber bands.
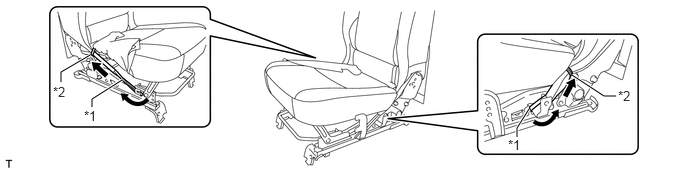
Table 3. Text in Illustration *1
Seatback Cover Rubber Band
*2
Seat Cushion Cover Rubber Band
-
Detach the rubber band.
-
Remove the hog rings and roll up the separate type rear seat cushion cover.
-
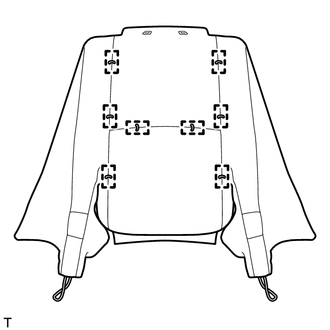
Detach the 5 hooks and remove the rear No. 1 seat cushion cover with pad.
-
REMOVE SEPARATE TYPE REAR SEAT CUSHION COVER
-
Remove the hog rings.
-
Remove the hog rings and separate type rear seat cushion cover.
-
REMOVE REAR BACK LOCK CONTROL LEVER SUB-ASSEMBLY LH
-
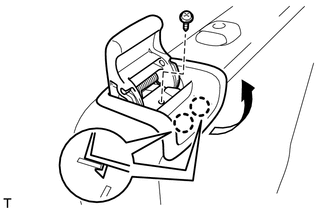
Remove the screw and detach the 2 claws.
-
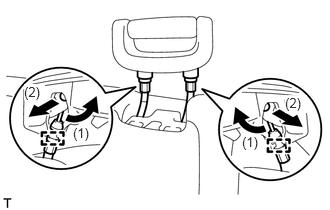
Detach the 2 clamps of the cable ends.
Disconnect the 2 cables in the order shown in the illustration and remove the rear back lock control lever sub-assembly LH.
-
REMOVE REAR BACK LOCK CONTROL LEVER SUB-ASSEMBLY RH
-
Remove the screw and detach the 2 claws.
-
Detach the 2 clamps of the cable ends.
Disconnect the 2 cables in the order shown in the illustration and remove the rear back lock control lever sub-assembly RH.
-
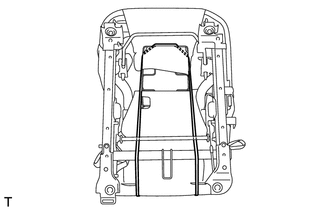
REMOVE REAR NO. 1 SEATBACK BOARD
Open the lower part of the rear seatback board.
-
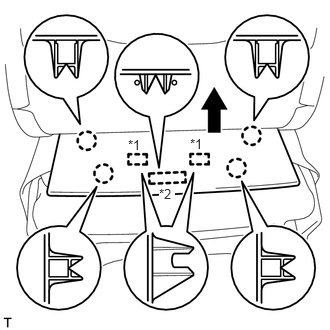
Detach the 4 claws and 2 hooks.
Detach the guide and remove the rear No. 1 seatback board.
Table 4. Text in Illustration *1
Hook
*2
Guide
REMOVE REAR SEATBACK BOARD SUB-ASSEMBLY LH
-
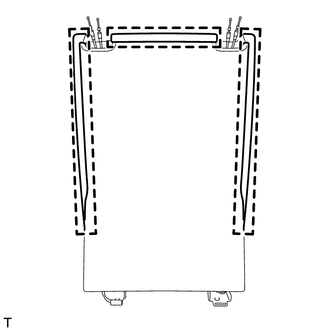
Detach the 3 hooks.
-
Detach the 2 claws.
Detach the 2 hooks and remove the rear seatback board sub-assembly LH.
-
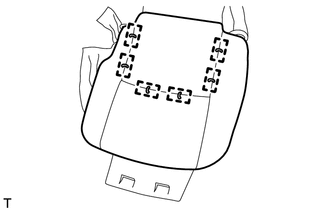
REMOVE REAR NO. 1 SEATBACK COVER WITH PAD
-
Detach the 3 hooks and 2 rubber bands.
Table 5. Text in Illustration *1
Rubber Band
-
Detach the 2 hooks.
-
Remove the hog rings and detach the 2 hooks.
Table 6. Text in Illustration *1
Hog Ring
*2
Hook
-
Detach the 4 claws and remove the 2 rear seat headrest supports.
-
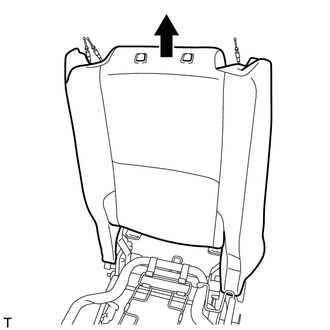
Remove the rear No. 1 seatback cover with pad.
-
REMOVE SEPARATE TYPE REAR SEATBACK COVER
-
Remove the hog ring.
-
Remove the hog rings and separate type rear seatback cover.
-
REMOVE REAR SEATBACK LOWER COVER SUB-ASSEMBLY LH
-
Remove the hog rings.
-
Remove the hog rings and rear seatback lower cover sub-assembly LH with rear seatback lower pad.
-
Remove the lower part of the rear seatback lower cover sub-assembly LH from the rear seatback lower pad.
Remove the hog rings and rear seatback lower cover sub-assembly LH.
-
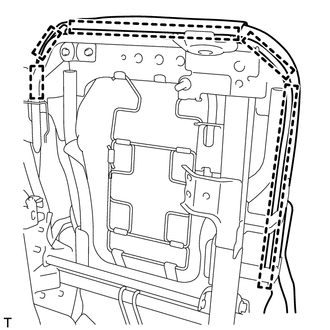
REMOVE REAR SEATBACK COVER LH
-
Detach the 2 claws and guide and remove the rear seatback cover LH.
-
REMOVE REAR SEATBACK COVER RH
-
Detach the 2 claws and guide and remove the rear seatback cover RH.
-
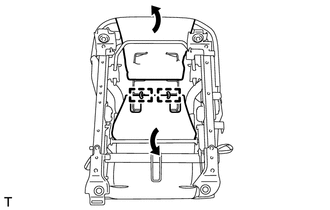
REMOVE REAR NO. 1 SEATBACK SPRING
-
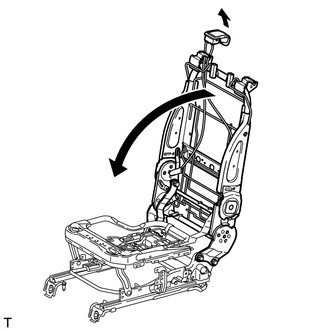
Temporarily install the rear back lock control lever RH.
Operate the rear back lock control lever and fold down the seatback frame.
-
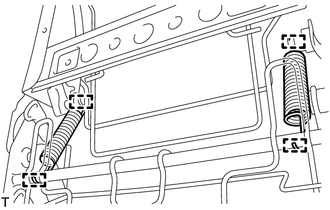
Detach the 4 hooks and remove the 2 rear No. 1 seatback springs.
-
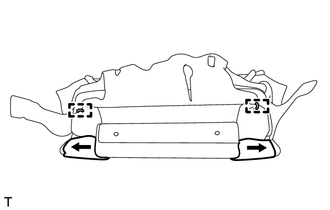
REMOVE NO. 1 SEAT CUSHION FRAME SUB-ASSEMBLY LH
-
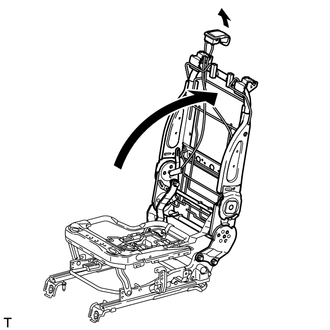
Operate the seatback rear back lock control lever and raise the seatback frame.
Remove the rear back lock control lever RH.
-
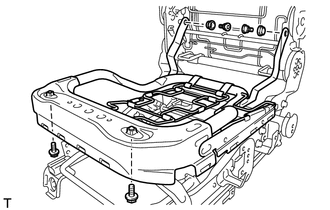
Using a T45 "TORX" socket wrench, remove the 2 "TORX" bolts together with the 2 spacers.
Remove the 2 bolts and No. 1 seat cushion frame sub-assembly LH.
-
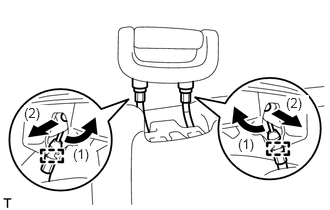
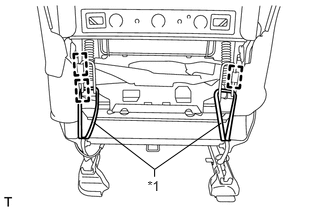
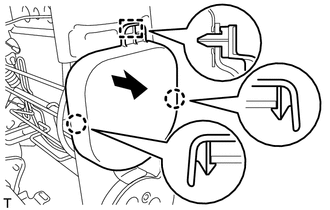
REMOVE RECLINING REMOTE CONTROL CABLE ASSEMBLY
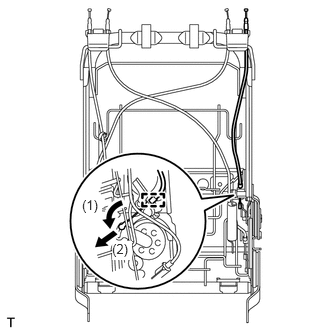
Detach the clamp of the cable end.
Remove the reclining remote control cable assembly in the order shown in the illustration.
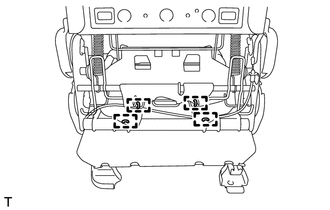
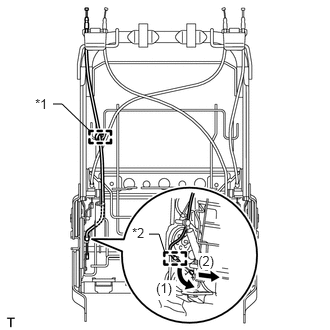
REMOVE REAR NO. 1 SEAT LOCK CABLE ASSEMBLY
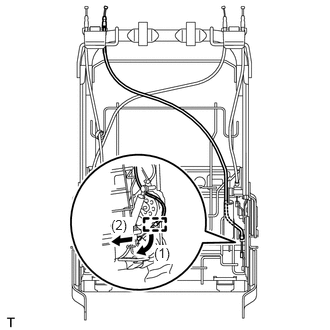
Detach the clamp of the cable end.
Remove the rear No. 1 seat lock cable assembly in the order shown in the illustration.
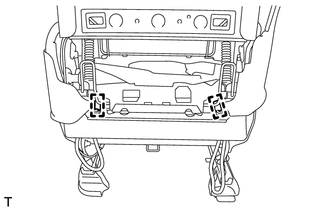
REMOVE RECLINING REMOTE CONTROL CABLE ASSEMBLY
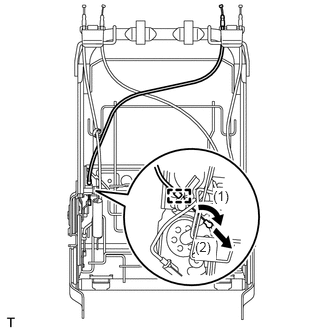
Detach the clamp of the cable end.
Remove the reclining remote control cable assembly in the order shown in the illustration.
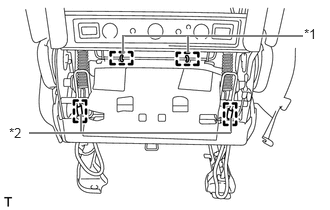
REMOVE REAR NO. 1 SEAT LOCK CABLE ASSEMBLY
Cut off the cable tie.
Detach the clamp of the cable end.
Remove the rear No. 1 seat lock cable assembly in the order shown in the illustration.
Table 7. Text in Illustration *1
Cable Tie
*2
Clamp
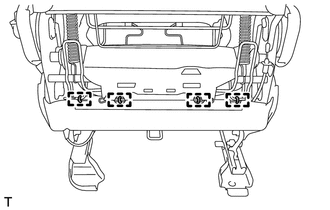
REMOVE NO. 2 SEAT ADJUSTER CONTROL CABLE ASSEMBLY
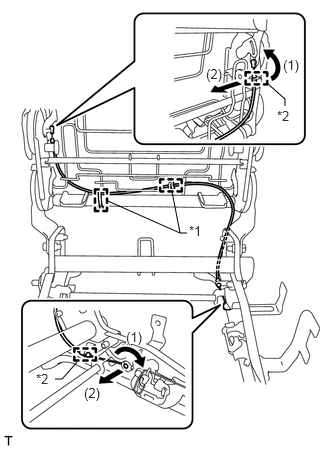
Cut off the 2 cable ties.
Detach the 2 clamps of the cable ends.
Remove the No. 2 seat adjuster control cable assembly in the order shown in the illustration.
Table 8. Text in Illustration *1
Cable Tie
*2
Clamp
REMOVE NO. 1 SEATBACK FRAME SUB-ASSEMBLY LH
-
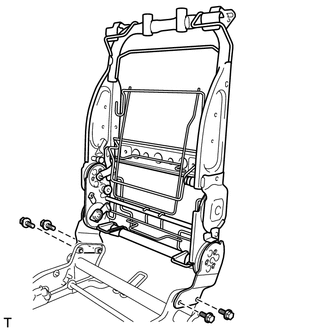
Remove the 4 bolts and No. 1 seatback frame sub-assembly LH.
-