VANE PUMP(for 1GD-FTV, 2GD-FTV) DISASSEMBLY

CAUTION / NOTICE / HINT
Note
-
When using a vise, place aluminum plates between the part and vise.
-
When using a vise, do not overtighten it.
PROCEDURE
-
SECURE VANE PUMP ASSEMBLY
-
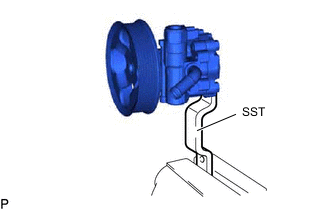
Using a SST, secure the vane pump assembly.
- SST
- 09630-00014 ( 09631-00132 )
-
-
REMOVE FLOW CONTROL VALVE
-
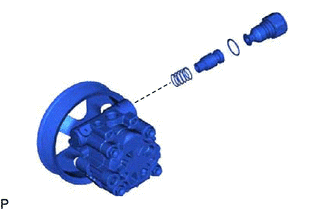
Using a 27 mm socket wrench, remove the pressure port union from the front housing.
-
Using a screwdriver, remove the O-ring from the pressure port union.
-
Remove the flow control valve from the front housing.
-
Remove the flow control valve compression spring from the front housing.
-
-
REMOVE POWER STEERING SUCTION PORT UNION
-
Remove the bolt and suction port union from the vane pump assembly.
-
Remove the O-ring from the suction port union.
-
-
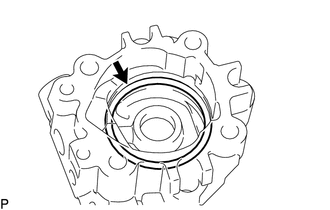
REMOVE REAR HOUSING
-

Remove the 4 bolts and rear housing from the front housing.
-
Remove the O-ring from the rear housing.
-
-
REMOVE SHAFT WITH PULLEY
-
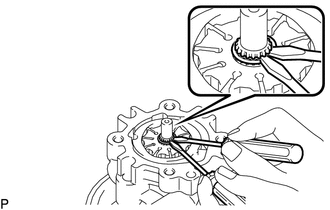
Using a screwdriver, remove the vane pump shaft snap ring from the shaft with pulley.
-
Remove the shaft with pulley from the front housing.
-
-
REMOVE VANE PUMP ROTOR
-
Remove the 10 vane pump plates from the vane pump rotor.
Note
Be careful not to drop the vane pump plates.
-
Remove the vane pump rotor from the front housing.
-
-
REMOVE VANE PUMP CAM RING
-
REMOVE FRONT VANE PUMP SIDE PLATE
-
Remove the front vane pump side plate from the front housing.
-
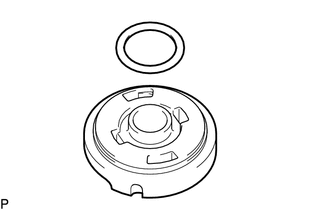
Remove the O-ring from the front vane pump side plate.
-
Remove the O-ring from the front housing.
-
-
REMOVE VANE PUMP HOUSING OIL SEAL
-
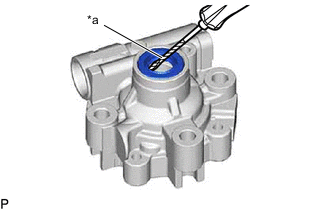
*a Protective Tape Using a screwdriver, pry out the vane pump housing oil seal.
Tech Tips
Tape the screwdriver tip before use.
-